
Guidance for Astophotography Part 1
<link rel="canonical" href="https://starlighthunter.com/articles/" />
In astrophotography we are always looking for the best way to obtain images with the highest possible exposure to capture all the light that reaches us from the sky.
This "hobby" of increasing exposure time is not just a whim. By increasing the exposure time we are capturing more photons in the sensor of our camera, but also, as a side effect, we are reducing the reading noise of our images. We will talk about this in future articles.
The first option to increase the exposure time is monitoring. To do this, we use motorized mounts that are capable of moving our camera and objective or telescope at the same speed as the night sky.
This allows a drastic improvement in the exposure time that we can apply without the stars moving, but it is still not enough for very dim objects, and although the tracking is very precise, it is never perfect.
The next step in finding perfect tracking is to use the guidance technique. In this article we will talk about the theory and equipment components needed for guiding, and in subsequent articles we will talk about specific low-cost equipment, software and start-up of the guide.
How does the guidance work?
Guidance is based on using a very sensitive additional camera to take captures every few seconds, and using software to calculate how far a star has moved in the image. Once this displacement is calculated, the software sends a series of pulses to the frame to correct those imperfections in the next step, and thus obtain the most perfect images possible.
The guide allows to drastically increase the exposure time, because while the guide software sends the corresponding corrections and we have the mount well aligned to the polar, we can spend minutes and minutes with the shutter open that the stars will not move from the site in our image .
Guidance types
There are several types of guidance. The most common are the following:
Guidance with attached telescope: A second telescope is attached with the guide camera to the telescope that we use to take the photos.
Off-axis guidance: In this type of guidance, the same telescope that we use to make the captures is used as an optical train for the guidance camera.
Each type of guide requires a different equipment, but in any case there is always a common element: we need a camera.
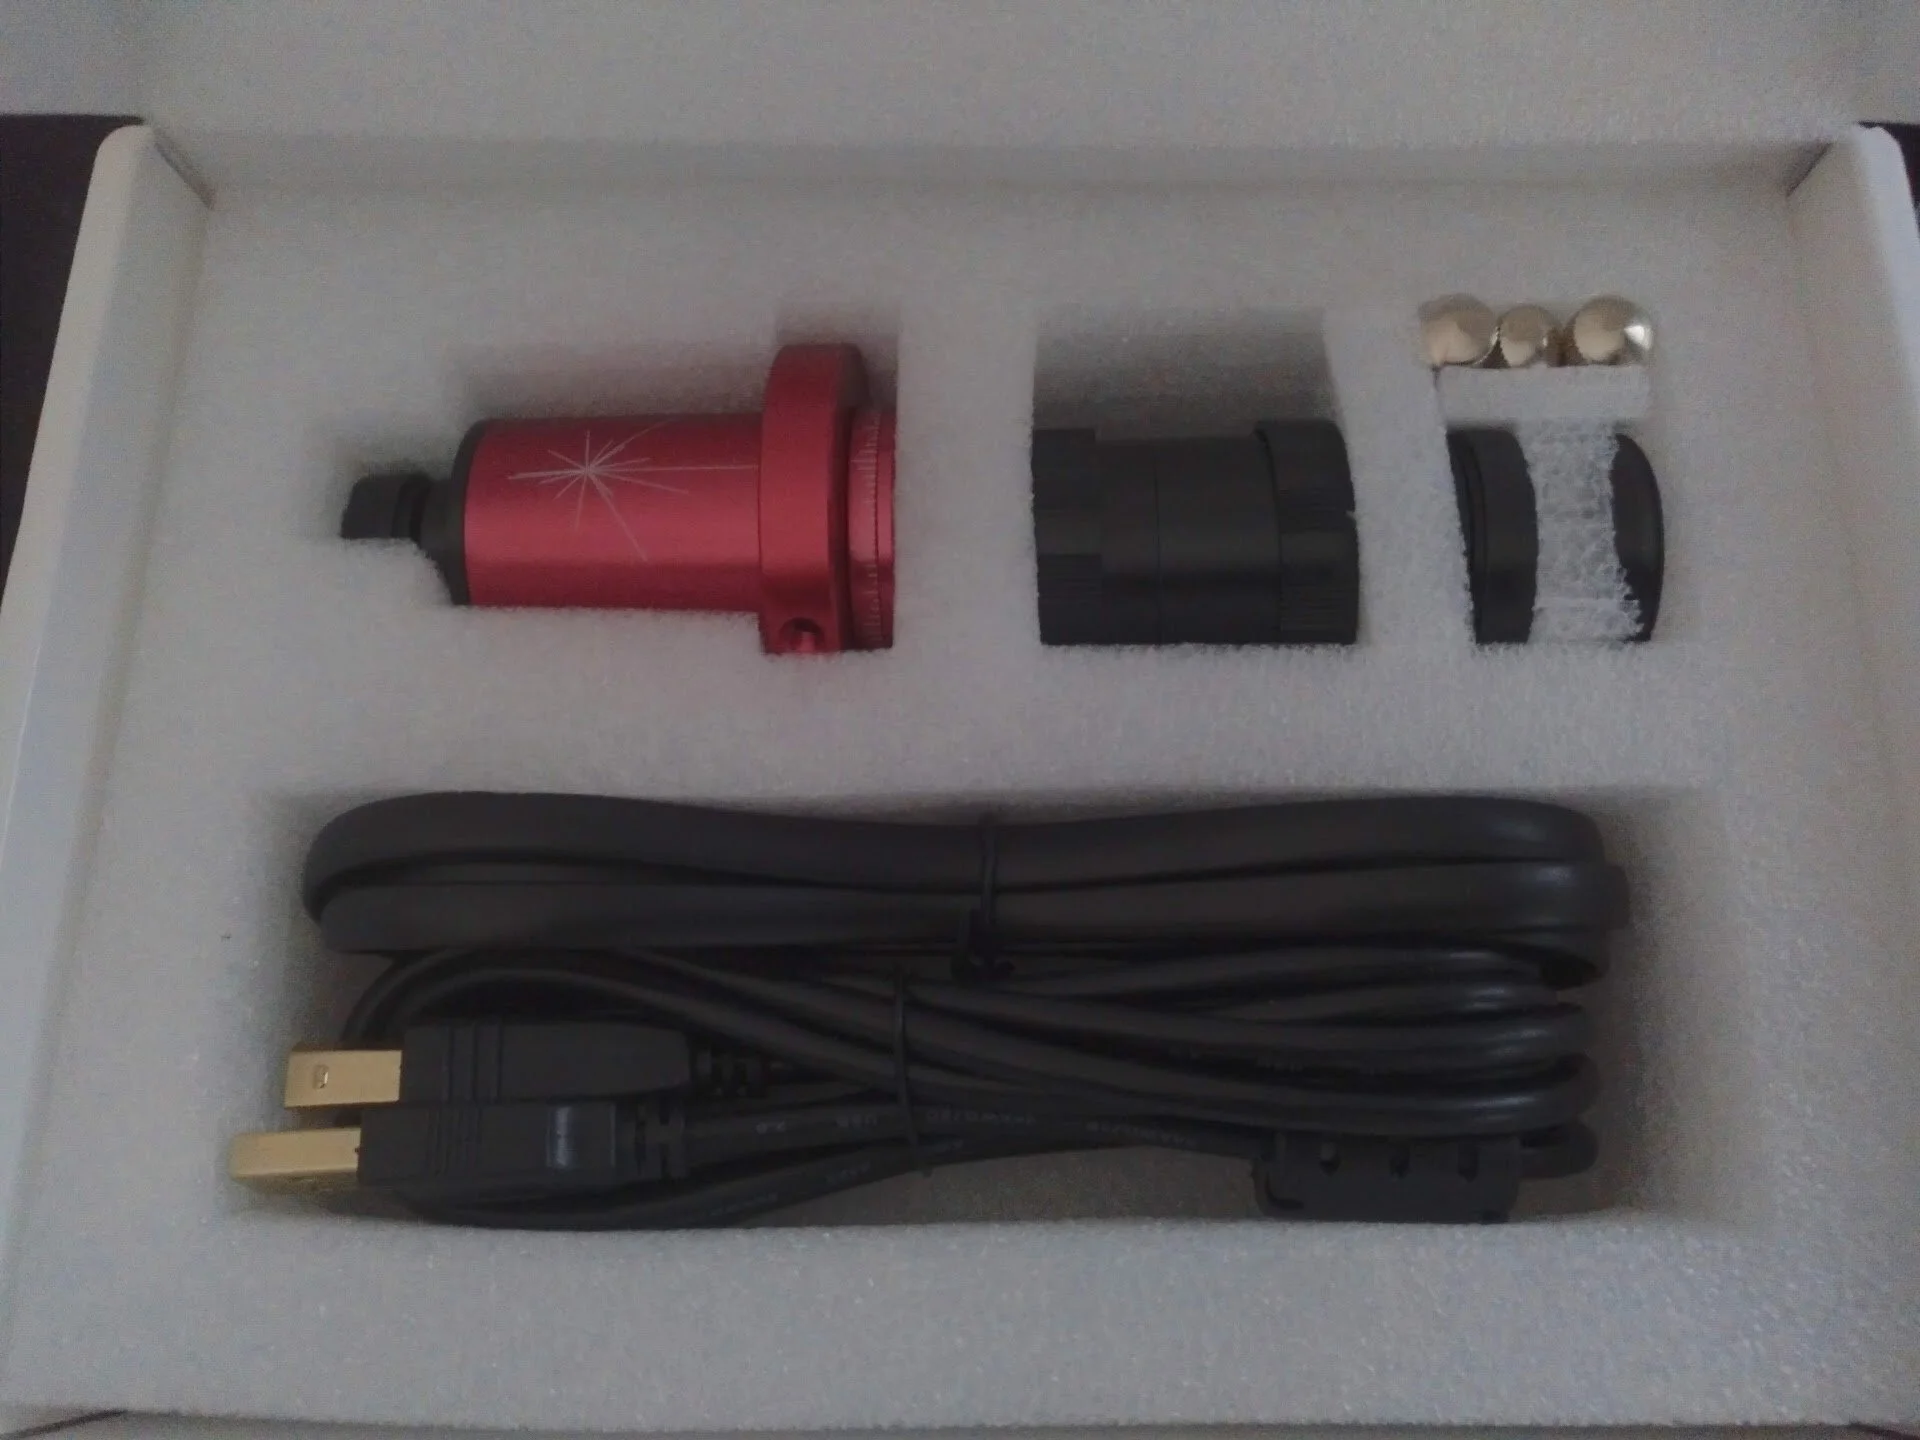
Guiding camera
The guidance camera does not need a high resolution or a large sensor size. What is important is that the pixel size of the camera is small to detect image displacement earlier.
It is also important that the camera has enough sensitivity, since the more sensitive the camera is, the easier it will be to see stars in the image and the less exposure we will need to be able to see them. This is important because if the exposures are very long, there is a long time between corrections and the image may be too skewed.
There are specific cameras for guidance. They are usually smaller and cheaper cameras, without refrigeration. In some cases, the same cameras that are often used in planetary photography are also used for guidance.
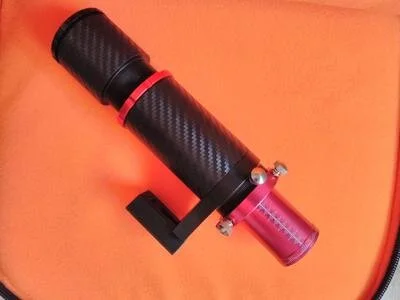
Guiding telescopes
Guiding telescopes do not differ much from telescopes used for imaging.
The general trend is to use cheap telescopes, since we do not need great image quality (as long as the stars are as punctual as possible).
Achromatic refracting telescopes are often chosen, and in some cases where the imaging equipment is quite large, telescopes such as the 72ED can be used for guidance.
There are also specific telescopes for guidance. They are usually small and with little focal length, but they are more than enough for most cases.

Off-axis guidance
For off-axis guidance, a specific accessory is required that allows the guidance camera to be coupled within the same optical train that we use to take the photos.
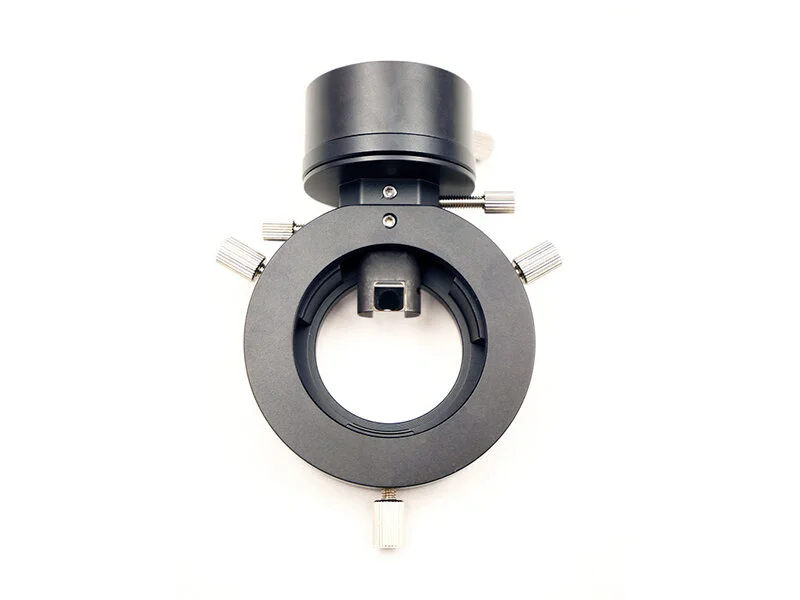
The accessory is an OAG (Off Axis Guider), and its operation is very simple. It is a ring that stands between the telescope and the photo camera, which has a small prism. This prism captures part of the light that comes from the telescope and reflects it perpendicularly to the optical axis of the telescope, allowing an eyepiece or a camera to be placed to receive the same image that the other camera receives.
These accessories tend to be more expensive overall than a Guiding Telescope, but are lighter in many cases and more comfortable. In addition, when guiding using the same telescope we obtain an extra precision since the displacement calculations are made on the same portion of the sky that we are capturing.
software
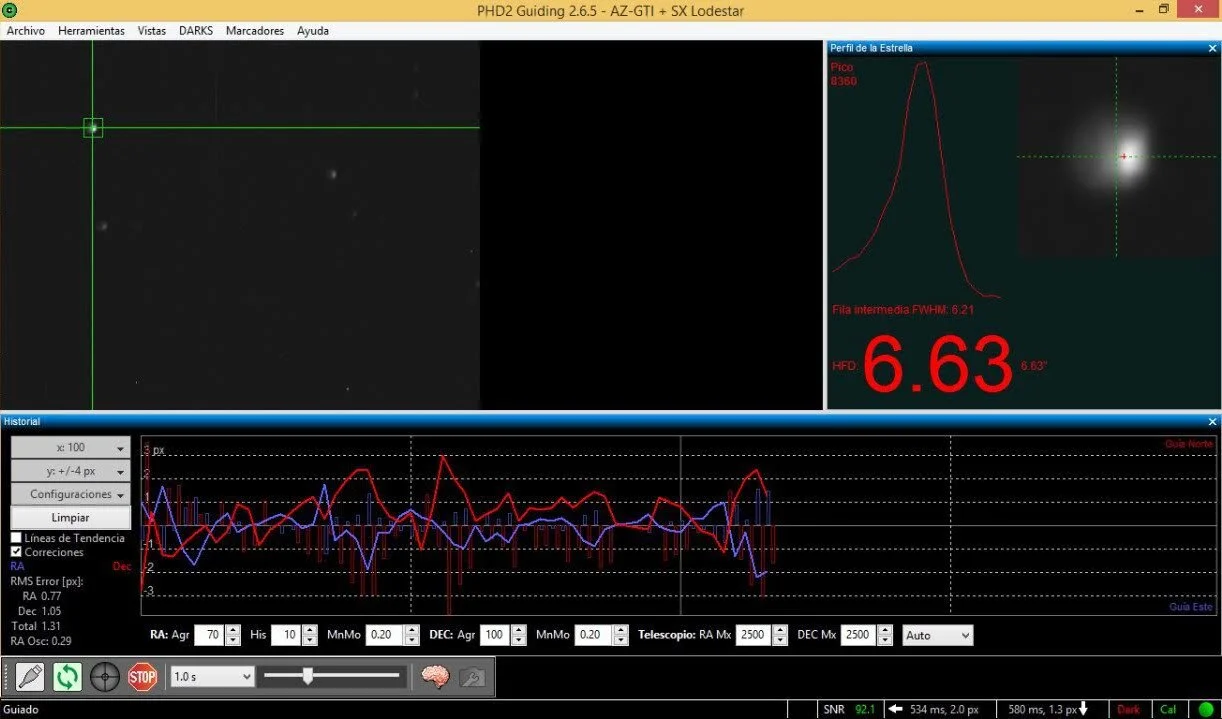
There are several guidance programs, but the most widespread is the PHD2 software. It is free and multiplatform software.

Software is the brain of the guidance system. It is in charge of analyzing each image that arrives from the guiding camera and detecting the displacement that the image has suffered since the last captured image.
The precision level of the calculation of this displacement is very high. This is because previously we will have to calibrate the software to be able to check the amount of movement generated by each pulse on the mount, and the calibration of the image quality.
Normally, this type of software has a series of tools to monitor the quality of the guidance, and with them we can check how well we are getting the photo to move as little as possible.
Autonomous guidance systems
There is also the possibility of using autonomous guidance systems that simply connect to our mount and do not need software or a computer to control them. The best known example is perhaps the Lacerta brand self-guiding equipment and the best known is the Lacerta MGEN II.
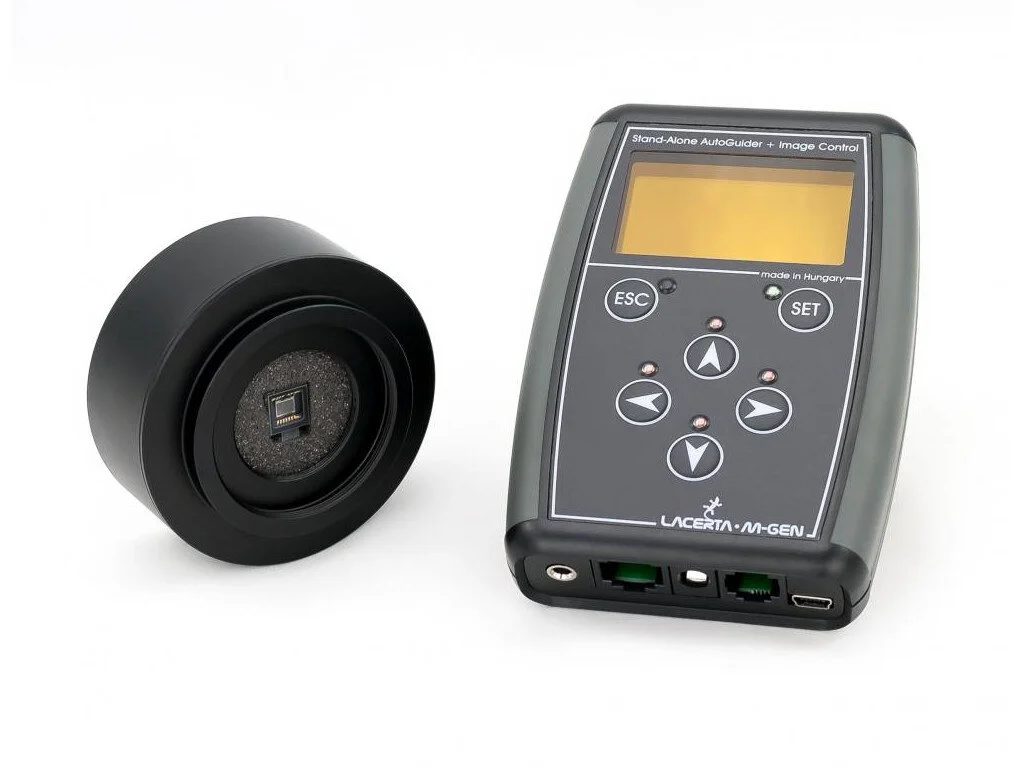
This option is very interesting for configurations without a computer and for its convenience when configuring them, but they also greatly increase the cost of the equipment.
Conclusions
This article is intended as an introduction to guiding in itself. I hope that with it the basic concepts about the guidance that we will use in the following article are clear.
In the following article I will give details on the low-cost guidance equipment I use for my outings and their configuration.