
ZWO AM5 Harmonic Mount ‐ Product and User Experience Review
Simon Lewis ‐ The Greendale Observatory, New Zealand
Introduction
Over the past few years there has been a steady growth in the market for lightweight, portable mounts for astrophotography, driven by a strong demand from users interested in getting away from light polluted cities, to image from dark sky locations. Mounts in this category have been through multiple evolutions during this time, coming from simple motor driven star trackers to more recent mobile app connected units.
There is a growing market for lightweight GOTO mounts and this genre of mount has seen some interesting developments in recent years. As the demand for lightweight, accurate GOTO mounts has increased, manufacturing has looked to alternative options to create the ultimate portable mount that can handle everything from simple DSLR and Mirrorless cameras though to full sized telescope setups.
The traditional equatorial mount does not easily lend itself to lightweight operations.
They rely on large heavy counterweights to balance their payloads adding to the bulk the astrophotographer must carry with them.
The requirement to balance the payload using a counterweight also adds significant size to the mount body as well as increased transportation needs. With this in mind several manufacturers have started to create mounts using specialised harmonic/strain wave gearboxes to avoid these constraints.
These mounts offer an amazing level of torque and carrying capacity in very small bodies and in many cases will carry large loads with no counterweights, all features that support improved imaging in the field. There have been several new manufacturers creating these mounts but a recent
newcomer to the market might surprise you, ZWO.
I will also add that I did not get paid in dollars or in kind for this review, I and many others provide our input as we enjoy the ZWO product set and are keen to ensure they include the features that any active astro imager would want.

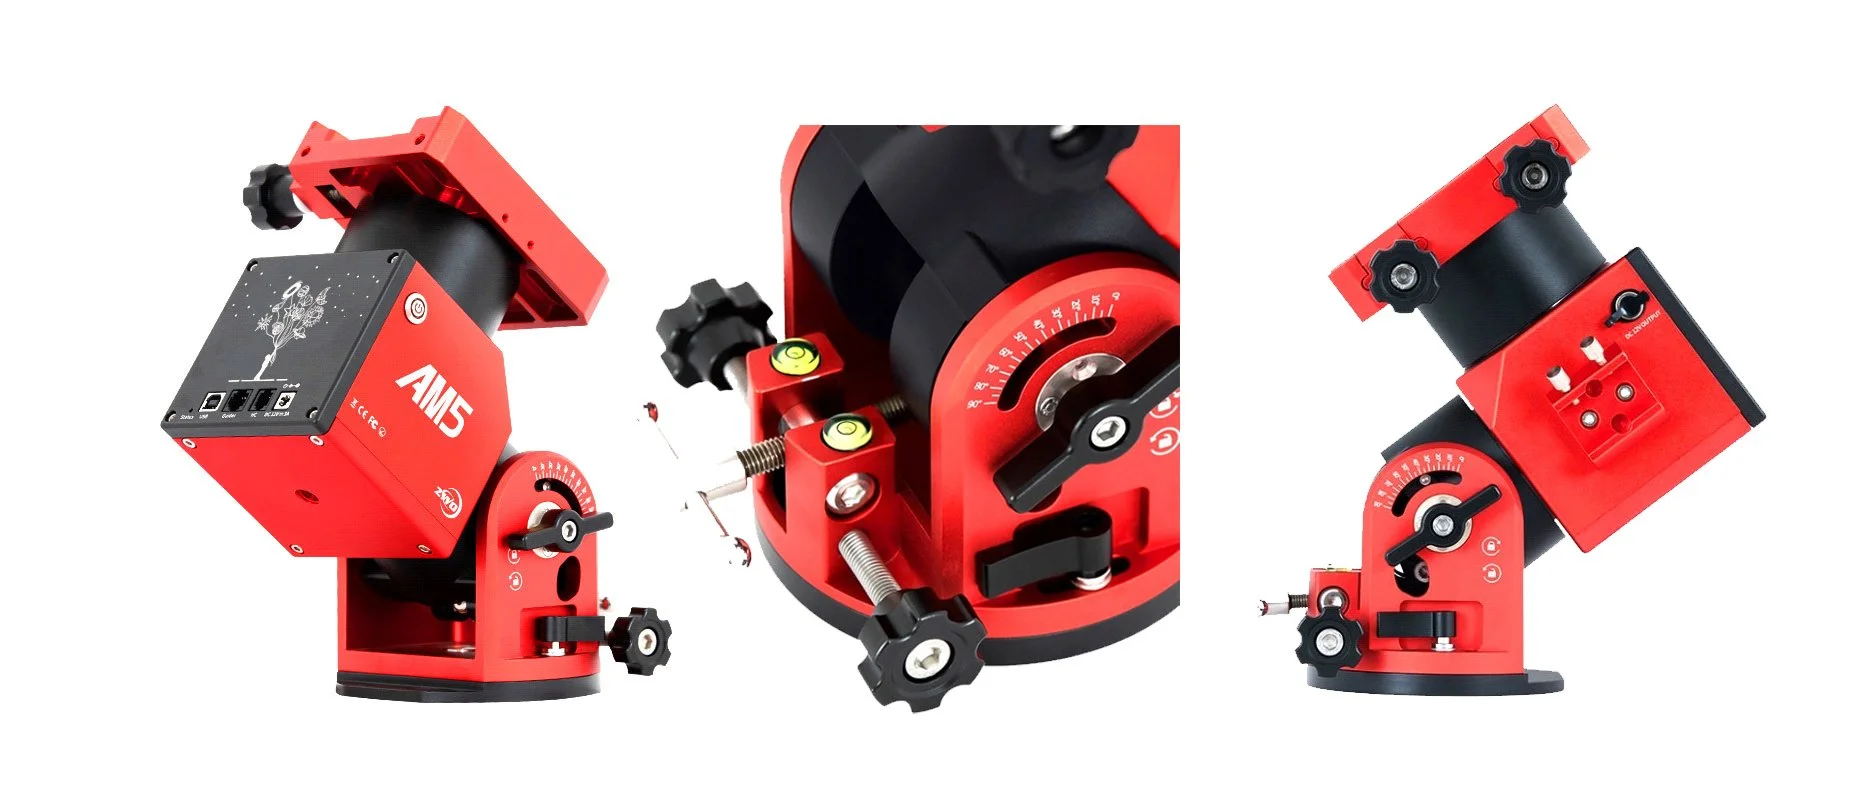
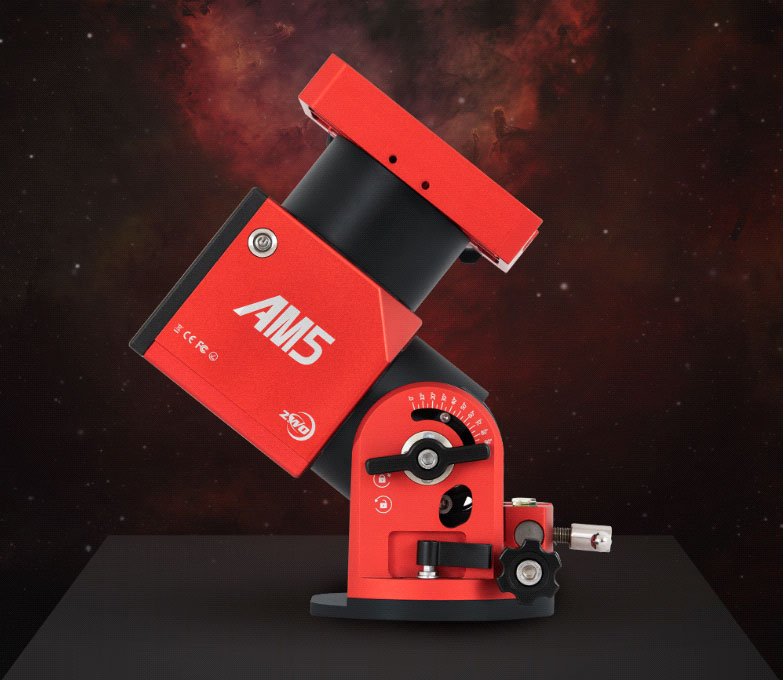
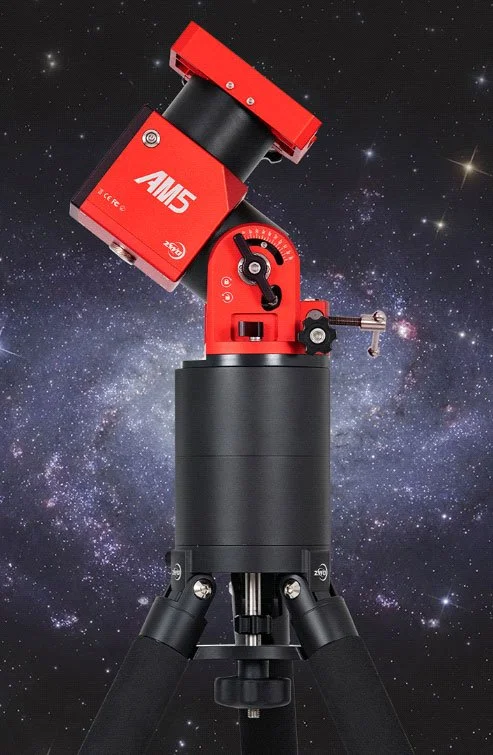
Meet the AM5
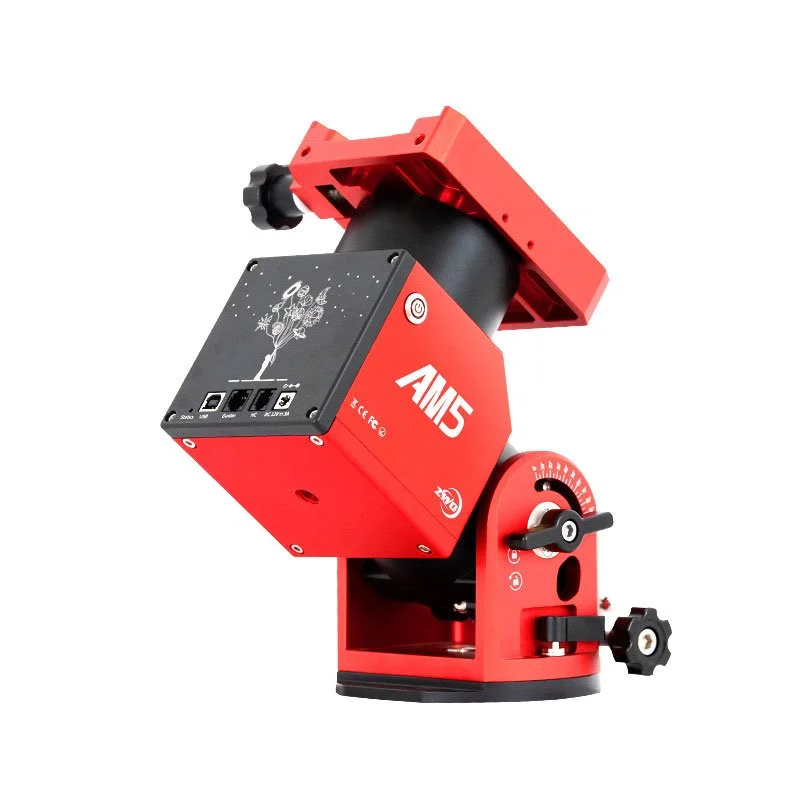
The AM5 is a small, lightweight portable mount that can operate in both equatorial and altitude‐ azimuth modes. It features a high payload capacity in a small body utilising a strain wave gearbox and is designed with a modern style operator interface using a simple joystick or mobile app.
No more 1980’s LCD displays here!
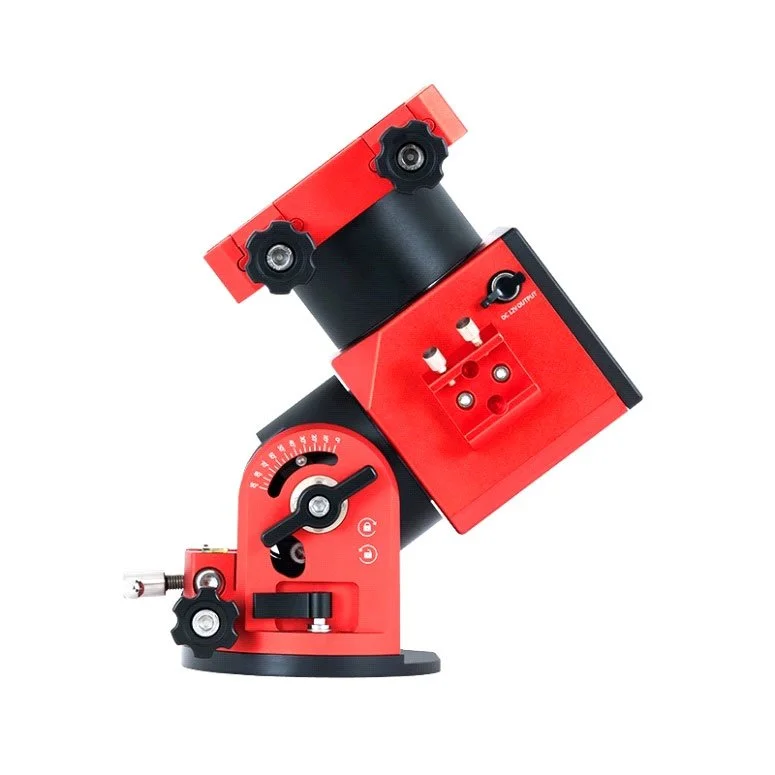
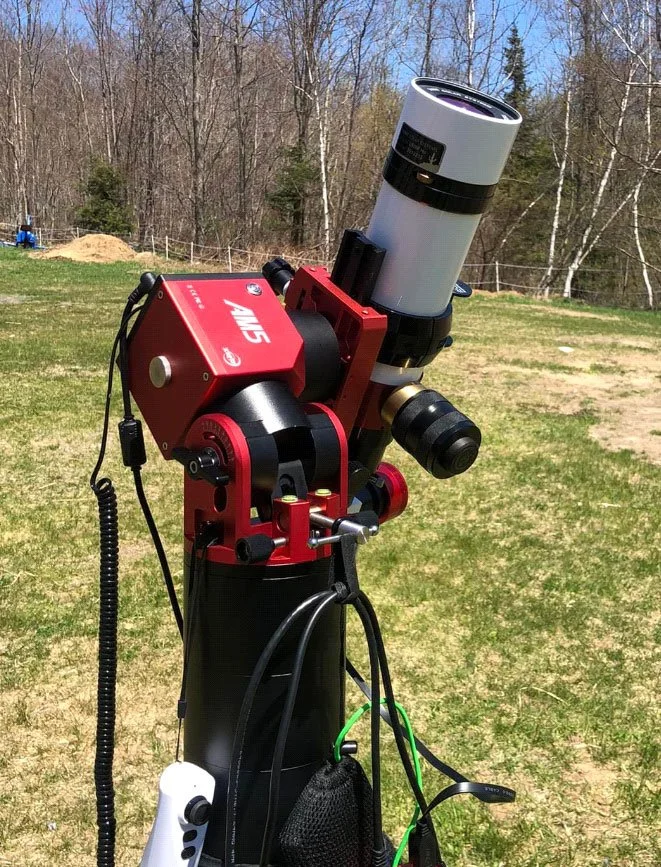
The mount finish is a beautiful mix of red and black anodising with white lettering. It’s a very pleasing and hard‐wearing finish I have found to stand up well to usage in the field during many hours of testing. The AM5 is highly compact, measuring 230mm high and 130mm wide and weighing in at 5.5 kg. Its constructed using a CNC milled aircraft aluminium body which creates a mount that is extremely strong yet remains light weight.
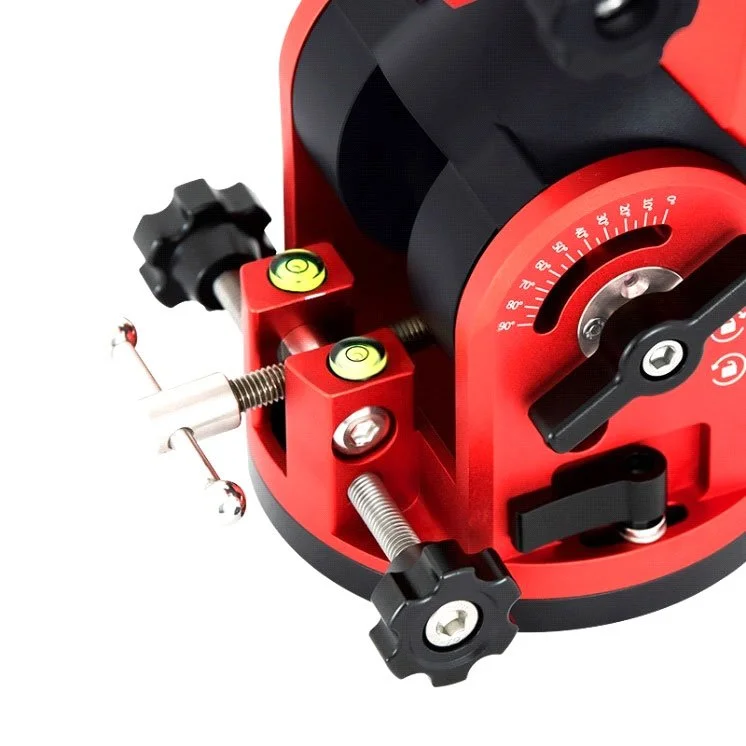
The mount will carry a payload of up 13kg with no counterweight and up to 20kg with the addition of the optional counterweight arm and weight. The counterweight arm screws into a 12mm threaded hole on the underside of the mount. The AM5 comes with all the features an astrophotographer would want. A dual standard saddle with aluminium clamp knobs comes as standard. Azimuth and elevation controls are easy to use and robust.
The azimuth hold downs are small levers using a clamp style fitting – no more dropping a hex key in the long grass at night! Elevation clamps are two large T style knobs either side of the mount.
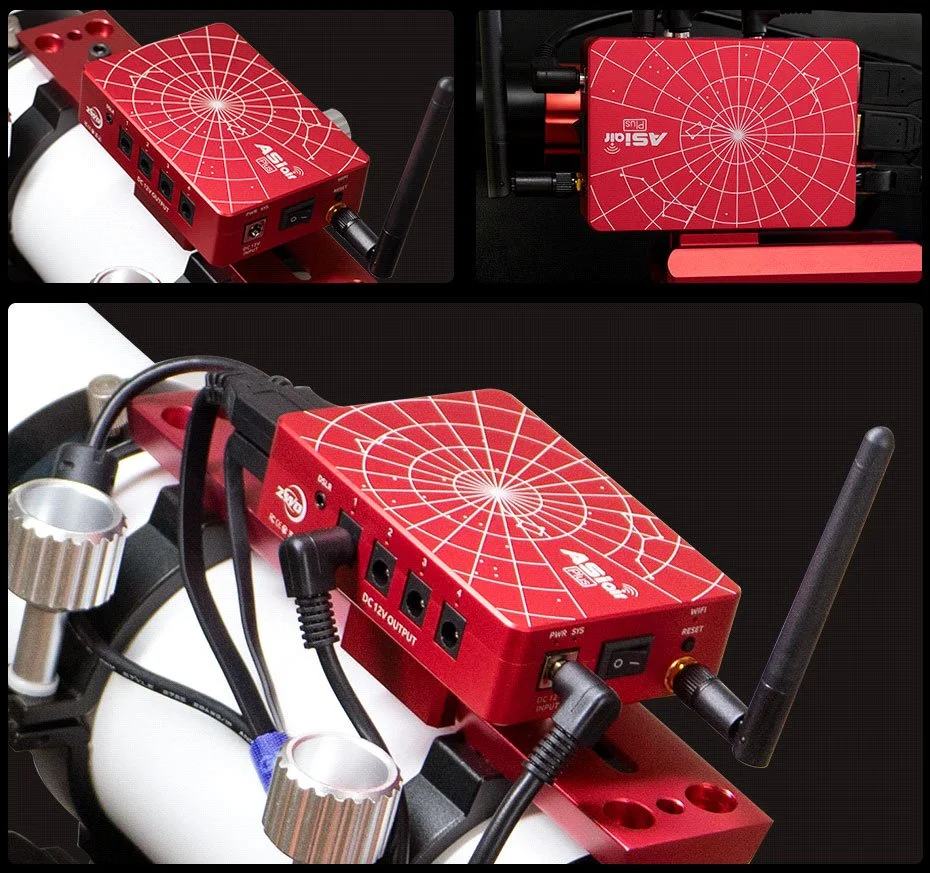
The mount is designed to fit the optional TC40 carbon fibre tripod but has a 3/8” screw mount on the base for use with other tripods. One of the AM5 testers has been using his Celestron tripod to good effect during testing. The AM5 is designed for 12V operation and is extremely light on power consumption using around 0.5A during tracking and around 2A when slewing with a full load. 12V in is via a 5.5 x 2.1mm DC jack. The front panel also provides the user with a USB socket for mount control, a hand controller port and an ST4 guide port.
The supplied hand controller is very much like a small joystick found on games systems and yet provides all the functions need for stand alone observing. The hand controller also contains a Wi‐Fi module for cable free connection. On the final production versions of the mount, you will find a DC outlet socket for powering accessories like the ASIAIR and a finder scope mount on the side of the body for either a polar finder scope, laser pen or more likely these days, an electronic polar scope and camera.
Each mount comes with its own test sheet and guaranteed to be better than +/‐ 20 arcsec PE, which is very good for harmonic drive mounts.
AM5 PE Report
About the AM5 PE Report
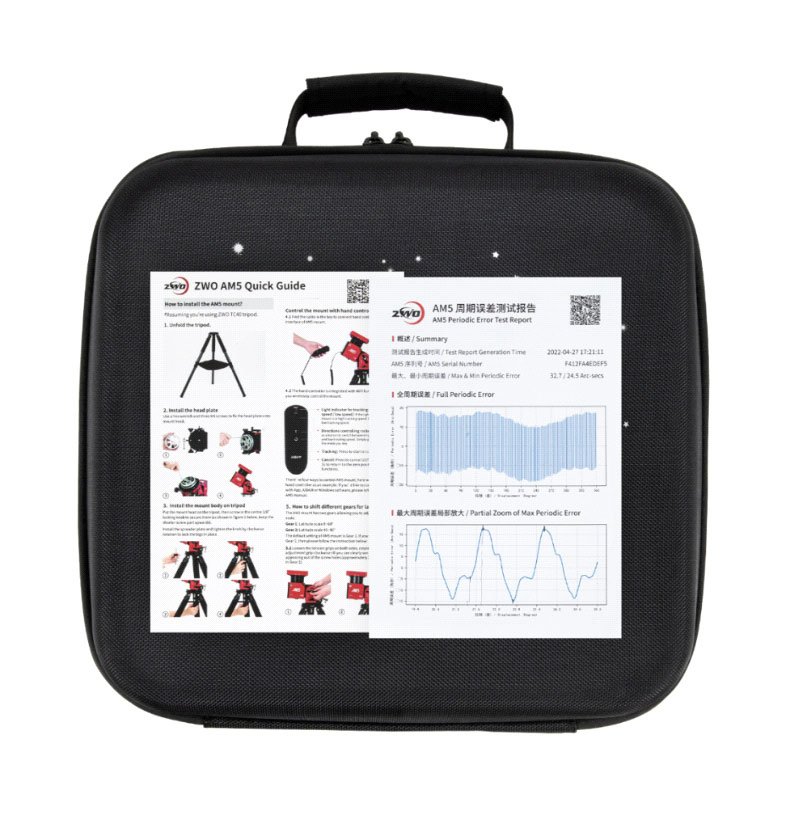
There is an important document included in the box with every mount and something fairly unique to the AM5 – the PE test report. One key area of focus for the ZWO team was to ensure the AM5 meets a highly repeatable performance and they have worked hard on the AM5 test procedure to maximise quality on delivery. Some companies producing mounts may include a report on their mounts Periodic Errors (PE) and at the very beginning ZWO had the same thought; To include a report showing the PE result for 1‐2 single PE cycles.
However, after some intensive research during development, ZWO found the periodic errors of a harmonic/strain wave geared mount behaved very differently from that of a worm gear mount.
And the outcome of that was, when we say ‘periodic’ errors, we really should understand that the errors are actually not that ‘periodic’! It seems the error of each gear is different from another and this discovery surprised ZWO and they decided to test the full periodic errors of each mount. A full period would rotate the mount 360° in 24 hours for one reducer rotation. To scrutinize the full PE of each mount is a very laborious task, but ZWO eventually created such a test, and you can find the detailed test results in every mount’s box.
Now when you receive your AM5 package you can find a custom report in the box, giving a clear report of the reducer performance for your mount. The shipping box contains a paper version of the report, but you scan the QR code on the report and you can then find an online version of the test report to download and share with friends.
The reports will be stored in ZWO’s server permanently too, so don’ worry if you misplace it.
ZWO sets a minimum standard for each AM5 mount before allowing it to be released from production. Each mount’s maximum periodic error must lie within the range of +/‐20 arc seconds.
Of course, due to the manufacturing differences each mount has its own unique periodic error curve, bringing different maximum and minimum periodic error values but the mount must not exceed this tolerance before being released to the customer.
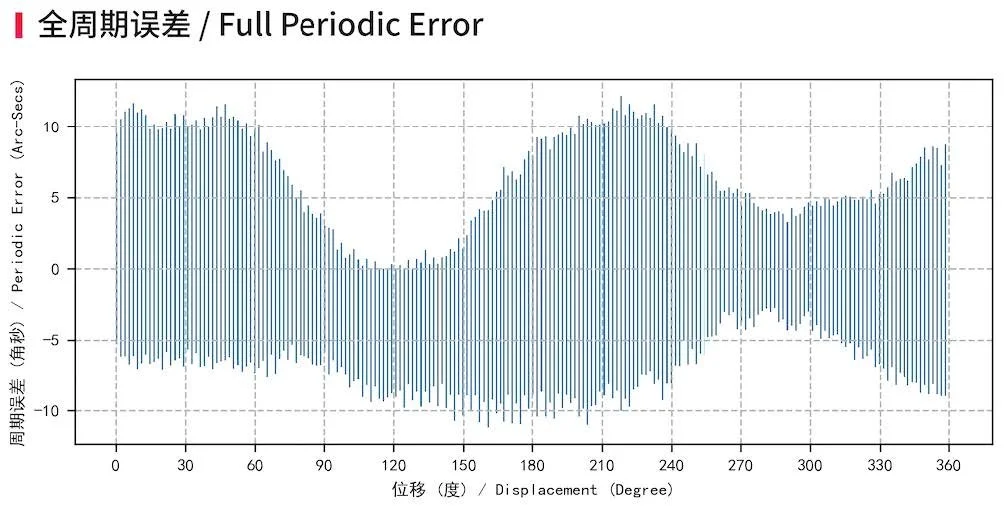
Some users might find the maximum periodic error of their AM5 mount is smaller (or larger) than others, but if the total PE value is under 40 arc seconds, then AM5 is within an acceptable range and is released to the public. With a PE in this range, you can easily get a good guiding accuracy between 0.5″ ~ 0.8″ at 900mm focal length with a 1‐second guide exposure. The smaller the periodic error is, the better tracking accuracy the mount can achieve without guiding.
For interested readers there is a very detailed explanation of the PE report and its breakdown here:
https://astronomy‐imaging‐camera.com/tutorials/10‐things‐you‐need‐to‐know‐about‐thecustom‐
am5s‐pe‐test‐report‐provided‐by‐zwo.html
What about PEC?
One question I saw asked regularly during discussions of our beta test was “what about Periodic Error Correction” (PEC)? In short, the AM5 does not have a PEC function and for good reason.
PEC manages periodic error corrections. The mount records the error curve over 1 or more period then plays it back during imaging allowing the mount to correct for gearing errors in an attempt to minimise PE errors. Most worm/ring gear style mounts have the PEC function included in the hand controller and PEC can help a lot for astrophotography without guiding. For applications that use guiding, such as deep sky or long exposure imaging, the use of PEC is not desired as guiding commands fight the PEC for control of the mount with unpredictable results.
You will also remember, as I mentioned above, harmonic/strain wave periodic errors are actually not that periodic and so it’s not possible to correct for errors by recording these and playing them back. For these reasons ZWO decided not to implement PEC in the mount as it is somewhat meaningless given the above findings. Instead, they have focused on the Quality Assurance (QA) aspects of each mount to ensure they meet the desired minimum standard before despatch and that only happens after completion of a successful 24‐ hour test for every mount.
AM5 Operational Modes
The AM5 is extremely flexible and can operate in several modes that support all types of
astronomers from visual observers, solar imagers, planetary and deep sky imagers.
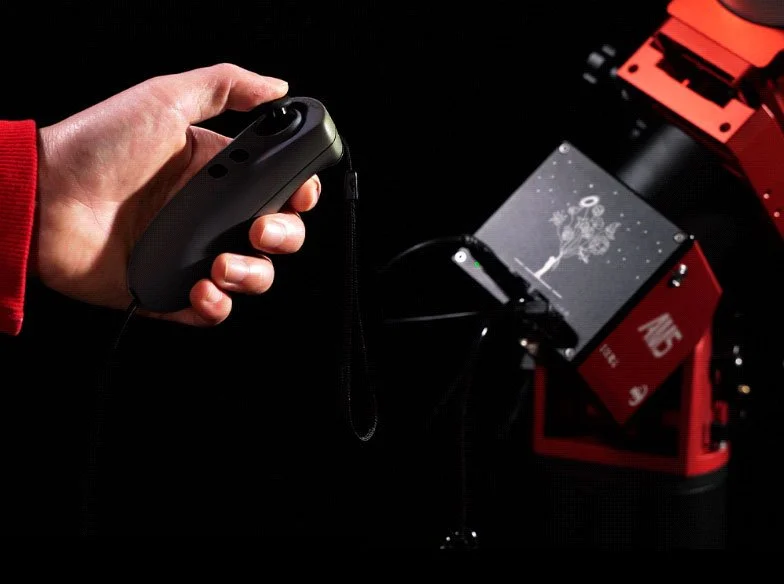
Astronomers can control the mount via the easy‐to‐use joystick, using the AM5 app running on a mobile device such as phone or tablet (Android and IOS are supported), or via ASCOM/INDIE and INDIGO. The joystick Wi‐Fi connection also helps with cable management and allows users to control the mount via Wi‐Fi versus a cabled connection, making it one less cable to think about.
Standalone Visual Use – EQ/Alt Az Mode
In standalone use the mount is very easy to set up and operate. The user can quickly set up the tripod, drop the head unit into the quick release clamp, connect power, turn on the mount and be ready to observe in a few minutes. You can run the mount in two standalone modes: In the traditional Equatorial mode, with the mount setup and operated like a normal polar aligned equatorial mount, or, in Alt Azimuth mode. In this mode you can simply set up the mount with it pointing north and then use the hand controller to move in azimuth or altitude to your required point in the sky.
Changing the mount from EQ to Alt AZ mode is accomplished by removing two bolts in the side of the body and changing the altitude from the chosen EQ elevation, to the full 90‐degree position. The two modes are selected on the mount body by holding down one of the hand controller buttons while powering the mount on. The front panel LED on the mount will indicate which mode is selected, red for EQ mode or green for Alt AZ mode. In both these modes the joystick controls the mount axis. Pushing the joystick to one side or up down will slew the mount in the corresponding axis, the harder you push the stick over the faster the slew rate.
You can also turn sidereal tracking on and off from one of the hand controllers’ buttons and send the mount to the home position using another button by pressing and holding it.
The mount is fitted with mechanical sensors to detect the home position. When turned off the mount has an in‐built braking system, and this will ensure neither of the axis slip if power is removed, even with large payloads. This standalone mode is useful for quick visual observing, solar observation or using small unguided payloads like a DSLR or mirrorless camera.
Standalone – AM5 App
An alternative to the standalone mode above is to use a mobile device such as phone or tablet, using that to act as a software driven hand controller versus the joystick. This mode provides the user with an amazing set of features that you could never find on a traditional hand controller.
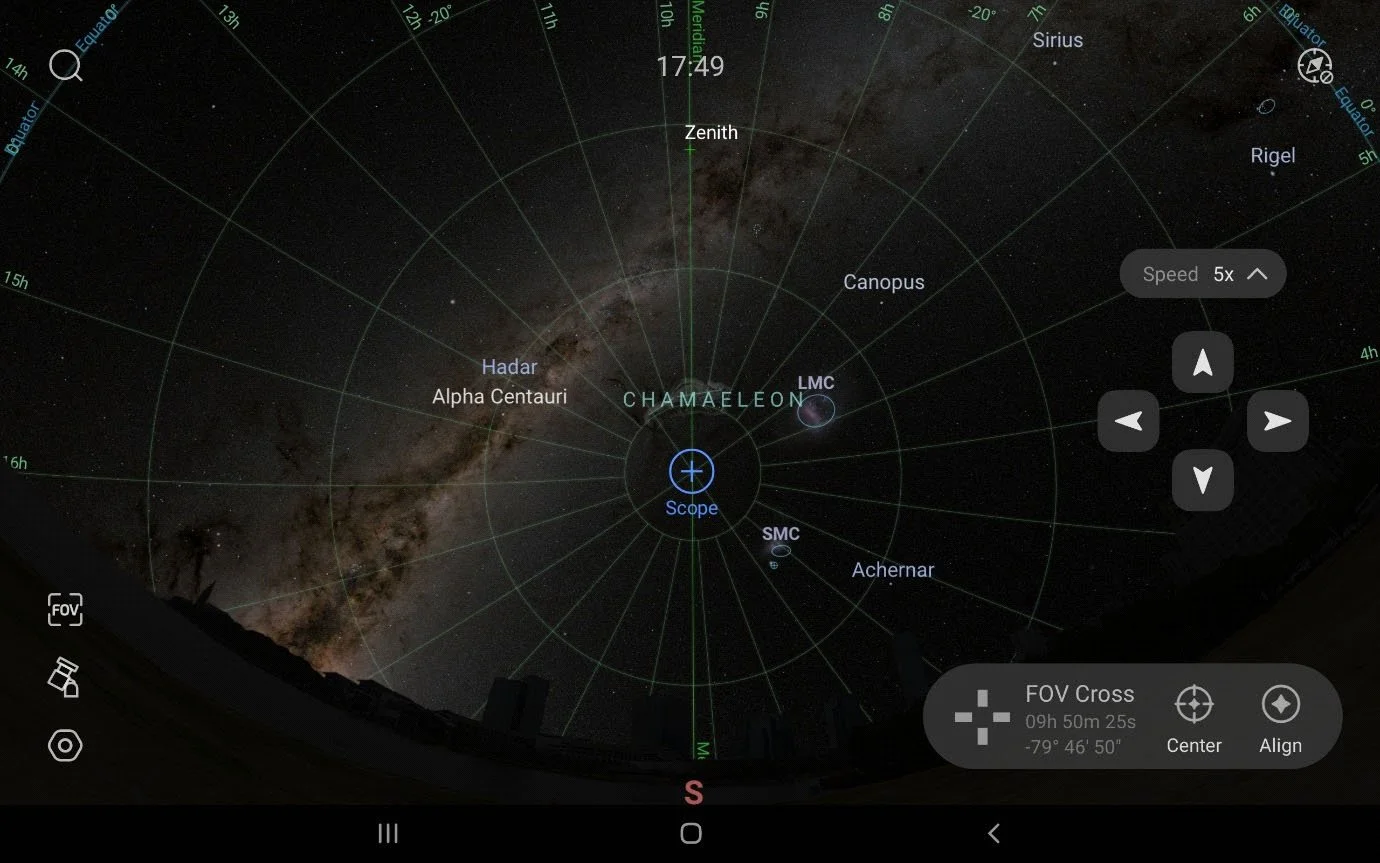
Traditional 80’s style LCD controllers can’t offer features such as the AM5’s inbuilt Sky Atlas, an easy and fun way to find your way around the sky! The app is also very similar in design to the Sky Atlas found in the ASIAIR app and ASIAIR users will feel very comfortable with it. Likewise, users of the AM5 app who graduate to using the ASIAIR will feel right at home. Using the app you can choose tonight’s best objects, choose objects by catalogue name, or just browse the visual atlas using the typical finger gestures like pinch and zoom found on a phone or tablet.
The user can also access the mount update pages for easy system updates. This has to be one of my favourite AM5 features and the system configuration settings can be accessed directly from within the app. After using the AM5 app on your phone or tablet you won’t ever want to go back to a
hand controller with an LCD display ever again!
Astro Imaging – ASCOM/INDI Integration
For users of imaging systems other than the ASIAIR, the AM5 offers ASCOM/INDI drivers for use inside SGP/NINA and many others. The ZWO website has the latest drivers for download, and these include the AM5 drivers and ASCOM control panel software. In this mode the mount will work as any EQ mount does and is easily integrated into ASCOM so you can use applications like PHD2 alongside your imaging software. The mount uses the very common Meade LX200 command set, so there is not much that won’t integrate with it!
Astro Imaging – Using Wired / Wi‐Fi Connections
When astro imaging with the AM5 you can connect to the mount in two ways. First you can connect to the mount via the normal USB cable connection or, alternatively, via a Wi‐Fi connection.
In the wired mode the mount’s front panel USB connection provides a connection either to ASCOM/INDI devices or to the ASIAIR. In the Wi‐Fi mode you can connect to the AM5 using the Wi‐Fi module located in the hand controller.
For the ASIAIR you can also use the ASIAIR station mode to set up a connection with the joystick, which then removes the need for a wired cable connection.
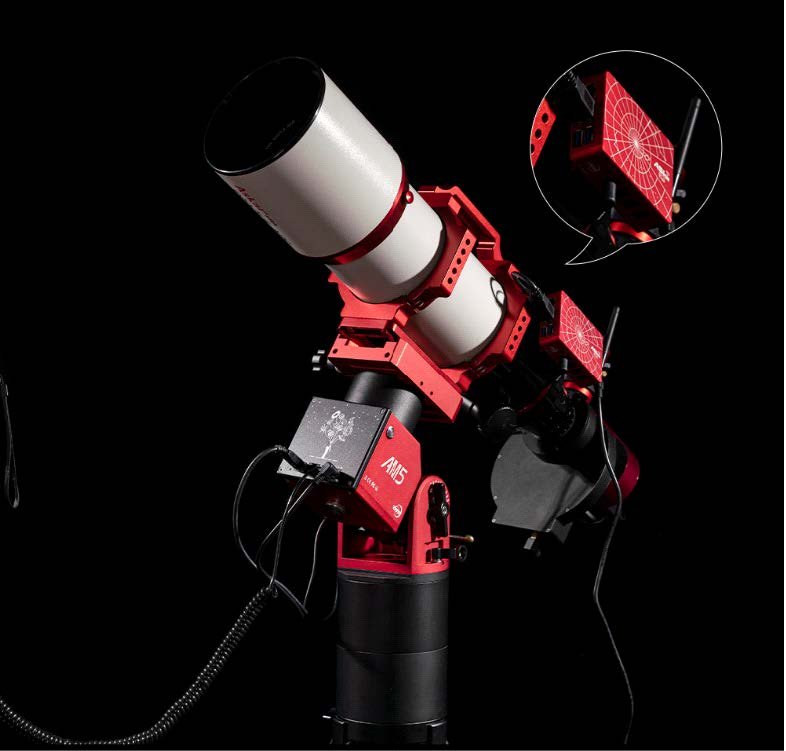
Astro Imaging – ASIAIR Integration
While the AM5 works very well in standalone mode, or, when integrated with ASCOM/INDI devices, it really comes alive when integrated with an ASIAIR Plus, and this is my favourite choice for this mount, it really is a dream to use in this configuration. If you are unfamiliar with ASIAIR then I’d recommend you head over to the ZWO website and check it out: (https://astronomy‐imaging‐camera.com/product/asiair‐plus).
It’s a small compact astro imaging computer designed for use with a tablet or mobile phone and offers a feature rich app designed for astrophotographers.
The ASIAIR offers almost everything an astro imager needs, from cable management, 12V distribution and control, polar alignment and guiding, plate solving, and a full featured image sequencer, deep sky and planetary imaging functions and it even comes with a built‐in sky atlas!
Using the ASIAIR with the AM5 allows you use the tablet or phone to easily control the mount using the on‐screen joystick and mount controls. The ASIAIR will also drive the mount around using the inbuilt sky atlas which has to be the most fun thing in years!
Sitting in my chair under the stars, using the tablet to browse and select objects, getting the mount to go to the object, plate solve and align itself to the object, then take an image using the tablet is just immense fun.
We use the mount at our outreach events at the Canterbury Astronomical Society and the kids just love driving the mount around using the tablet! They are just so in tune with this modern style of interface, its second nature to them.
It’s a real draw when they see the technology being used in this way and they are streets ahead of the adults in getting amongst this modern way of astronomy. Using the ASIAIR/AM5 combination is really seamless and even more so if you use the ASIAIR Station Mode and connect the ASIAIR to the AM5’s Wi‐Fi instead of using a USB cable.
It really is a dream to use and makes for the ultimate lightweight rig for the field.
AM5 Firmware Upgrades
One of the most annoying parts of owning any other telescope mount can be the complex method of uploading new firmware to the mount or hand controller. Normally you must download the firmware to a PC then use a cable to connect to the mount, install some drivers, upgrade software and firmware file, then upgrade various boards on the mount, then start again with the hand controller. They are just so messy!
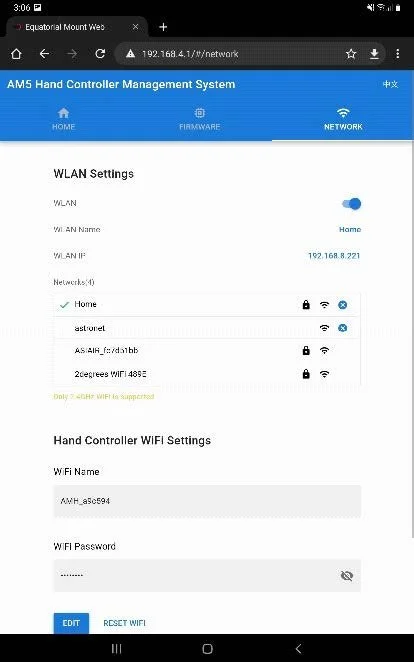
Well forget all that with the AM5! Mount upgrades are done over the internet via Wi‐Fi!
When you first receive your mount, you will want to connect your mobile device to the Wi‐Fi in the hand controller. Opening the AM5’s default webpage address presents a configuration page. From here you can configure the Wi‐Fi settings for the hand controller and connect it to an internet connected Wi‐Fi access point and then check the latest firmware states for the mount and hand controller.
Updating is simply as seeing if there is an update available and then pressing the update
button. The mount will download the update over the air and then apply it restarting the mount
as necessary. This must be the simplest mount to update and so easy to do – no more serial cables!
TC40 Tripod
Overview
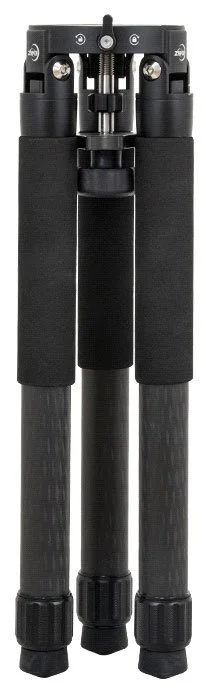
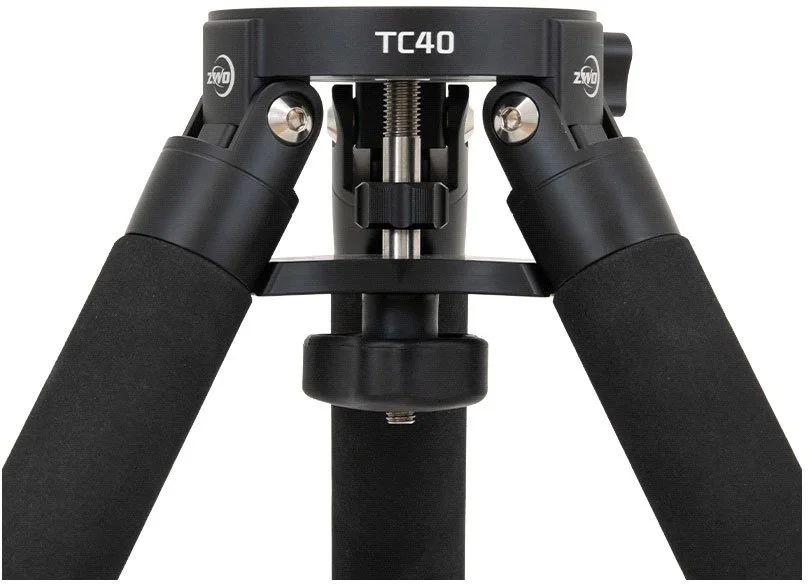
The recommended tripod option for the AM5 is the matching TC40 carbon fibre tripod. This is a lightweight carbon tripod weighing just over 2kg but capable of carrying a 50kg payload. Its extremely well made and the perfect field companion to the AM5. The tripod is a two‐section unit that measures 500mm collapsed and extends to a maximum height of 800mm with both sections in use and 470mm with the first section only.
The tripod legs are 40mm diameter for the upper sections and 36mm for the lower. The legs end with a screw thread and rubber foot. The feet can be removed and replaced with ground spikes for use on softer surfaces like grass. There is a handy mounting plate that fits to the base of the AM5 using 3 x 6mm screws and this provides a quick release mechanism for the AM5 allowing you to quickly drop it into the top of the tripod.
Using the quick release plate means setup can be accomplished in a few minutes. It’s also perfect for a fast getaway at the end of the nights imaging session when a warm bed is calling! The tripod comes with a weight bag so you can add weight to balance the tripod for larger loads and a threaded centre pin, spreader plate and tension knob.
In Use
I really like the TC40 as a tripod and when combined with the AM5 as it creates a stable mounting for the telescope in a compact and lightweight package and it’s very portable. I didn’t find anything I disliked about it and with the addition of the quick release plate it means I can setup and be ready for imaging in minutes. Removing the AM5 from the tripod is just as quick, which helps when changing kit around during testing.
When beta testing the AM5 using smaller scopes and mirrorless cameras, I did not bother installing the spreader plate and set up as done in a matter of seconds.
The final production tripods will come with a set of matching ground spikes for use on soft ground as mentioned above. I found that in my early days of owning the AM5 and tripod I was quite concerned about stability.
The lack of counterweight is initially quite disconcerting. But the more I used the AM5 the more confidence I gained in it with larger and longer scopes. After some weeks I was as happy running my long tubed ES127 refractor as much as I was with the short tubed wide field Askar FRA400 rig.
A weight bag is included that hangs between the tripod leg and I used this with spare counterweights and even my portable battery pack, the weight providing additional stability to the mount and payload.
Personally, I am still concerned with long length tubes or larger SCT’s in breezy conditions, but I mounted over 10kg of refractor and cameras on the AM5 without issue and my initial concerns about stability quickly disappeared.
If you are overly concerned about it tipping over then the 3/8” mounting point allows the use of a larger tripod. My colleague, TJ Connolly, utilised a spare Celestron tripod for his bigger scopes during testing and while perhaps not required, it does ease the mind somewhat when balancing your pride and joy!
On a final note, it’s worth noting that the TC40 is compatible with a number of other mounts too if you are in the market for a lightweight tripod.
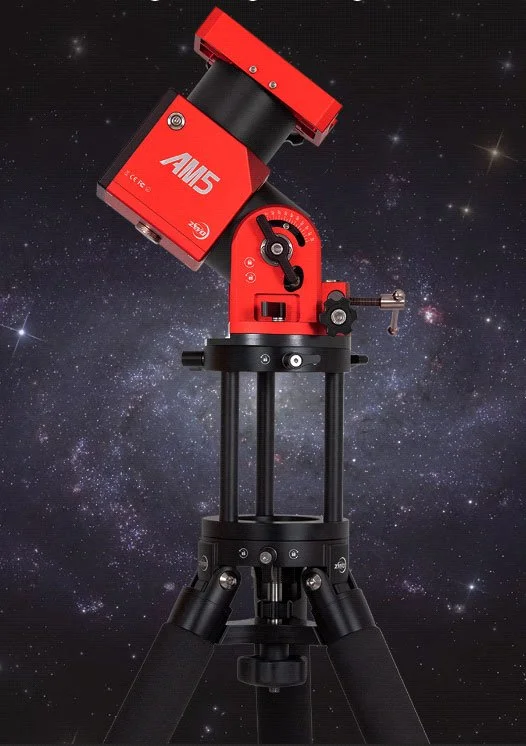
Pier Extensions
As found in other mounts, you may find longer telescopes can collide with the tripod legs at the meridian. ZWO have provided an optional pier extension accessory to overcome this problem.
The AM5 pier extensions are machined from the same aluminium as found in the head unit and are also finished in the same pleasing black anodised finish. There are two types available: A solid tube style that is machined in sections and a bird cage style extension.
The solid extensions are designed to screw to the base of the mount using 3 x 6mm screws and these increase the height over the legs when installed. Each extension adds 70mm in height and adds around 0.5kg for each ring added. Two are included in the base extension kit and you can purchase additional extensions to raise the mount height further if desired.
I would keep an eye on increasing this beyond three extensions as you will quickly become unbalanced if you increase the height too far. The bird cage style is a more flexible approach for rigs that need quicker/simpler disassembly as it’s possible to move the mount using the top and bottom clamps versus screws. So, this might suit you better if looking for a quicker removal/setup time. The birdcage style weighs 1kg and measures 160mm high.
In Use
The pier extensions really help if you have a longer length OTA, so for users of larger refractors or long tube Newtonian reflectors, you will find the extension invaluable in avoiding those tripod legs crashes at the meridian. They are simple to use but the solid version is not something that is quick and easy to remove from the mount. I tended to leave mine installed and while that makes the mount head a little heavier overall, I found the convenience of not having to install or remove them each time I used the mount far outweighed the additional weight.
If that’s an inconvenience or does not suit your operating style you may like to consider the bird cage style extension.
I also found for visual use with my solar scope, that the pier extensions really improved the viewing angle for the eye piece and that eased the position on my neck. So, you may want to investigate these extensions with your purchase if you use visual scopes or longer tubes that might impact the tripod legs.
Overall User Experience
So how was the AM5 in use?
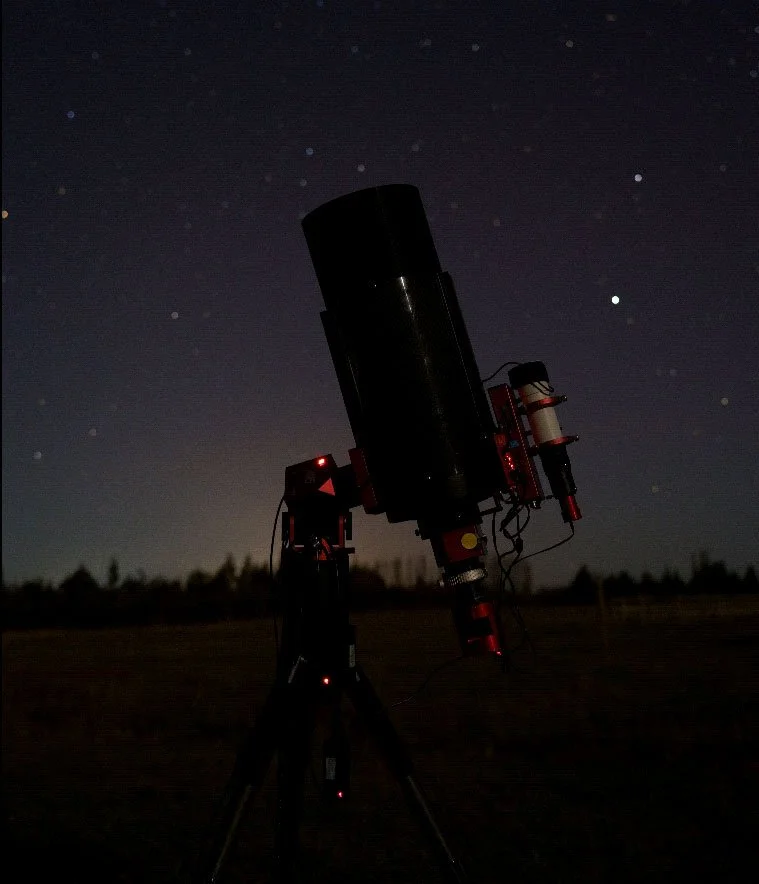
Well, I have used the mount and tripod combination over many nights of imaging and during the day for solar viewing during months of beta testing. I used the mount extensively in both EQ and AZ‐ALT modes and used it in standalone mode, with my phone and the AM5 app for visual and solar imaging and I used it for deep sky imaging with Sequence Generator Pro via ASCOM. I also spent many hours operating it with the ASIAIR Plus and my Samsung Galaxy Tablet.
How was it? I can truly say you are going to LOVE this little mount! Its size and weight make it simple to transport, with the AM5/TC40 combination making it fast to setup and be ready for imaging in just a few minutes using the handy quick release plate.
The mount lock down levers and azimuth and altitude adjustments are all easy to use in the dark and the use of metal knobs on the dual saddle allows you to operate them even with gloves on.
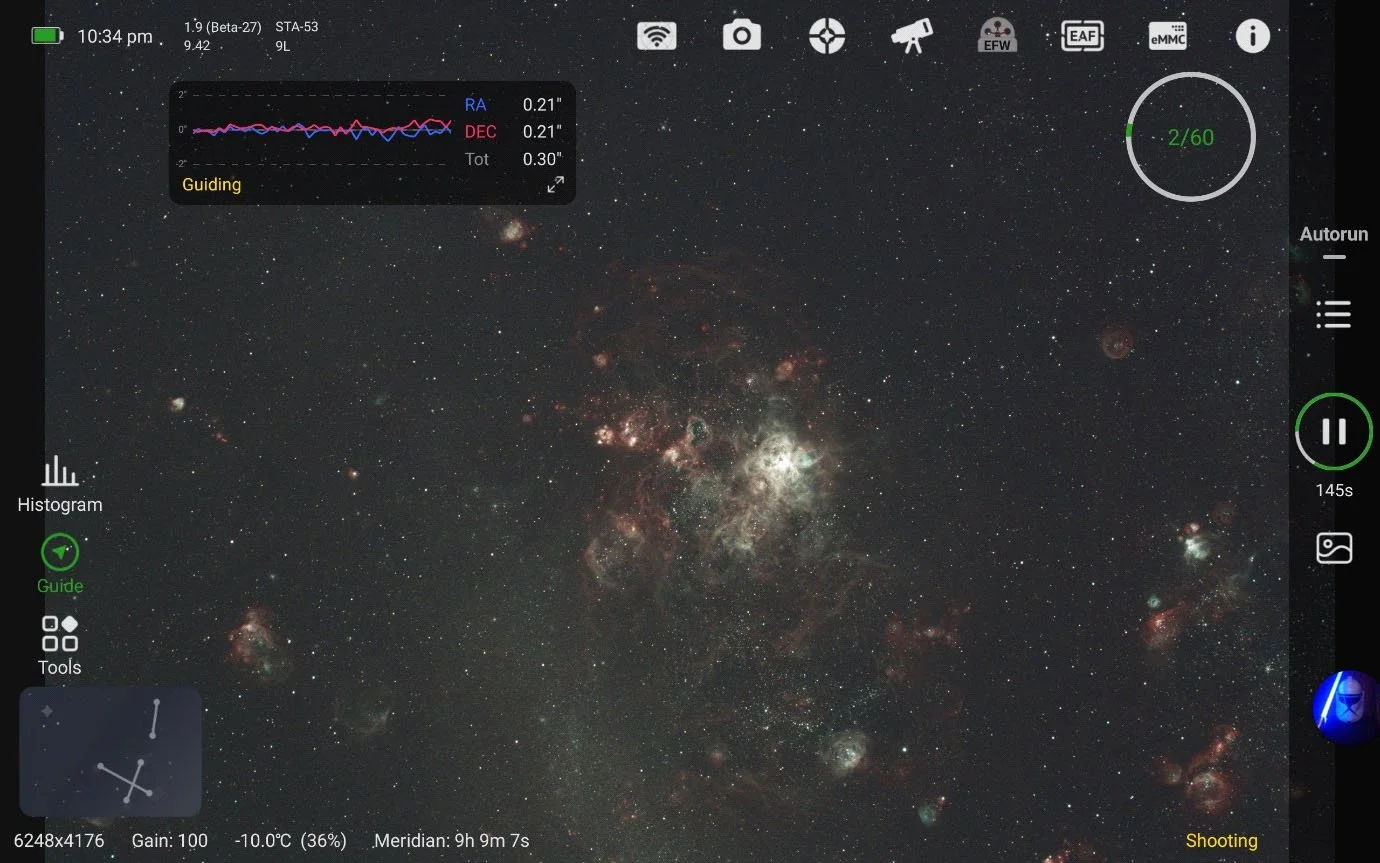
The mount is smooth and quiet in operation, slewing quickly and accurately to target. GOTO’s and plate solve were always spot on and it guides really well. ZWO suggest up to a 900mm focal length and a 1” pixel scale to guide around 0.6 ‐ 0.8” for deep sky imaging.
On some nights I could exceed that with guiding as low as 0.30”. The beta testers experience matches the suggestions from ZWO closely and in some cases easily exceeds it.
For planetary use of course this would be different, and the team used much larger OTA’s with planetary cameras successfully on this combination, unguided.
For me one of the biggest sellers for the AM5 is the flexibility in connectivity.
This lovely little mount will mix and match just about anything you’d like to connect with!
Standalone the AM5 app is really, really, fun! You will never want to go back to an LCD display again after using your phone or tablet to drive the AM5 around the sky using the Sky Atlas.
If you want the absolute best from the AM5 then just add an ASIAIR. I just loved the integration of the AM5 with the ASIAIR – it’s seamless and this is a match made in heaven!
The ASIAIR makes astro imaging fun and easy and the integration with the AM5 just adds to it. We used the combination on our Outreach nights and the kids just loved driving the mount round the sky using the tablet. They’d take pictures of different targets then emailed themselves the images! They are just naturals using this type of technology and it really engages them in astro imaging using it in this way. I also loved sitting in my garden chair driving the AM5 using the ASIAIR via my tablet and doing testing, while watching the stars too with a cup of coffee.
If I felt the need to test the ASCOM side, then again it was a simple and easy setup using
either Wi‐Fi or wired connections. It just works and is a real joy to use.
Would I recommend the AM5?
Absolutely! I am loving this little mount if you hadn’t gotten that vibe from me already. If you are in the market for a small, lightweight yet powerful mount then this is very worthwhile considering. I really like the matching TC40 tripod and together they make a formidable setup.
You may want to consider a bigger tripod for much larger OTA’s and you would want to consider your pixel scale and tube size before purchasing. The AM5 will certainly perform well for visual, solar, and deep sky or planetary imaging and the modern style of operating is a breath of fresh air compared to 1980’s style LCD controllers.
We are going to see a revolution now in the features offered by application driven mounts and the AM5 is leading the way with its stand‐alone app or seamlessly integrated into the ASIAIR. I promise you won’t want to go back!
ZWO AM5 Astronomy Mount
https://astronomy‐imaging‐camera.com/product/zwo‐am5‐harmonic‐equatorial‐mount
ZWO AM5 Facebook Group
https://www.facebook.com/groups/zwoasimount
10 Things to know about the ZWO AM5 PE report
https://astronomy‐imaging‐camera.com/tutorials/10‐things‐you‐need‐to‐know‐about‐thecustom‐
am5s‐pe‐test‐report‐provided‐by‐zwo.html