

The ZWOASI 1600 Pro
Let's go Mono!
by TimCowell
Beyond the Rainbow
Did you start your astro imaging adventure using a DSLR, perhaps a phone or maybe an OSC (One Shot Colour) camera? Do you remember the simple fun? That instant gratification of 'click and gasp' is usually compromised at the point of the 'long sub'. The day, or in fact night, that we go through the 60 second exposure barrier is truly the dawning of deep sky data and I hope that, like me, the tingle in your spine was intense. (If you are yet to get there, keep going, it is worth it!).
There can be no denying that OSC imaging is hugely rewarding and since astrophotography is complex enough already why add more hassle? The simple answer for me is, I don't know for sure as I was swept away with an idea in an article one day and found myself in a dreamlike state phoning 365Astronomy for advice.
Zoltan, the hugely knowledgable owner, had originally supplied my OSC, the ZWOASI071, with its generous sized sensor producing rich colour images in a very easy fashion. To be clear, when buying my OSC I didn't know my arc second from my RMS error and many say I still don't, but that didn't stop me harvesting satisfying pictures to impress my friends with, thanks to its simple operation. Then, the Moon came, a mostly full or fullish moon that appeared on every ripe and ready starry night, or so it seemed. Maybe there was also a sense that I was ready for something I thought I'd never try. I hung up the call, the ASI1600 was on its way along with some useful, if not necessary accessories at a 'bundle deal' price.
Boxing Clever
Wriggling the packaging away to get to the goodies I noticed Zoltan's 365Astronomy business card drop to the floor, so I pegged it underneath my screen because there had to be gremlins and glitches getting these tricky things working together. There were no glitches, lots to learn, but no nasty surprises. The plugging and playing part is simplicity, though getting things right first time will require a little planning and a clean, flat, well lit surface to work on.
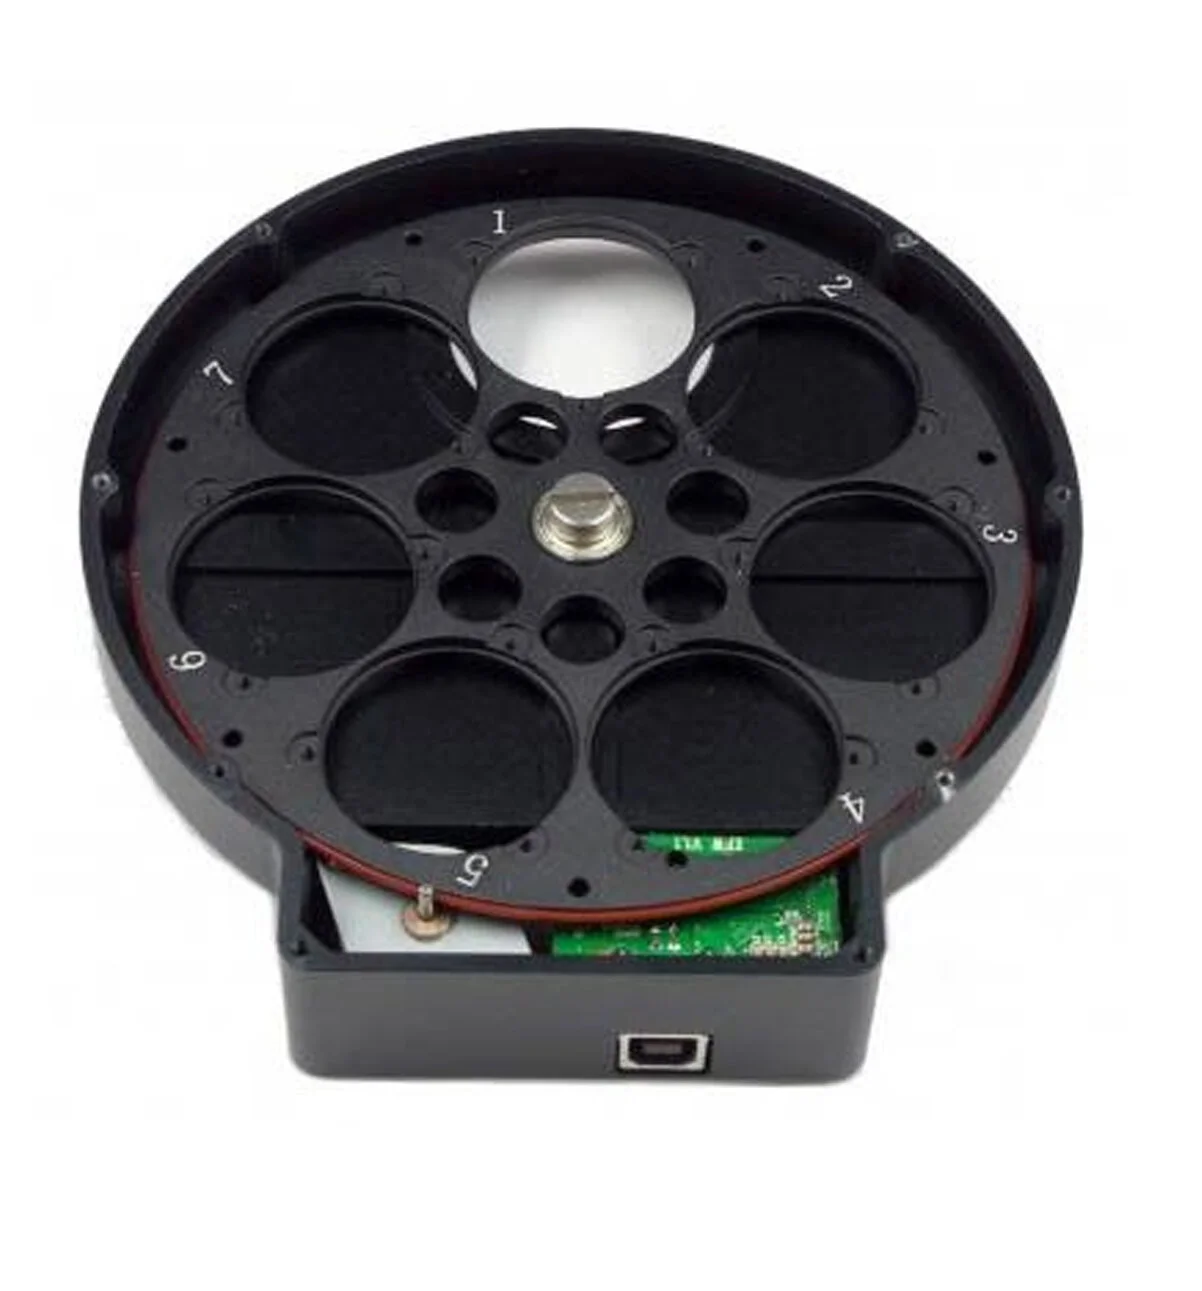
This is what I bought – ZWOASI1600 MMC Pro, ZWO 7 USB Filter Wheel, ZWO 36mm LRGB set and ZWO Ha, O111, S11 7nm unmounted filter set, what you might call the budget bundle as it represents the best value for money. The skilful among you will not be held back by these products, at this price point. They are well known and have seen significant uptake – you know exactly what you are getting.
In the camera box, along with complete and clear instructions and necessary USB 3 cable, are the all important spacers to set your magical number to find proper focus and image size on the sensor. Here we are told 55mm + 1mm for the filter = 56mm in total. So far so good (a pair of digital calipers are great for getting this measurement perfect, but, if you use the supplied spacers in the way shown in the instructions you should be fine).
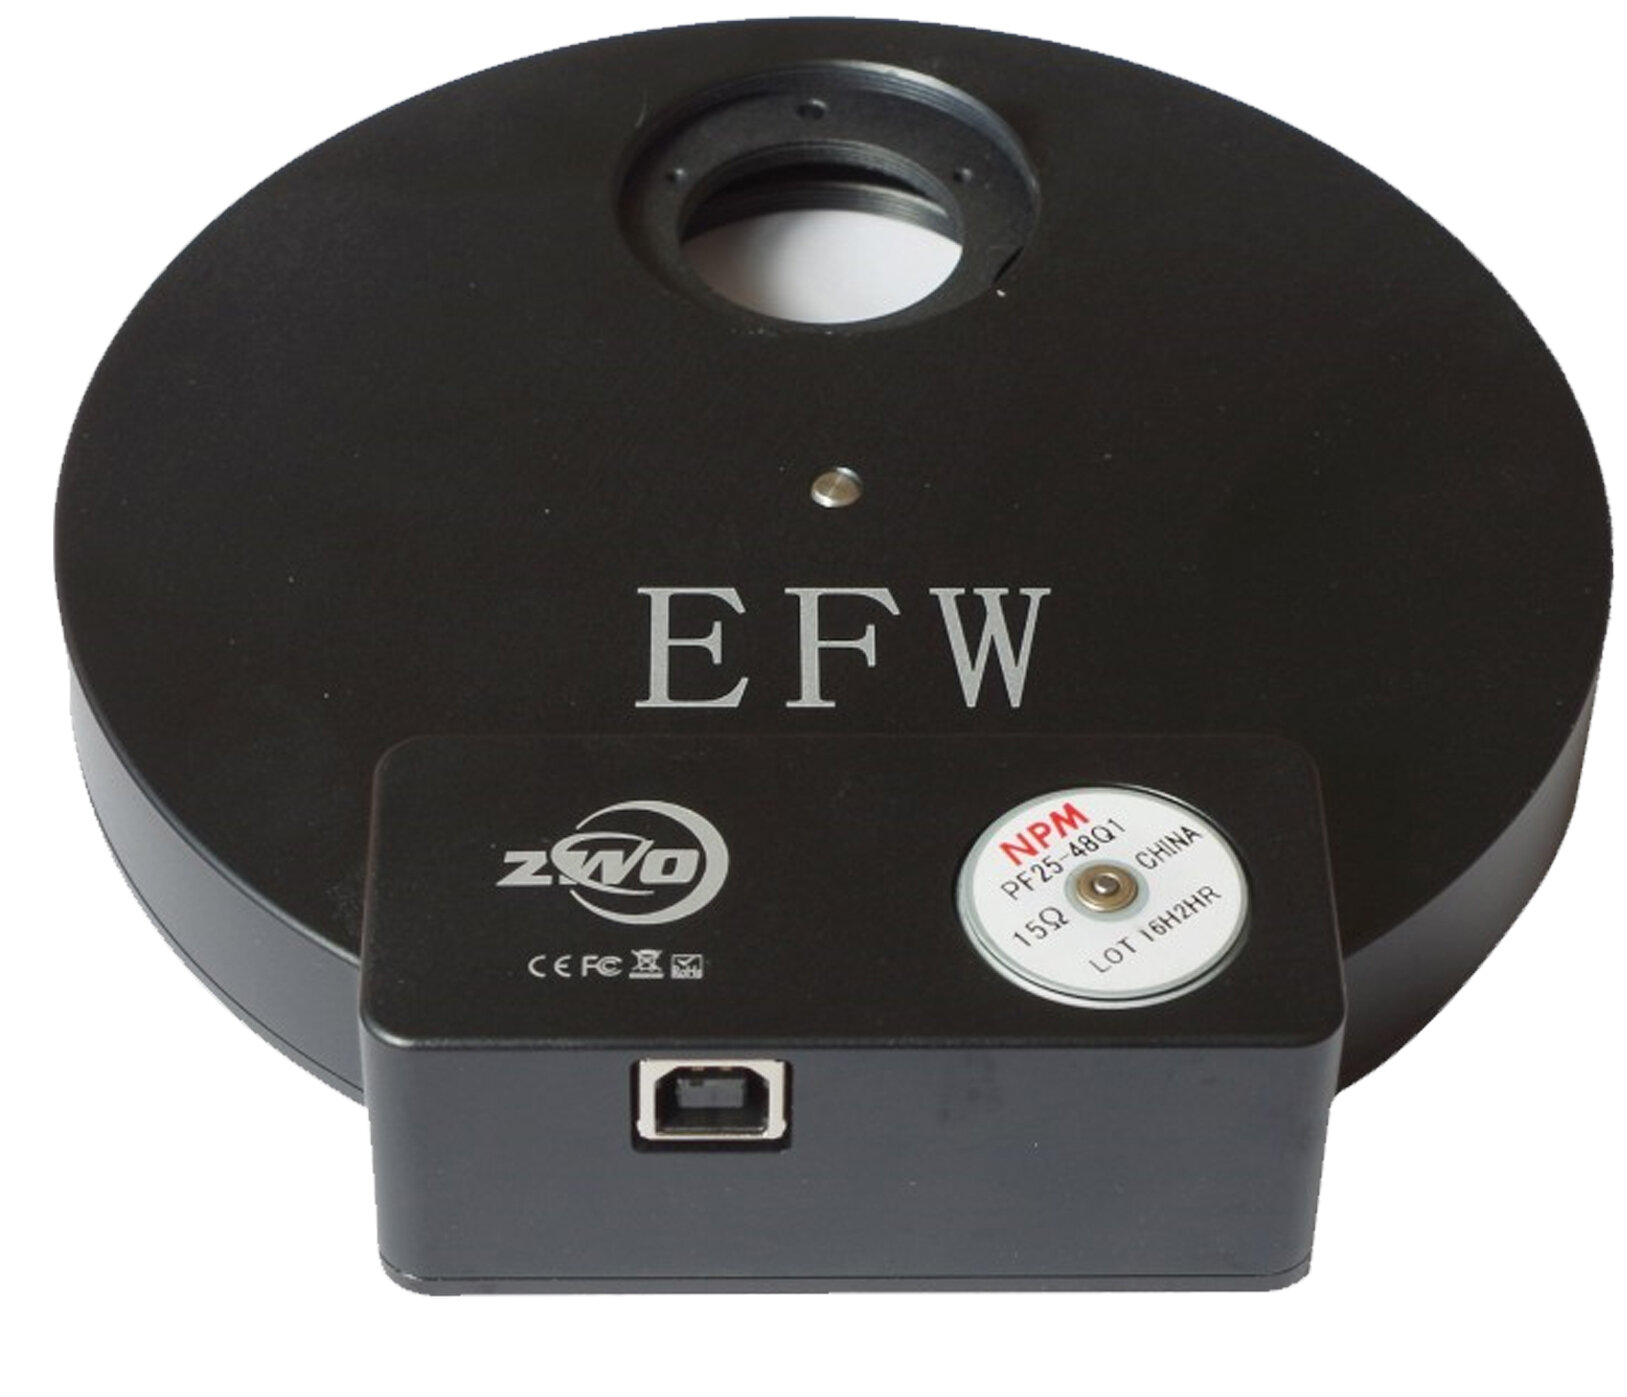
The next part to play in this symphony is the filter wheel, which in this case has seven positions and is computer controlled over its supplied USB lead (I connected mine to the USB 2 hub on the rear plate of the ASI1600). You will want to be methodical and careful once the wheel is opened and you start to load filters to minimise the ingress of dust and other nasty things. I found the tiny screws and gaskets that hold the filters in place a little tricky to fit.
Happily I had thoroughly washed my hands as the inevitable skin to glass contact took place. In hindsight, tweezers and gloves would have been sensible, as would not starting proceedings at 2am in the morning. Now for my schoolboy error – the filters are orientated and must be placed the correct way front to back in relation to the camera sensor. This is clearly shown on the ZWO website instructions, I just didn't read them properly.
Hooking Up
I made a few attempts at screwing the spacers, adapters and equipment together well enough that they didn't undo mid session, or at the slightest touch of the telescope cover. Once you have everything nicely set up you definitely do not want to disturb it so that your calibration flat frames are as perfect as possible. A sagging filter wheel halfway through an exposure is not what we want at all. You can make sure that you do a better job by leaving all cables off and making sure you have room for the filter wheel body to rotate (it can easily knock a guide scope as you screw things onto your OTA).
Fitted and fettled it is time to plug in the cables and connect your computer. Again, it is sensible to follow the excellent ZWO online instructions to download your choice of drivers - naturally ASCOM is beautifully supported here.
Pay careful attention to how your new equipment is positioned in relation to all slew angles. Does anything touch? Will your cables get tangled? The camera is a significant 1.10 kg in weight which is something to consider when balancing your rig. A daylight test with mount clutches free and the entire telescope in full dress is my approach. Swing it in all directions as you balance up. Velcro ties are inexpensive and slew limits in your hand control or computer software are easy to set.
The camera requires a power supply to run the efficient cooler and your usual 12v tip positive cigar type lead or optionally a ZWO mains supply will do nicely. Drivers ready, check! Capture software connected, check! Test frame and focus, ahhh! I tend to try to test these things in daylight and using Sequence Generator Pro as my capture software I clicked the frame and focus button a few times to dial in on a distant tree.
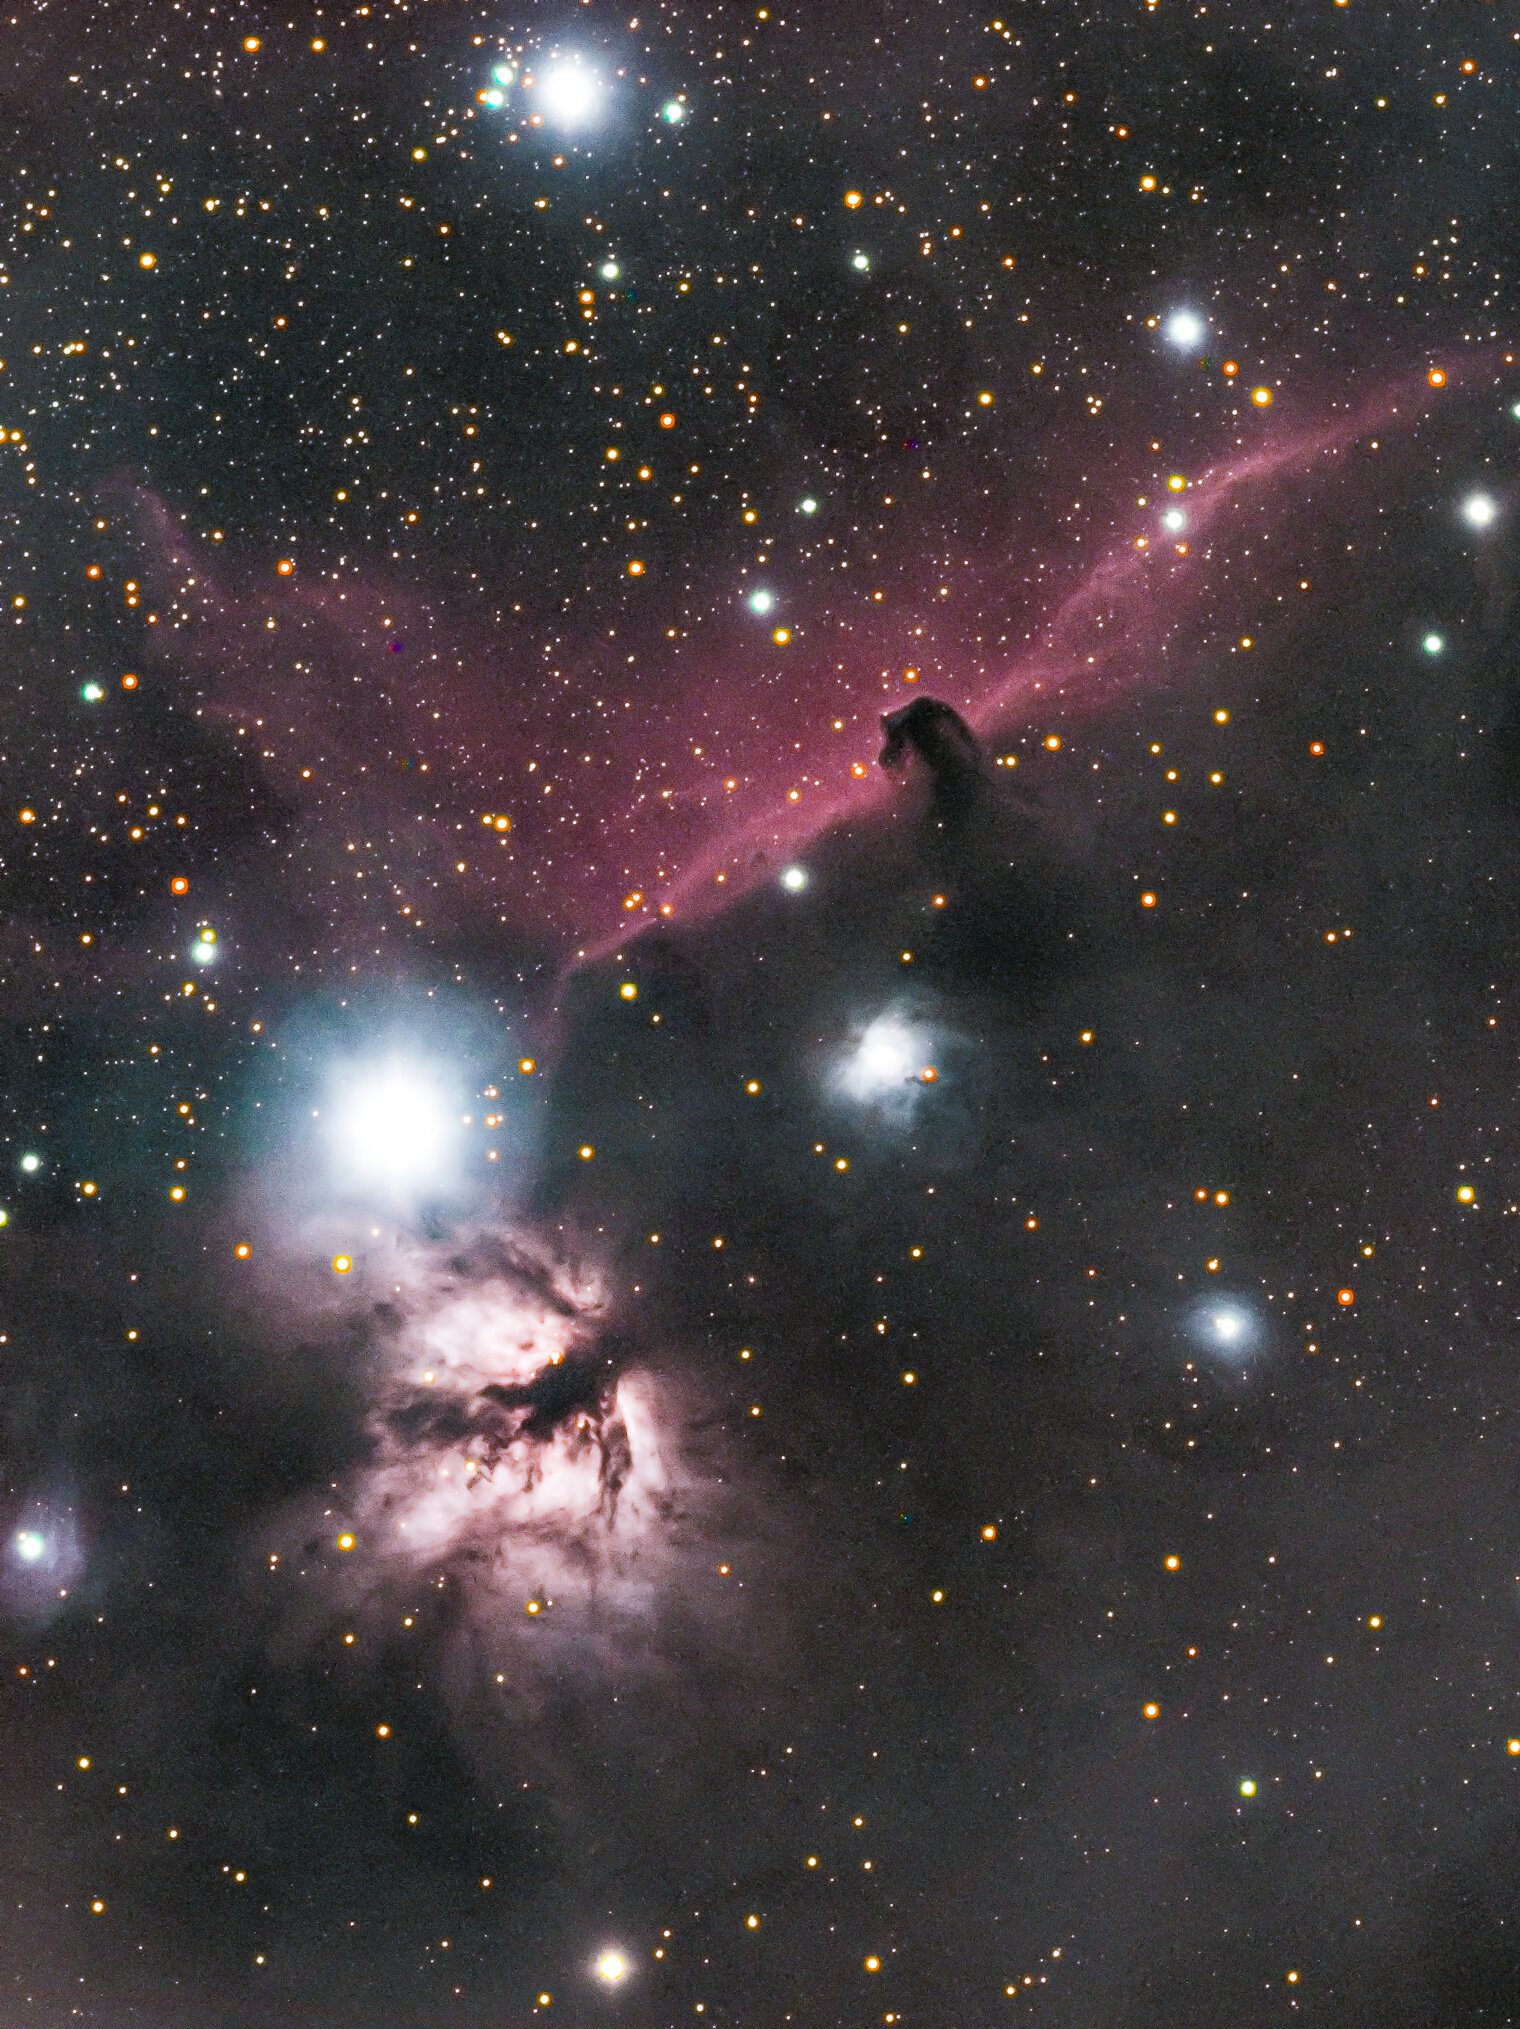
Marvelling at hearing the whirring cooler hold -10 C the wait for stars began on first light night. I gave Steve Richard's excellent book “Dark Art or Magic Bullet?” another thumb through. Stopping at the RGB chapter I felt that tingle again, stronger than before perhaps.
Fifty Thousand Shades of Grey
My telescope choices have changed over the years, where as my investment in mono is set to remain firmly with this 1600, so I was not concerned with any slight mismatch in terms of perfect ratio with the 3.8 um sensor pixels. As you can imagine, a sensor matrix should be matched to the resolution that the telescope provides. You will find online tools that visually represent compatibility between a huge range of 'scopes and cameras and the effect of adding a Barlow or reducer.
For my smaller scope, a fast William Optics Star 71 the sensor does not have enough pixels to match the high resolution image circle, however this has a negligible effect on wide field imaging. With my larger William Optics Zenithstar 103 the ratio is smack dab in the middle. So we know that the camera is theoretically versatile and simple to set up and can award perhaps 1 point there because these things should be fairly refined by now.
What of the acid test? Can I do proper, grown up, LRGB deep sky or will it be death by data?
Wheel of Fortune
This is it! A moment in time, a graceful, arcing dance between tracking mount and earth's rotation. Telescope and photon stream, locked in loving stare, across the jewelled sky. One of the great advances in computerised astro imaging has to be the ability to automate and sequence practically all aspects of a session. From taking a few clicks, to rotating and opening your dome based on weather and sky sensing. With a little imagination anything is possible, all of the tools are there for you.
For this night, book in hand, I have set a sequence for the following – 10 lots of 2 minute exposures for each filter. I doubt the computer needs it but I've added a 2 second delay between each filter change simply so I can think 'ooh that is clever' over and over again. In Sequence Generator Pro the filter docking module changes colour and label to represent the selected filter and another module sets and monitors the camera temperature.
Many of the camera and filter wheel settings are automatically detected thanks to ZWO's excellent compatibility. Being located in the south west of the UK I tend to lower my temp in steps of -5C until I reach either -10C in summer or -20C in winter, which would seem counter intuitive. The camera's chamber is very well sealed to prevent icing and dewing during cooling and even the cooling fan is magnetically levitated so as not to vibrate the sensor and smudge the image.
With each filter change you should consider checking and adjusting focus. Many of us adjust focus at timed intervals and also depending on thresholds such as ambient temperature changes. An electric USB focuser seemed like the height of laziness to me and much as I love the kinaesthetics of a buttery smooth action I was back on the phone to Mr. Trenovski. In fact that was the one and only support call. Purchase complete, PrimaLuceLab's Sesto Senso was integrated into my rig and the power of mono was revealed.
With a sequence well underway and all systems nominal, I started to take a look at my haul of super hi definition subs and was ready to gasp in amazement. I had read of the greater resolution of the mono compared to my OSC, however a pixel is still a pixel and these looked not much different than before. Only lots more shades of dull grey. There must be another stage to this that doesn't happen during image acquisition.
Mono magic has the most fascinating quality for me, that of mixing your grey filtered sub frames into a cohesive, natural looking, deep space wonder. This step comes under the category of 'If I can do it, you can do it'.
Layer Cake
Just like the work you did with assembling your frames for processing with your OSC camera, now you have a bigger job. Don't be daunted, the first few stacks will set your mind on how simple this is to perform because you have already done it. The key thing is not to lose track of what goes where.
The ZWOASI 1600 will reliably produce shot after shot throughout an imaging session and I have never had it lock up or fail in any way. The cooler cools, the sensor senses, it just works and has been a delight to use. I will have to try very hard indeed to find the limits of this amazing device, which, as you have seen in a myriad of stunning images, is popular for a reason. That being said, you will need to be diligent and take your calibration frames (flats and darks only, at this time ZWO do not recommend bias frames for their CMOS sensors). These are easy to do.
I tend to make calibration frames in the day, so in summer I only cool to -10 C to prevent overworking the cooling system. From my perspective -10 C works very well on my ASI1600 and I have not experienced dewing or icing of the sensor / window etc. The cooler is capable of cooling to over 40 C below ambient, not something I have felt the need to do yet.
With your stacking software open it is time to assemble your files. I make a folder with the name of the target and date (Orion April 2019), and inside that folder for LRGB I simply make Luminance, Red, Green and Blue folders and load the sub frames into the correct folder. Hardly rocket science. This makes it much easier for me to navigate when loading my images into Pixinsight.
The process is similar with all of the popular image stacking and processing software. With Luminance light files matched with their associated flats and darks and so forth and your preferred software ready, you can begin number crunching your nights work.
With enough data and appropriate stacking and registration settings, even satellite trails may be removed and hot pixels nullified.
Rainbows End
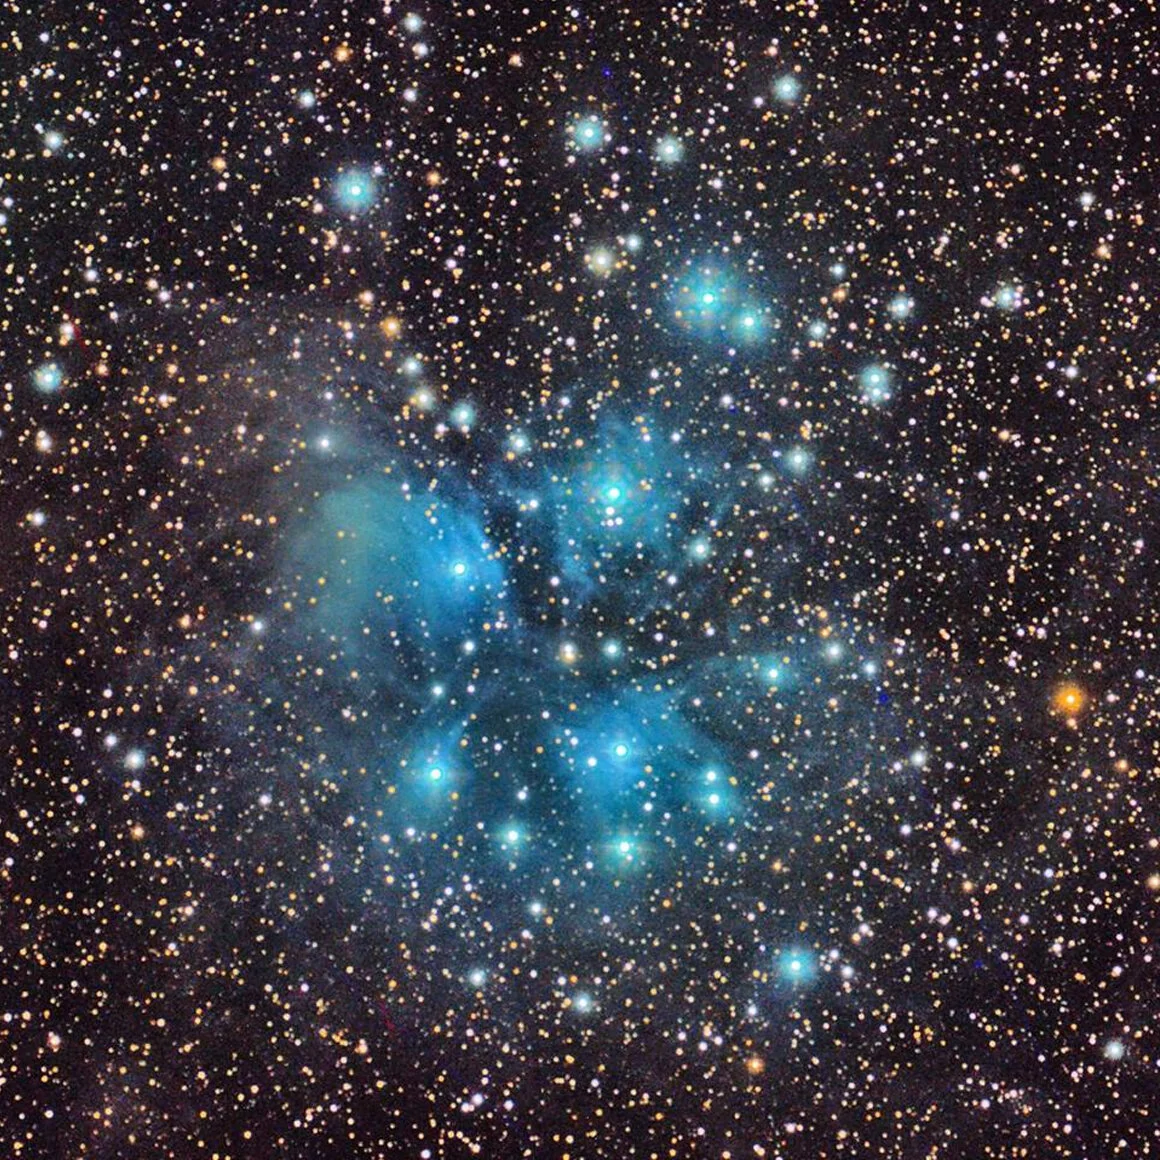
The ASI1600 boasts a large sensor in the 4/3 format. It is physically 17.7mm x 13.4mm and when you see it nestled inside the heavy red barrel body it looks eager to gather the precious light. A resolution matrix of 4656 x 3520 pixels makes for a generous image size, even allowing for cropping. The MN34230 sensor is not overly prone to blooming or glow, at my summer -10 C setting the raw frames show few defects and this makes for a much simpler processing job. One of the things that really drove home how well this camera performs was its ability in marginal conditions, including moon cast. Time after time I get nicely even frames that are easy to calibrate ready for combination.
Will you notice that is has onboard 256mb buffer memory? Probably not, when things work well the underlying features tend to be forgotten. Will anyone nudge you and say 12 bit ADC there, ouch! No, because you will be surrounded by people like myself that love a great astro image and this camera will produce great images at every opportunity. All you have to do is assemble the ingredients properly.
I still haven't tried lunar imaging with my ASI1600 but it can manage a swift 23fps at full resolution and higher still with region of interest. It is useful for solar and planetary too; I did say it was versatile. It has the performance to satisfy for the longer term and the price point is pitched firmly at affordable. My camera is over 12 mths old now and we are just getting to grips with each other. I find there is more to come with every session. The settings are there to experiment with. I like high dynamic range HDR preset with 5 minute subs, how about you?
I think that if you are considering the move to mono you really have nothing to lose and much to gain. Narrowband filters really can cut through moon glow and there is something special about bi colour combinations and the Hubble palette. The processing burden is not so great when you consider the quality of the output. Who doesn't like a nicely made Hydrogen Alpha Heart nebula?
The ASI1600 MMC Pro is a 'go to' camera every time you consider a deep sky target, it can handle it all. With a little tinkering of your sequence timing, as conditions change, you can always go home with something interesting in your capture folder. If you only have an hour or two? Bi colour is for you! A winters night, perhaps back to back nights, will soon get you into the 1 hour per filter club and the richness of detail starts to produce pictures that really pop.
If you pinned me down to the one shot colour v mono question, then, for me the answer is clearly black and white.
Features of the NEW ZWO ASI1600MM-PRO
Resolution: 16MPixel 4656X3520 at up to 23fps
Pixel Size: 3.8µm
Exposure range: 32µs - 2000s!
Read Noise: 1.2e @ 30dB gain
Full Well: 20ke
ADC: 12 bit
Cooling: 40 - 45 degrees below ambient (obviously, only on cooled versions)
Standard Autoguider Port
Built-in RAW mode and Grey mode output support. Only about 30% storage space required compared to the Color data format!
Peak Quantum Efficiency: appr. 60% or above
Full aluminum housing with standard 2" interface
M42X0.75 internal thread.