

Like many of you, my love of this hobby began at an early age. I spent countless hours during many summer nights looking up at the night sky. My first “telescope” was a small spotting scope given to me by my grandfather. Its objective lens was perhaps 1 inch across. I distinctly remember setting it up on the hood of my grandmother’s car and pointing it at the moon. That was it, I was hooked! Let’s clear the water a bit before we press forward. A Dobsonian telescope, simply put, is a Newtonian OTA (optical tube assembly) mounted on an alt/az mount.
When John Dobson invented the Dobsonian he wanted the general public to have access to an inexpensive, lightweight, and yet at the same time a large aperture scope. Dobs since then have morphed quite a bit; truss tubes, outstanding optics, GoTo and tracking capabilities, etc. So, what makes a Dob a Dob? Well, it’s the alt/az mount. If that is the case, then we could call any type of scope (Mak, refractor, SC, astrograph) mounted on an alt/az mount a “Dobsonian.” The point being, the terms “Dob,” “Dobsonian,” “alt/az mount,” are all, generally speaking, synonymous. Typically, when buying a Dob, you are trading the accuracy and precision of an equatorial mount for the larger aperture (mirror size). For a given dollar amount, Dobs have a greater light collecting ability.
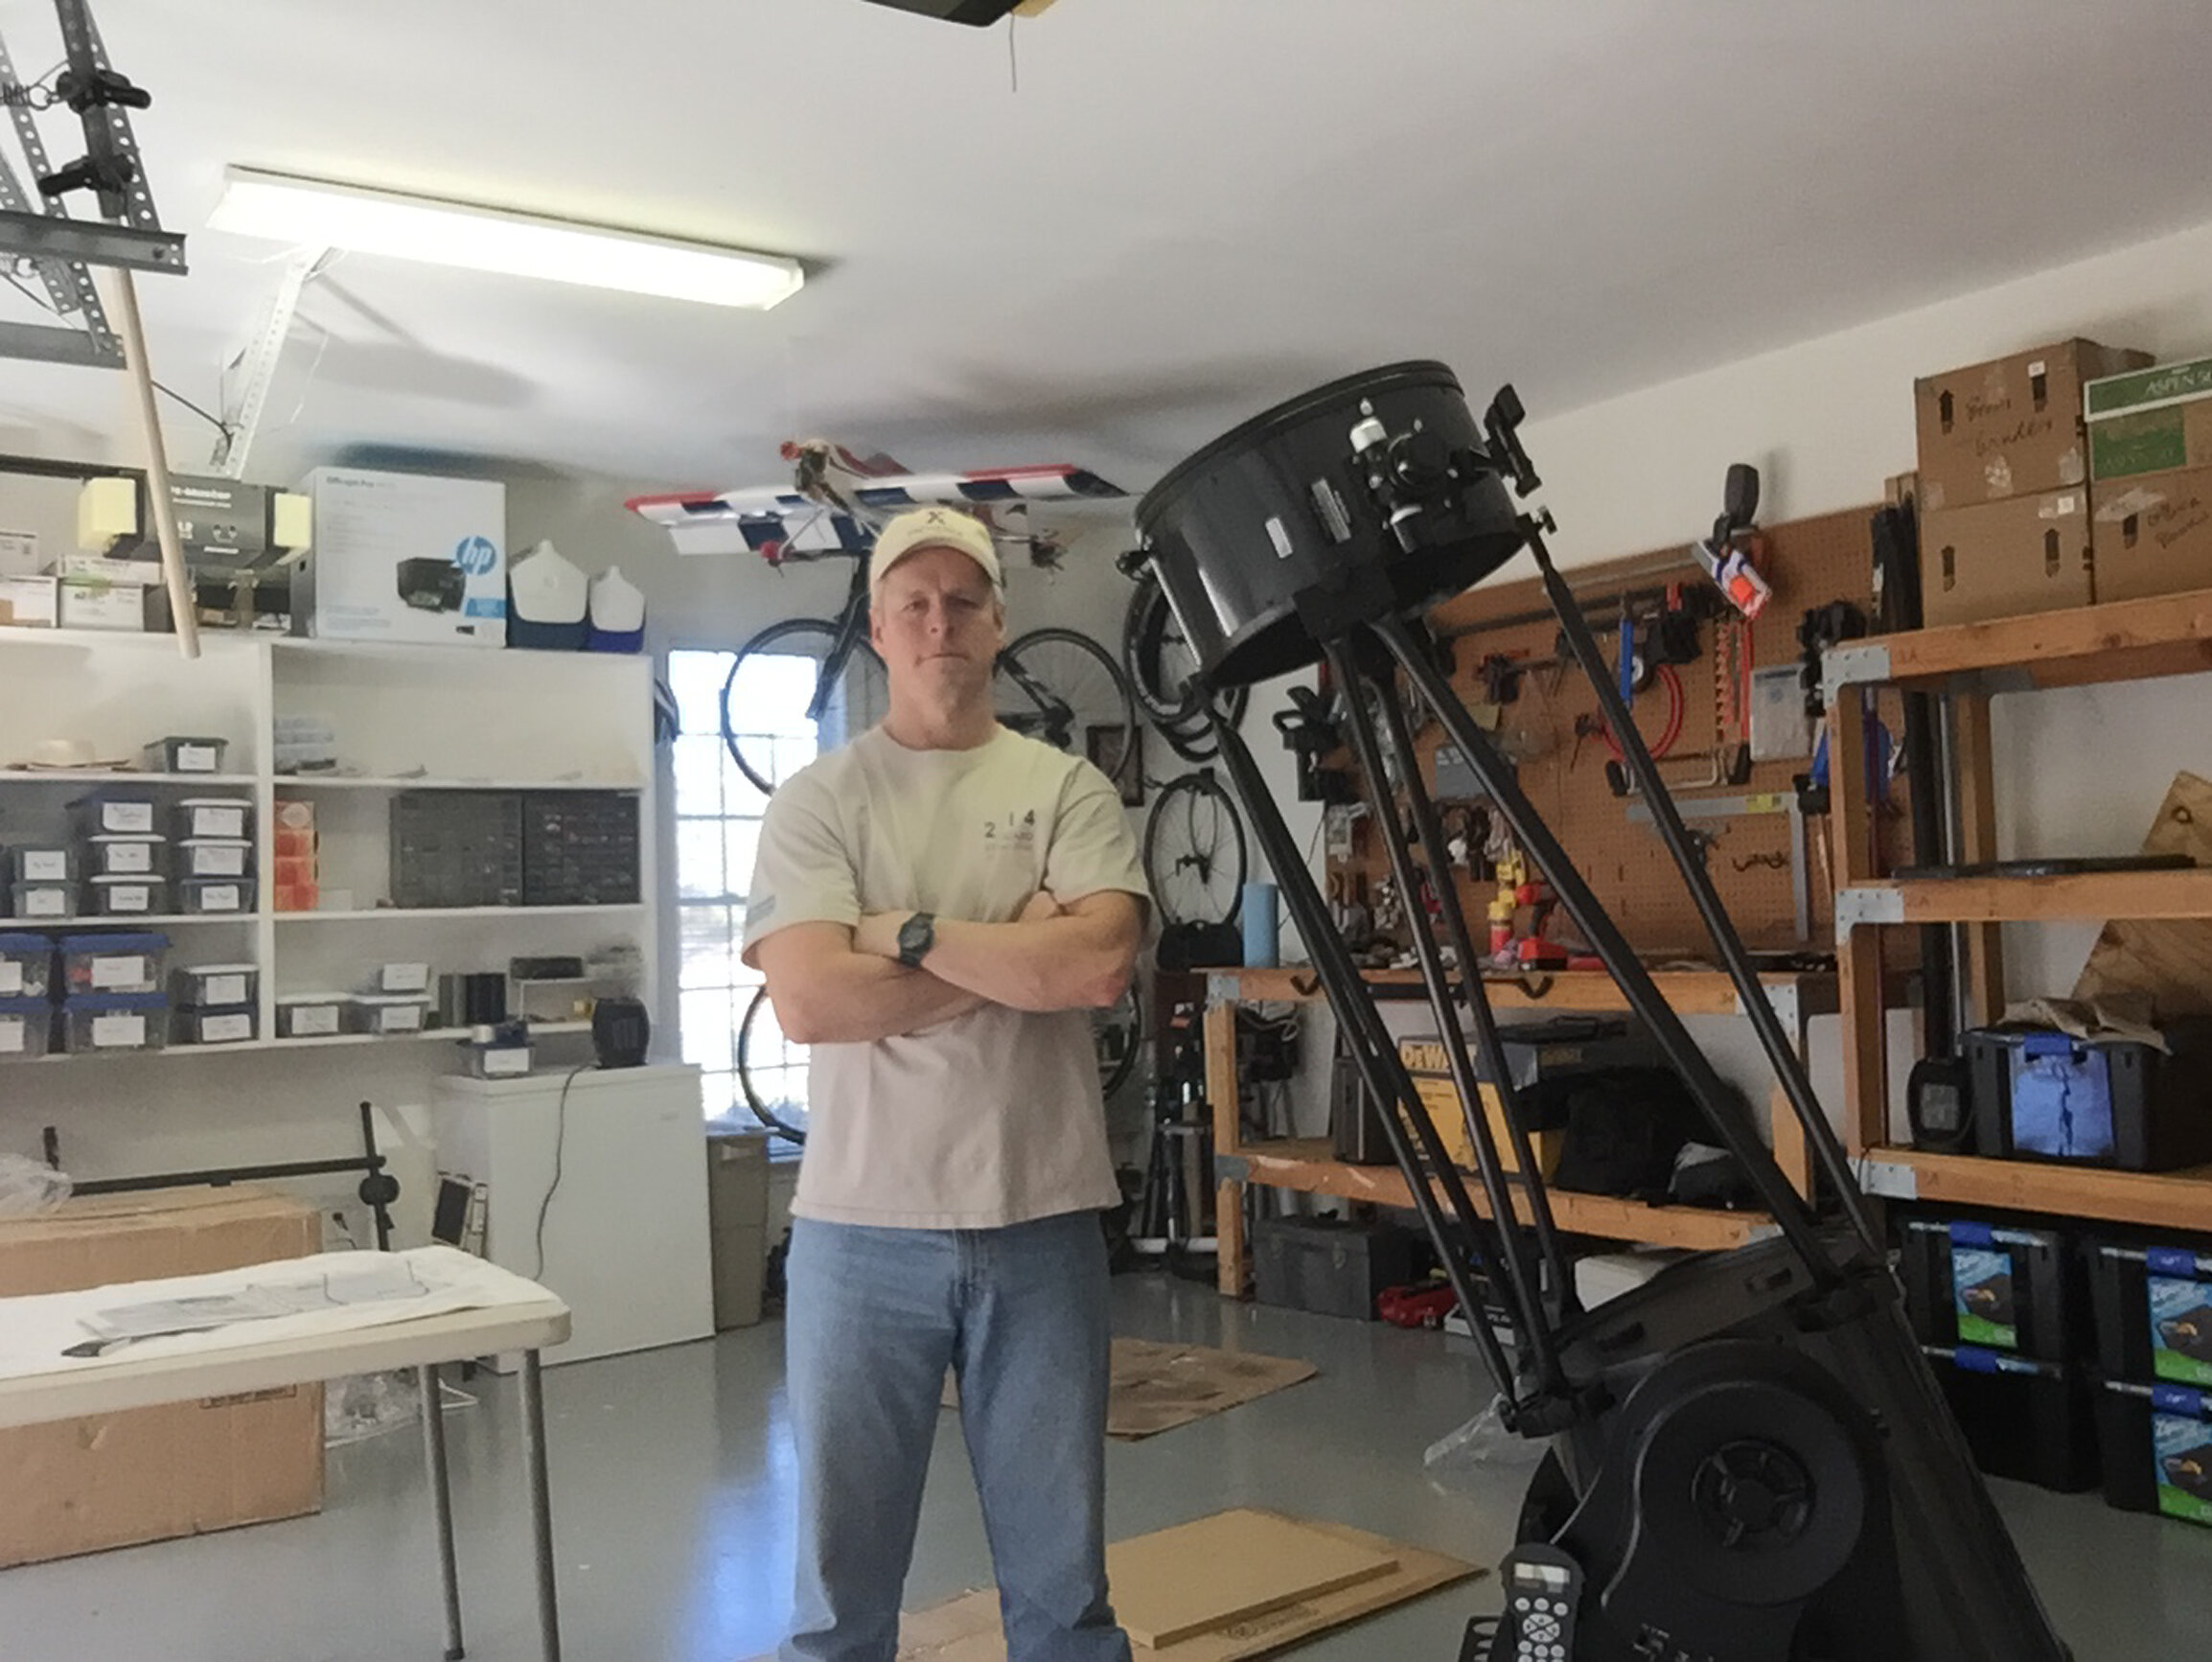
I own an Orion 16-inch GoTo Dobsonian and as the name implies, it is a standard GoTo scope with the type of hand controller most of us are familiar with. The scope can be completely disassembled and transported. Total time for tear-down and setup is about 25 min. I have transported it a number of times with zero issues. Total weight of the basic scope is about 195 pounds. It has a focal length of 1,800mm giving it a focal ratio of 4.4. It comes with a 2-inch, dual rate (11:1) Crayford focuser. The tracking and GoTo capabilities are not unlike other mounts. On most days it is spot on and on rare occasion, a few resets are required to get it to behave. And being a Dob, the OTA sits on a standard Alt/Az mount. The optics are outstanding. The scope comes with a true parabolic mirror (versus a spherical mirror). I also purchased the optional shroud to keep stray light from entering the bucket.
It goes without saying visual observing with this scope is phenomenal. A friend of mine with an 11-inch Schmidt-Cassegrain (SC) has told me there is no comparison between the two scopes. Many faint galaxies can be viewed through my Dob whereas they remain invisible in his SCT. And, needless to say, M42 is jaw-dropping. It fills the entire field of view and many of its colors are easily seen. Jupiter’s red spot and Saturn’s Cassini gap are both easily discernable. Many folks out there (I call these folks the “naysayers”), including formal and professional sites, will tell you Dobsonian scopes cannot do astrophotography. Or some will use the term “not ideal for astrophotography (AP) other than planetary”. I completely disagree on several levels. First, what is AP? It is simply a photograph of something my scope is able to resolve. So, if I take a blurry and somewhat ugly picture of M1, I have just delved into the world of AP. I am not aware of any requirements that AP photos be on the order of something we’d see from HST.
Think about it. Why do we do AP? I think part of the reason is the “hunt.” Knowing an elusive and difficult target is out there and we hope to capture it on “film” drives us into the bitter cold night after night. But I also think we are motivated by the following: sharing the love and fascination of the hobby with others. Try this one day. Go to a friend and describe to them what you saw the night before when viewing the Flame Nebula. Note their reaction. Now, do the same thing with another friend but this time show them one of your pictures while doing it. You’ll see the reaction is completely different! Pictures allow us to carry our hobby with us and share its joys with others. If I hold my iPhone to the eyepiece of a small alt/az scope I bought at a garage sale last week and snap a picture then it’s done - I’ve just entered the world of AP and the word “can’t” is instantly removed from my vocabulary!
Second, let’s not tell people what their limitations are. Let’s provide them with inputs, guidance, and advice and let them figure out the challenges and their limits. Notice I said “their limits.” Scopes don’t necessarily have limits, people do. The same exact scope in the hands of two different people will have different capabilities. I’ve imaged the moons of Uranus as well as quasars with this scope and yet I know folks with the same scope still struggling to image planets. That’s perfectly fine. Their performance envelope will expand with trial and error just like ours did. Let’s not quell growth in this hobby by setting limits for people on day one by telling owners or soon to be owners of Dobs, “You can’t do astrophotography.”
The cameras I use are the ZWO ASI120MC, Sony QX-1, and Atik 420. I have also imaged with an Orion planetary video camera as well as a NexStar planetary camera. For planetary and lunar, I shoot both stills and video. All stills (planetary or DSO (deep sky objects) are shot in RAW format. My typical video processing: convert to AVI (if needed), process video in AutoStakkert (stack video frames), and pull out details using wavelet layers in RegiStax. For DSO processing, I use Nebulosity to review and toss out bad subs. I then use PixInsight for debayering, dark/flat/bias calibration, image registration, image integration (stacking), and image post processing. I almost always do some bit of post processing in Photoshop.
I occasionally use Topaz for additional noise reduction. Now let’s talk specifically about astrophotography with a Dobsonian. Astrophotography with a Dobsonian brings its own set of unique challenges. Probably first and foremost, and the one most AP hobbyists are familiar with, is field rotation. Field rotation is the apparent rotation of objects in the scope’s field of view, either through the eyepiece or on your camera’s sensor. An easy way to visualize field rotation is to think about the following: when Orion rises in the east, Orion’s trusty hunting dog, Canis Major is below Orion and has yet to rise.
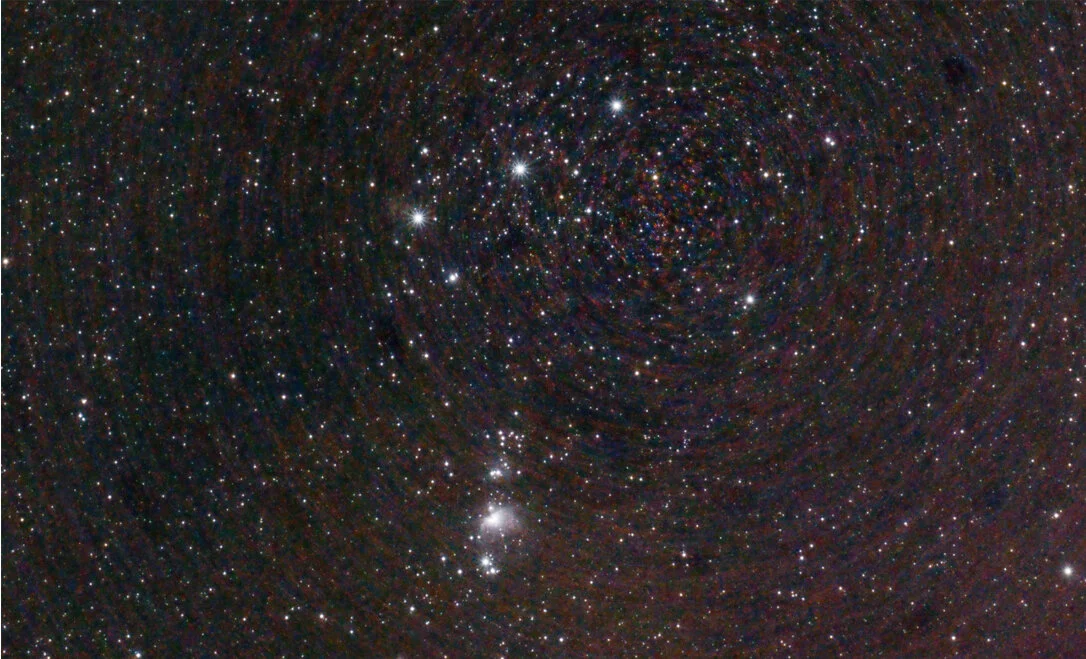
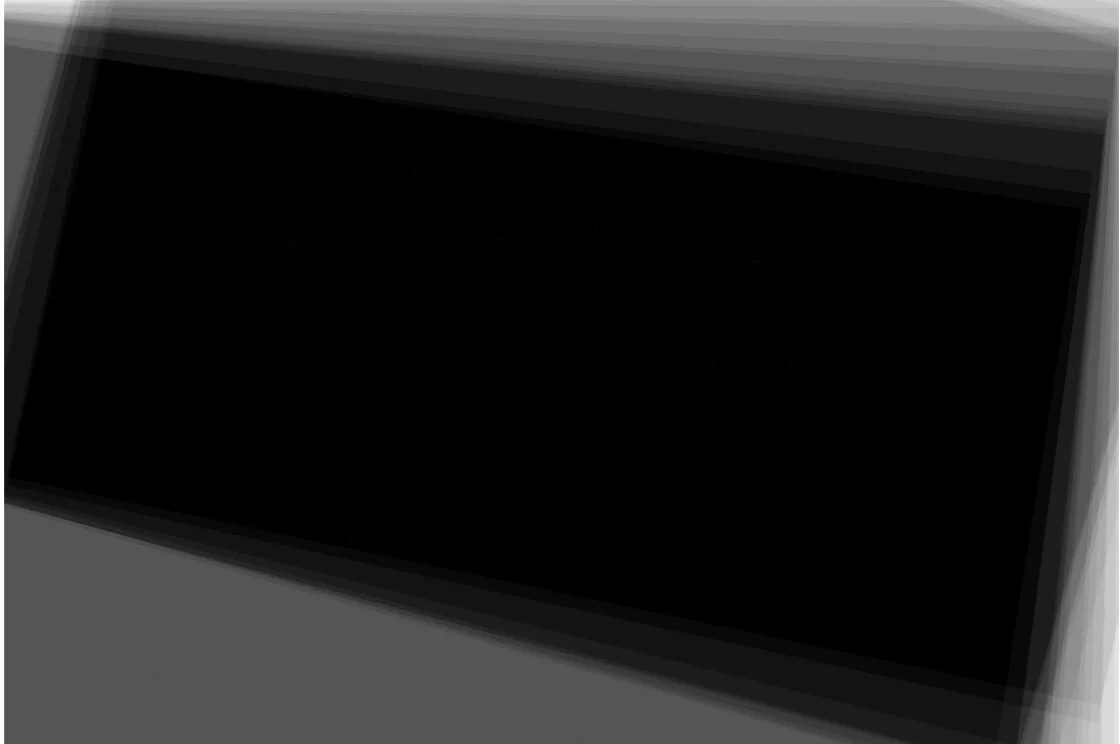
But, when Orion sets in the west, his dog has yet to set and is now above Orion in the sky. For Canis Major to appear to move from below Orion to above Orion, the whole scene had to have rotated approximately 180 degrees. Field rotation is rarely noticeable during normal viewing but is certainly an issue for AP. Simply put, field rotation causes objects to form arcs much like star trails. It is important to note, field rotation, generally speaking, is not a problem between exposures. Stacking software such as PixInsight or DeepSkyStacker will fix rotation deltas between exposures during the alignment/registration process. Where field rotation is a problem is during exposures. During exposures, the field rotation effects are being captured by the sensor! Some field rotation effects can be removed during the stacking process however it still leads to poor image quality for longer exposures. Image 1 shows the effects of field rotation. The basic subject, in this case Orion, is certainly discernable, but there are way too many “left overs” for this to be a good photo. In fact, you can tell exactly where the camera was pointing by noting the point about which all of the artifacts are circling.
Field rotation also results in a loss of image data near the edges of the field. So, if you are taking many exposures, make sure you your target is centered in the field of view. Image 2 shows rejected pixels during the image registration process. You can actually see how the “frames” rotate about one another. Additionally, you can easily see that any data (galaxies, etc.) near the edges of the field of view would be rejected and only data near the center of rotation of each frame would survive the pixel rejection process.
There are some systems out there that rotate the camera/focuser in the direction of and at the same rate of the field rotation. These systems are usually found on alt/az systems at large observatories. With that being said, there are some smaller systems out there for an average sized scope. Some of these rotate the camera and some actually rotate the entire OTA. For us average amateurs however, the only viable solution is to limit our exposure times. Generally speaking, the maximum exposure time to minimize and overcome the effects of field rotation is 30 seconds. If we could track Orion the entire day, we’d see him rotating 360 degrees in a 24-hour period. This equates to 15 degrees per hour or .125 degrees every 30 seconds.
This seems to be a rate most stacking software can handle. Another challenge to Dobsonian AP with is tracking. Equatorial mounts track in a single azimuth. Meaning, there is only one motor running and therefore only one set of tracking errors to deal with should they occur. Alt/az mounts, however, track in both axes at the same time hence the probability of a bad frame due to a tracking error just about doubles. You can tell if one or both axes are off when reviewing frames (subs, frames, lights, are all synonymous) prior to processing. If a star leaves a straight trail, you are looking at errors in both axes. If a star suddenly trails and then veers off in another direction, you are seeing a one axis tracking error.
Along with tracking errors a lack of auto guiding systems for alt/az mounts can be problematic. Is it possible to auto guide for longer exposures? Yes. However, your guide star needs to be as close to your target as possible. Auto guiding will not eliminate field rotation. It will simply keep the guide star “frozen” in the frame and everything else will appear to rotate around it. How to overcome these challenges? The first we eluded to already, keep your exposures to 30 seconds or less. Next, take lots and lots of subs! An increase in the number of subs (often referred to as light frames) does several things for us. First, lots of subs can help counter the shorter exposure times. Many stacking software programs will calculate final pixel values using “additive” or “additive with scaling” algorithms. More subs will produce a better result. Additionally, a greater number of subs will substantially assist with noise reduction. If, out of 100 subs, 10 frames have noise at coordinate x,y but the other 90 do not, your stacking software will average the values of all the pixels at location x,y. The final result will have almost no noise in pixel x,y.
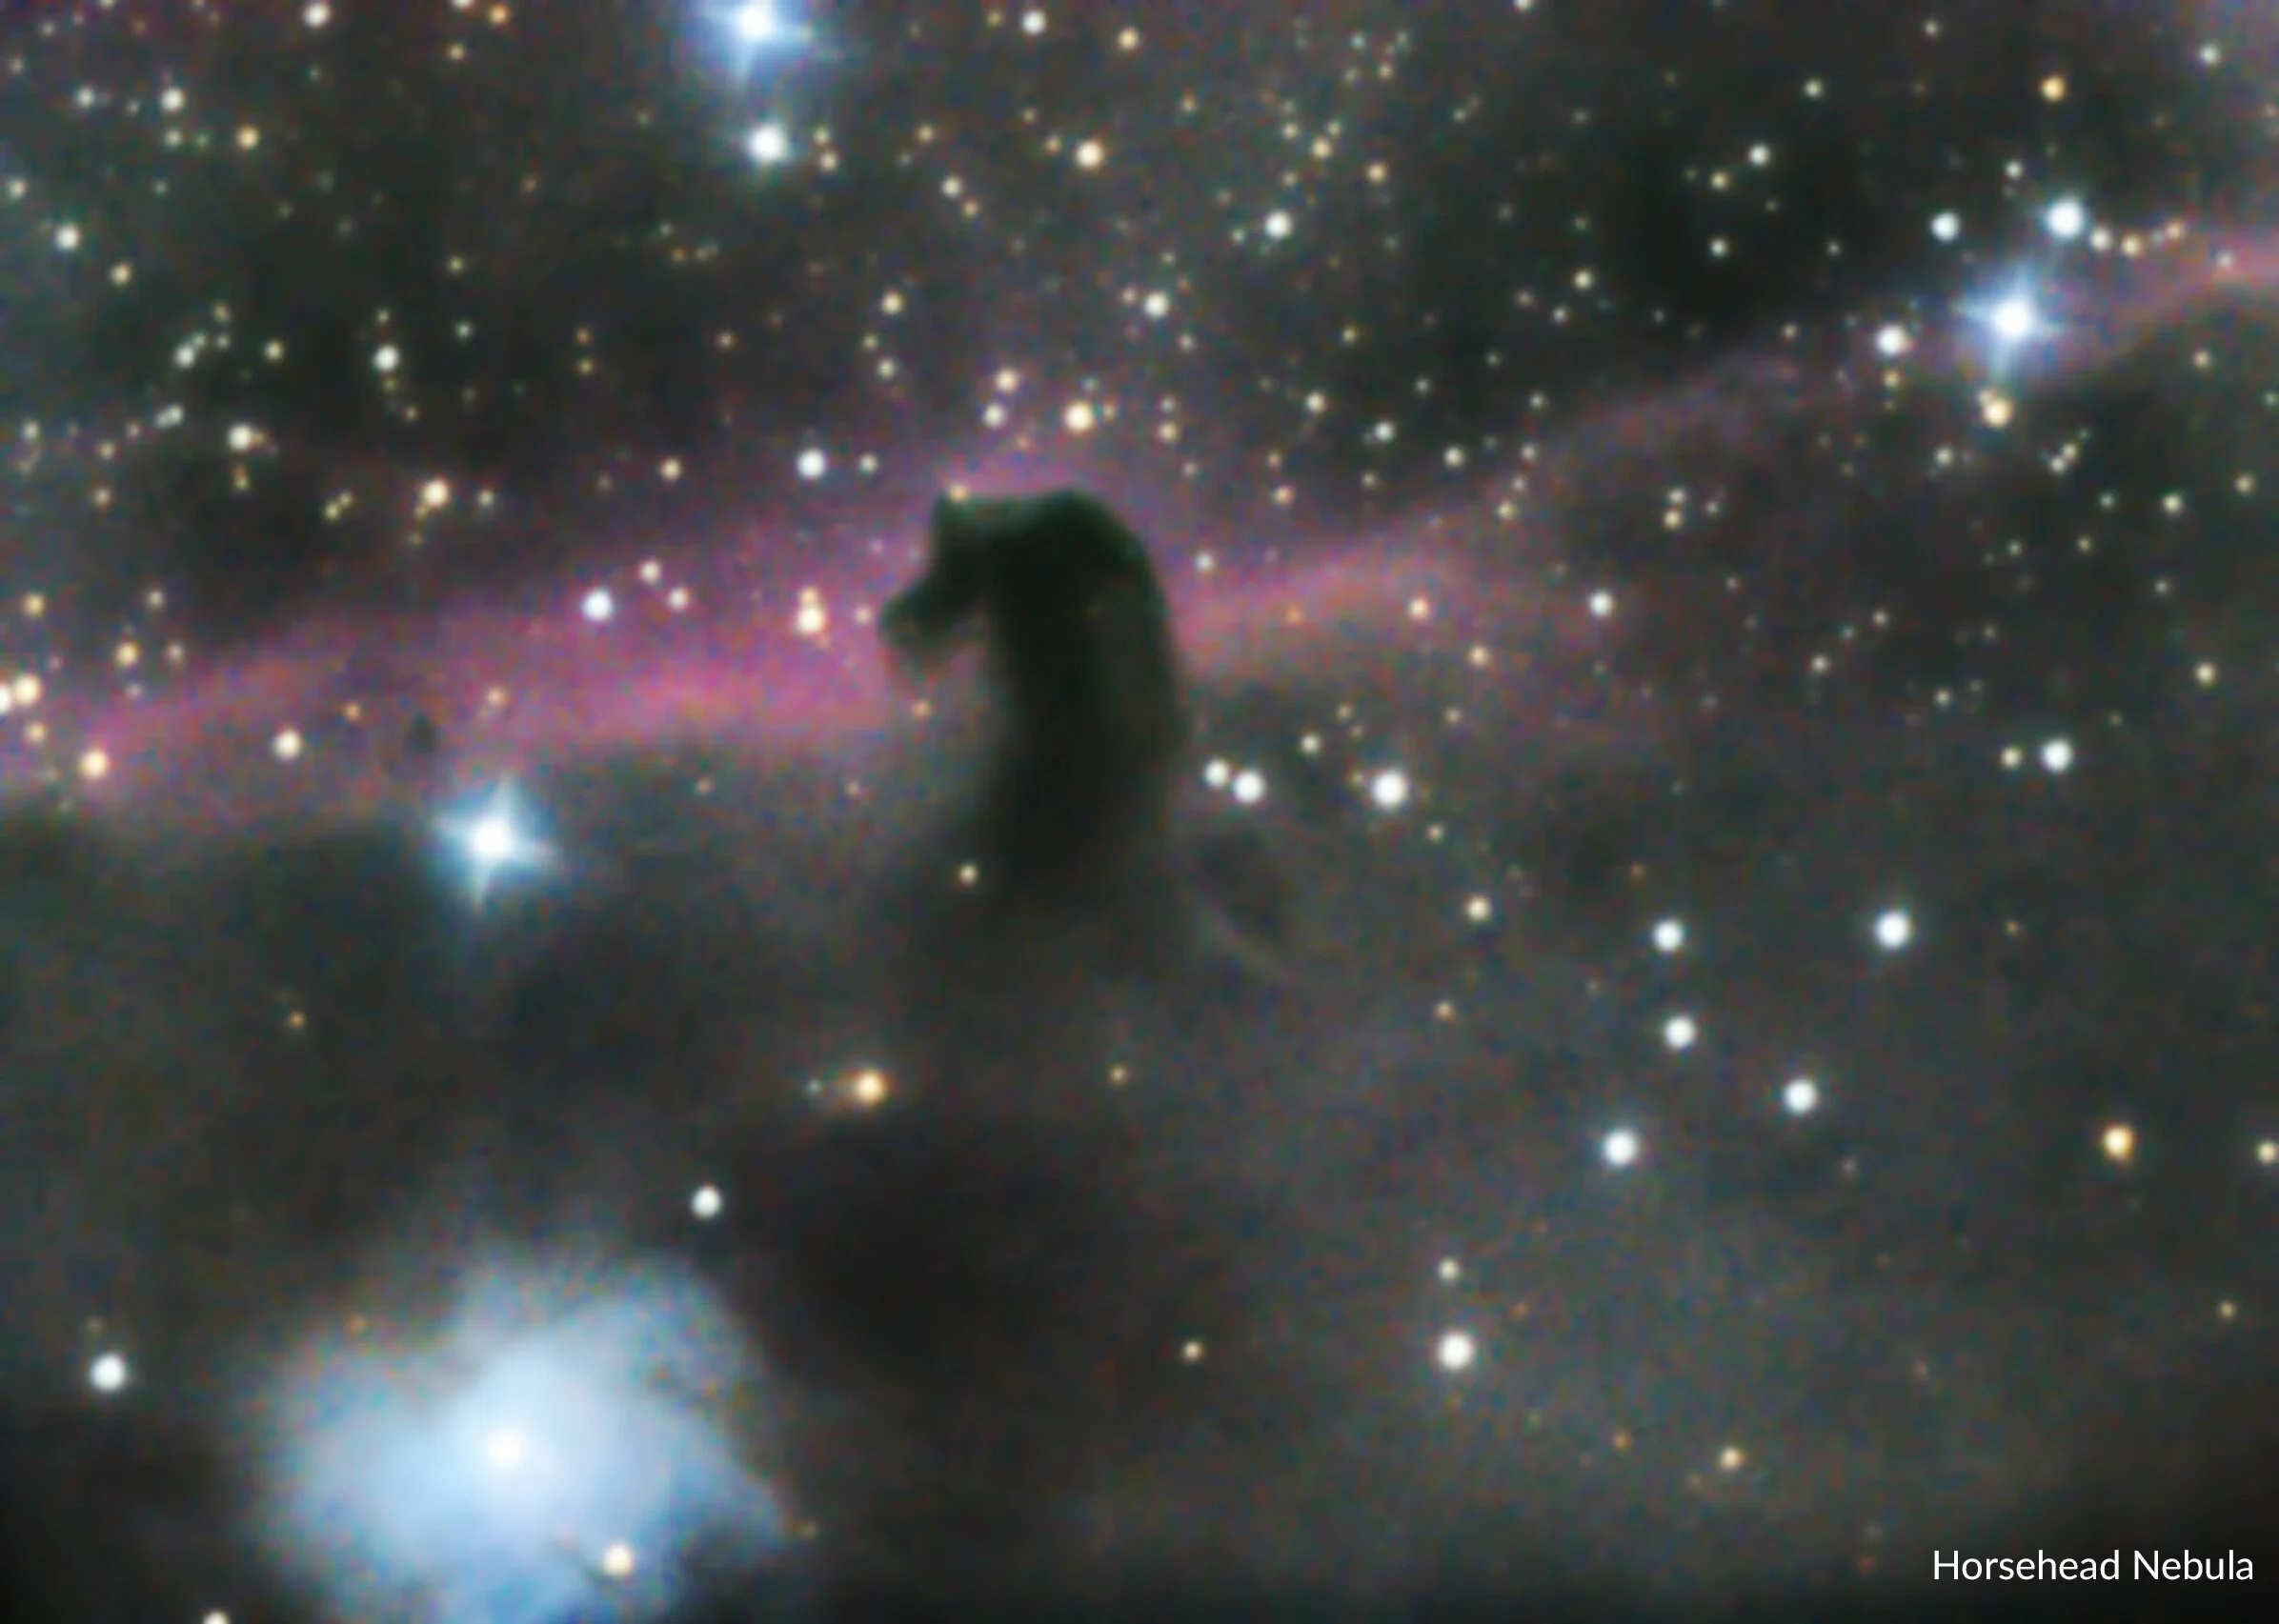
Next, when shooting lots of subs with an alt/az mount, stop imaging for a few minutes and do the following. Refer back to your first sub and compare it to the most recent sub. You will probably see some field rotation. Now, rotate your camera such that the live preview (or a test sub) closely matches the first sub taken. You can do this by visually aligning stars within the field of view. Think about it. Suppose you want to shoot 200, 30 second subs of the Horsehead Nebula. That equates to 100 minutes of imaging…or 1.67 hours. Your field will have rotated 1.67 x 15 degrees = 25 degrees! That’s a lot. Especially for a target like the Horsehead Nebula. There are lots of features near the edges of the field that I would not want to lose! And, what if we don’t have the actual horsehead centered in the field of view? Heaven forbid we actually clip off the horse’s head due to field rotation! To minimize tracking errors, I like to shoot no greater than about 50-60 degrees in elevation. I don’t want to shoot too low because I am now competing with the Earth’s atmosphere…but too high of an elevation, I find the azimuth drive doesn’t track as well. And remember, keep the target centered in the field of view during the entire imaging session. I often times stop imaging, recenter the target, and start imaging again.
In summary, AP with a Dobsonian telescope, including DSOs, is indeed very doable! Hopefully some of the mentioned tricks and techniques will help you along the journey. But most combinations of techniques and tools. That, my friend, is how it is done. Happy hunting! You can view more of this scope’s images at: https://youtu.be/ddnKuKy8qCA More details regarding scope specifics, features, and set up at: https://youtu.be/OxbTHIV4IsM