
A Journey of Patience - Dale A. Chamberlain
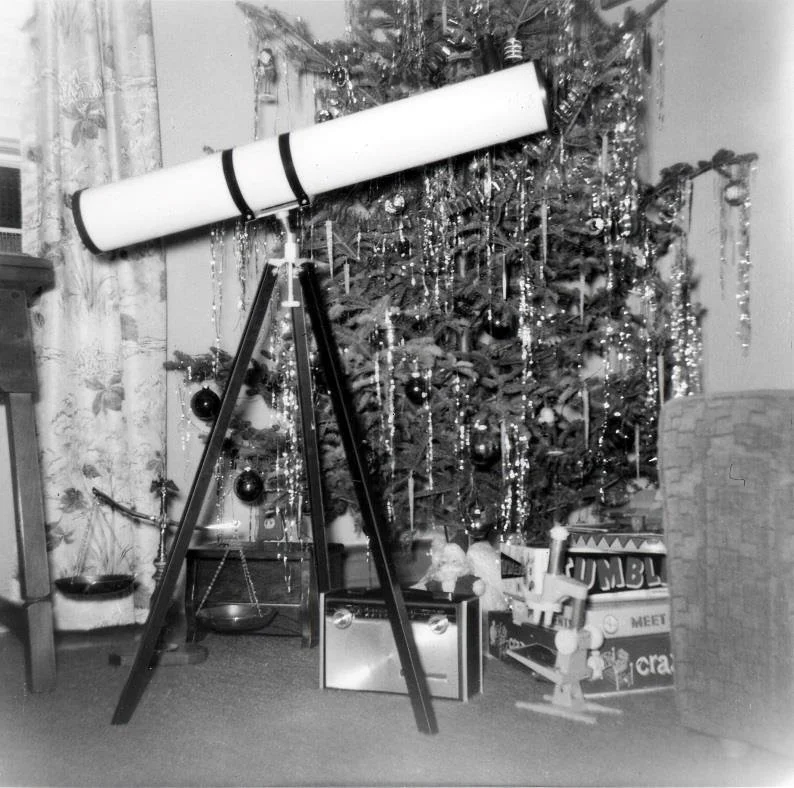
My journey began when I was nine years old and my grandmother presented me with a small reflector telescope for Christmas. The first thing I did was point toward the moon, which was on everyone’s mind at the time because of the Apollo missions. What a marvelous view to behold! Seeing detailed craters and shadows on the moon’s surface and wondering where the first humans would land. This hooked me then and there. Then came the trips to the McDonnell Planetarium in St. Louis, Missouri and seeing the film slides of deep space objects. I vowed I would someday take my images like those.
The learning curve was steep. The first lesson learned was to take good images: you need a good mount, preferably a German Equatorial Mount (GEM). It took a while for me to realize that. This was probably the most important and expensive lesson for me. My next telescope was an all-manual refractor; it had the GEM but no motor for tracking. I spent a lot of time polar aligning, although the scope was suitable for visual use but not astrophotography.
After that, I acquired a Celestron Nexstar. It had the tracking motor but was “Alt-Azimuth” and did not make for good images, and still missed the mark. Its successor was a Meade LX-200GPS 10” SCT telescope. It was motorized, had a GPS built in, which made alignment easier and could take a camera. It was mounted on a wedge which allowed it to track similarly to a GEM, but it was a fork mount making it difficult to balance when piggybacking a smaller field of view scope on it. At this point, I decided to mount it permanently on a pier inside a roll-off roof observatory.
All these lessons have brought me to where I am today. I have a Paramount ME II GEM mount with adjustable counterweights and plenty of weight capacity to hold a 14” Ritchey–Chrétien (RC) telescope and a piggybacked 80mm aperture SkyWatcher Esprit triplet refractor. All these are housed on a permanent steel pier in a SkyShed POD MAX dome observatory with all the automation, such as dome and slot control.
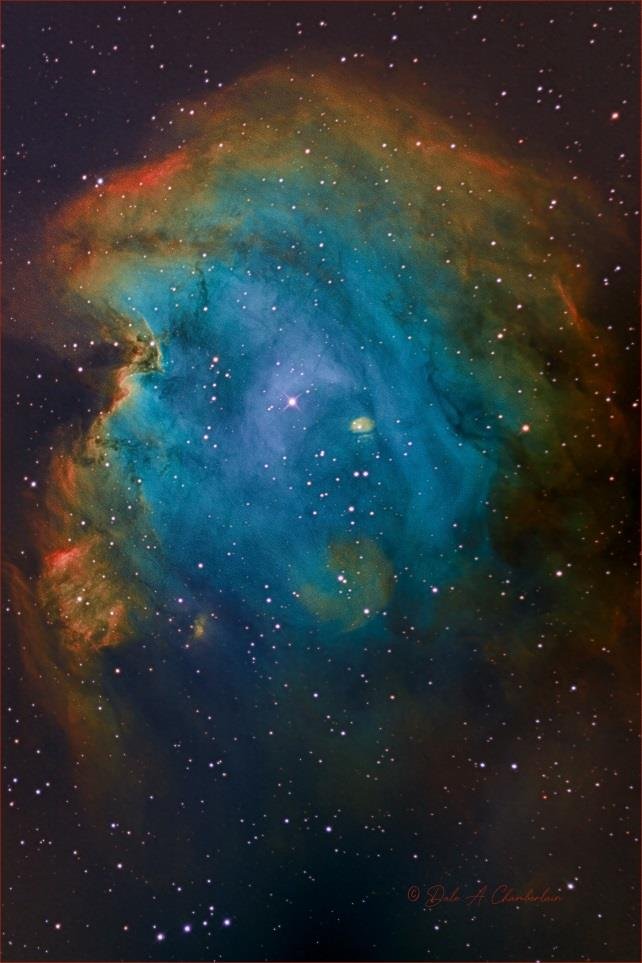
NGC2174 Monkey Head Nebula
This SkyShed POD MAX was the first constructed in the United States. Prototypes were built in Canada, where SkyShed is headquartered. This was so new that the instruction manuals had not yet been written when I received the materials. This was the next step in the journey. Working together on revisions as they came concurrently for each phase of construction of the dome was crucial.
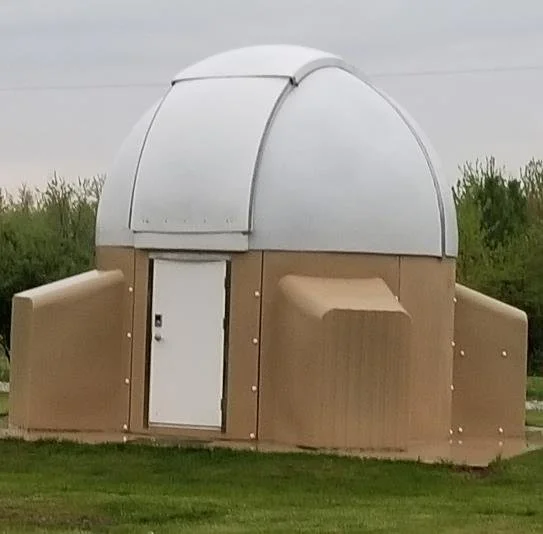
SkyShed POD MAX
Camera technology has significantly improved over the years. With backlit CMOS sensors boasting high resolution, deep well depth, and zero-amp glow, they are now the gold standard in astrophotography. Combined with the power of PixInsight for image processing and Nighttime Imaging ‘N’ Astronomy (N.I.N.A.) for image acquisition, the quality of astroimaging has been unparalleled. For an amateur, imaging can take place over the entire night, from astronomical dusk to dawn, fully unattended. Of course, learning PixInsight and N.I.N.A. did not come without its challenges!

My equipment roster also includes several broadband and narrowband filters. For my monochrome CMOS camera, I have a 7-position filter wheel holding 2” Chroma filters: Luminance, Red, Green, Blue, and 3nm narrowband Hydrogen-Alpha, Oxygen-III, and Sulfur-II. For my one-shot color (OSC) camera, I have a filter slider that can hold one filter at a time. There are various Optolong filters, plus a Radian Triad narrowband filter. Both telescopes have either a flattener lens (refractor) or a reducer/flattener (14” RC). These optics require more frequent cleaning than telescopes.

M16 The Eagle Nebula
With the myriad of hardware and software available, you likely will not find two configurations that are exactly alike. Getting all these components working together took a lot of patience and determination. I won’t kid you, sometimes I felt like giving up, but having the resolve to see it through yields great rewards. I hope you can see this in my images.
As technology and my skills improve, I find myself returning to the older images and replacing them with newer ones. My favorite targets are nebulas due to their beautiful colors and shapes.
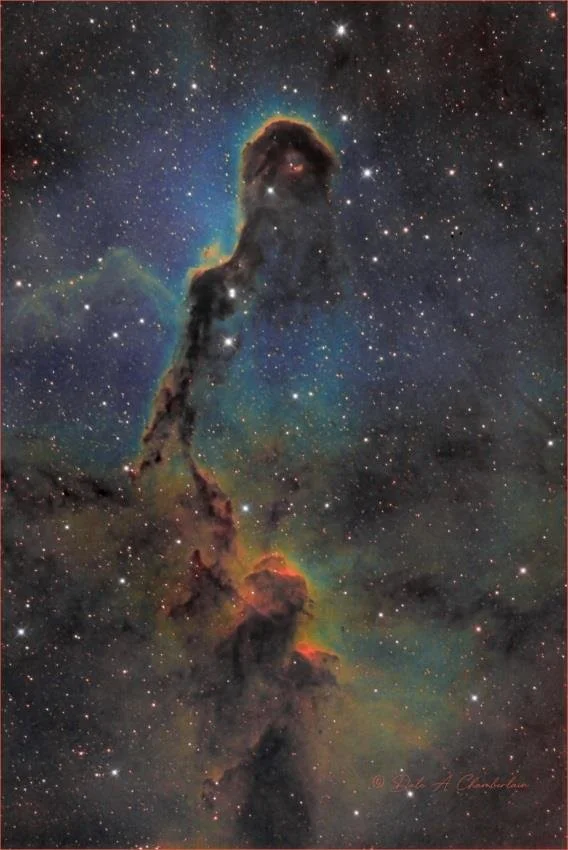
IC 1396A The Elephant Trunk Nebula
There are many advantages to having a permanent outdoor setup in an observatory. Polar alignment does not need to be performed each observing session, and optical trains and balancing can be kept in place. However, the equipment is constantly exposed to dust and humidity, and good clean optics are necessary for good images. My scheme is simple: don’t obsess over the mirrors but prioritize the optics closer to the camera sensor. I first saw the First Contact Polymer cleaning system at AIC in San Jose, California and I was intrigued. I ordered a kit that allows me to clean the filters thoroughly and efficiently, 12 in all, as well as the camera sensors, focal reducers/flatteners, and telescope mirrors. I used it on the filters, and they were spotless! Then I cleaned the camera sensors and the focal reducers/flatteners.
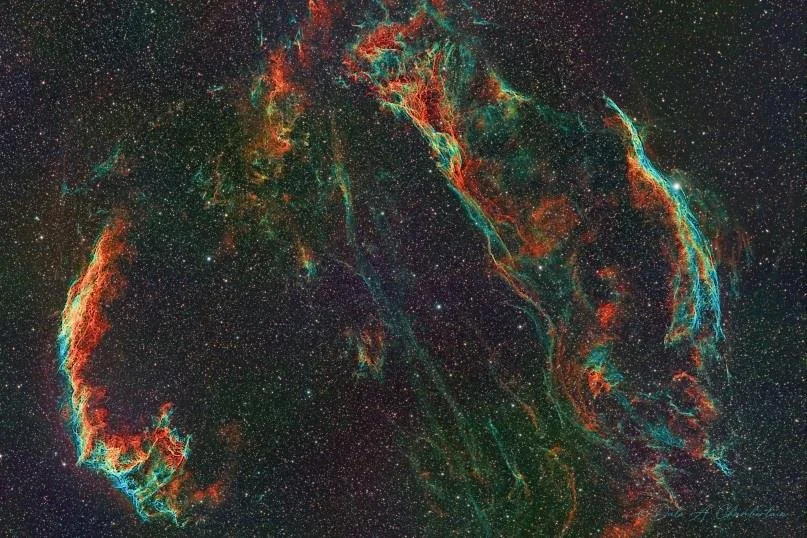
Sharpless 103 The Cygnus Loop
The dust and smudges on those components will affect the image quality the most. My flat frames were clean! I plan on cleaning the mirrors of the RC telescope and I believe the polymer cleaning system will offer less pressure on the mirrors than the more traditional methods. As any RC owner will tell you, pressure on the mirrors can cause changes to collimation, and collimating an RC is not a simple task!
I hope any future astrophotographer reading this will take the time to plan before buying. And realize there is never a point when you can declare the journey is over.
You can visit my website at https://chamberlainobservatory.com/
Are you a First Contact Polymer user and Astro Imager?
Contact us at sales@photoniccleaning.com for the chance to be selected as a featured guest in an upcoming issue of Amateur Astrophotography Magazine courtesy of Photonic Cleaning Technologies! Not familiar with our products? See our ad on the next page or visit us at http://www.photoniccleaning.com