
Deep sky & planetary Astrophotography by Goto Dobsonian Telescope & Monochrome CMOS camera
by Maurizio Mollinari, CEng MiMEchE
The latest CMOS sensor and digital processing technology allow the astronomy amateur to reach excellent planetary as well fine deeps sky imaging even with “visual “ telescopes, by just adding a minor set of accessories and modifications.
Astronomy amateurs can be divided in two main categories: Visualists and Astrophotographers. In the first case, the telescopic observation by the simple means of the eye is today still largely practiced, as the simpler way to look to the sky objects . Looking into the eyepiece live it has been for visual observers much more exciting than watching the photographic images taken even by professional astronomers. Clearly, the main advantage of the visual observation is the simplicity and lower cost of the required equipment.
In fact, a simple telescope version, widely know as Dobsonian, a reflector supported by a wooden altazimutal mount, is sufficient to allow nice visions of planets and deep sky objects. The low cost of the wood mount is traded off with a large aperture mirror, beneficial to collect as many photons possible. For astrophotographers, instead, the tools requirements have been always much different and far more expensive: in astrophotography no margin of error is allowed, everything must be perfect.
Not only the optics, but also the mechanics of the tracking mount must be top quality and therefore a larger investment is necessary to reach quality imaging. Typically, the astrophographer's telescope plays on Equatorial mount, with often an auto-guide system to correct even the smallest imperfections of the tracking.
Alternatively to EQ mounts, high end Alt AZ mount are also used, but are limited by field rotation and that implies a derotator additional system, or again an auto-guide system, adding further cost and complexity (1). Regardless, only some astrophotography amateurs are really able to reach the limits given by their own tool and by the site seeing, given all the tight control steps they have to respect.
On the other side, Dobson telescopes and Altazimutal ones have been used with some success but only on planetary astrophotography,(2)(3), and in deep sky, unless supported on a equatorial platform.(4) As with any astronomy equipment, the quality of the mount (stability, tracking accuracy), telescope and camera will of course have influence on the final result. But with good knowledge and persistence, great images are possible even with modest equipment.
In this project, the traditional believe that only a high quality telescope mount with the support of a auto-guide system is able to achieve good quality astroimaging for deep sky imaging has been challenged. An alternative procedure based on short exposures stacking and on an basic telescope upgrade can change an affordable motorized Dobsonian from “visual telescope” to a powerful astrophotography tool for both planetary and to fine deep sky photography, as described in the next paragraphs.
Astrophotography with Dob goto and CMOS low read noise sensors
The traditional requirements of long exposures and accurately guided mounts arise from traditional CCD cameras used for deep sky astrophotography and their a high-level of read noise.
For example, the popular CCD KAF-8300 reaches 7/8 e- values, typically. If there is such a high read noise every time that a frame is captured, long exposures are required to allow faint deep sky objects to be seen above the read noise level. Long exposures need equatorial mounts to track accurately and auto-guided correction system is also important.
This all changes when modern low noise CMOS cameras are used instead of CCD cameras. The low level of read noise means that faint objects can be detected in far shorter exposures (and can be enhanced by stacking many short exposures – something that would not be possible without low read noise).
CMOS last generation sensors have a Readout Noise in order of 1-2e-, therefore the contribution to the total noise of latest CMOS cameras is much lower than CCD, particularly in few seconds exposure times.
This property allows the user to reduce exposure time and then the blur given by the tracking mechanical issues, thus allowing a sharper image even with cheaper gears. Clearly, frames stacking is still a fundamental step to reduce the noise affecting the single frames. This issue is typically managed by classical alignment and stacking of a small number of subframes by programs, like Deepskystacker.
Unfortunately, short exposure requires a much higher number of frames than long exposure one, creating a problem of PC processing time and of hardware memory limits. Recently, an innovation has been implemented in the software Sharpcap that come in help: Live stacking. It is a feature that enables the capture of deep sky images without the traditional requirements of a high accuracy, guided, equatorial mount and long sub-frame exposures.
SharpCap corrects for any gradual drift or rotation between successive frames by tracking the movement of the brightest stars in the image. As the number of frames captured increases the noise level visible initially visible in the stacked image will reduce giving astounding deep sky images with the minimum of fuss.
The capture of a larger number of shorter exposures and software correction within SharpCap for any drift or rotation of the field of view between frames makes deep sky astrophotography accessible to a much wider audience at much lower cost.
Deep-sky astrophotography setup and procedure
• 14” Dobsonian Goto F 4.5 telescope
• Accessory focuser motor
• Coma corrector
• Focusing Bathimov mask
• Wifi Skywatcher adapter
• QHY163M camera
• USB 3.0 5meters cable
• PC Mac-book pro 2011 8MB
• Windows 10
• Cartes du ciel
• Sharpcap 3.2
• Astroart 7
The Skywatcher telescope is simple tool to use, as long the collapsable rods are fully extended and secured with their screws firmly. I use to keep the telescope outdoor in my garden, well protected with a motor bike cover from raining; it takes a minute to remove the cover and start observing with optics almost thermally balanced.
I start the telescope operation visually with an eyepiece to check all is right, then I connect the camera with the coma corrector to the focuser tube and plug the USB 3.0 cable; I have chosen the longest not amplified type I have found, 5 meters, to be able to use my PC and work comfortably inside home. The Wifi adapter is very useful to connect the telescope to the PC wireless; I believe that the Firmware is more update and works more accurately than the original handset too.
After collimation of the mirror, star alignment, focusing with a Batimov mask and pointing to the object, (Sharpcap is able to plate solve the frame and syncronise the star map), the capture can start. Live stacking needs some parameters set up to be assigned to work. Sharpcap provides a good documentation to help finding the right values, and only some practice is required to make the process working (5).
Once the capture is started, the program derotates and stacks the frames in live-view; typically 5-10 seconds exposure time has been the right compromise between signal level, tracking errors and field rotation. Sharpcap allows to save in 32 fits at a given time; I have chosen to save the frame every 5-10 minutes, typically I have been able to capture frames for 120 minutes per night with no major problem, except some common issues happening during night activity out of an observatory dome, like condensation formed on mirrors.
Adding a layer of pipe wrap insulation film around the telescope tube as a dew shield delayed the heat exchange for irradiation between the glass and the clear sky, most of the times. During very humid nights, a little fan directed toward the secondary mirror prevented the condensation on the optical surface completely. The capture setting varies from case to case, but normally I have set the sensor parameters at 16 bit acquisition, low gain, 2x2 bin.
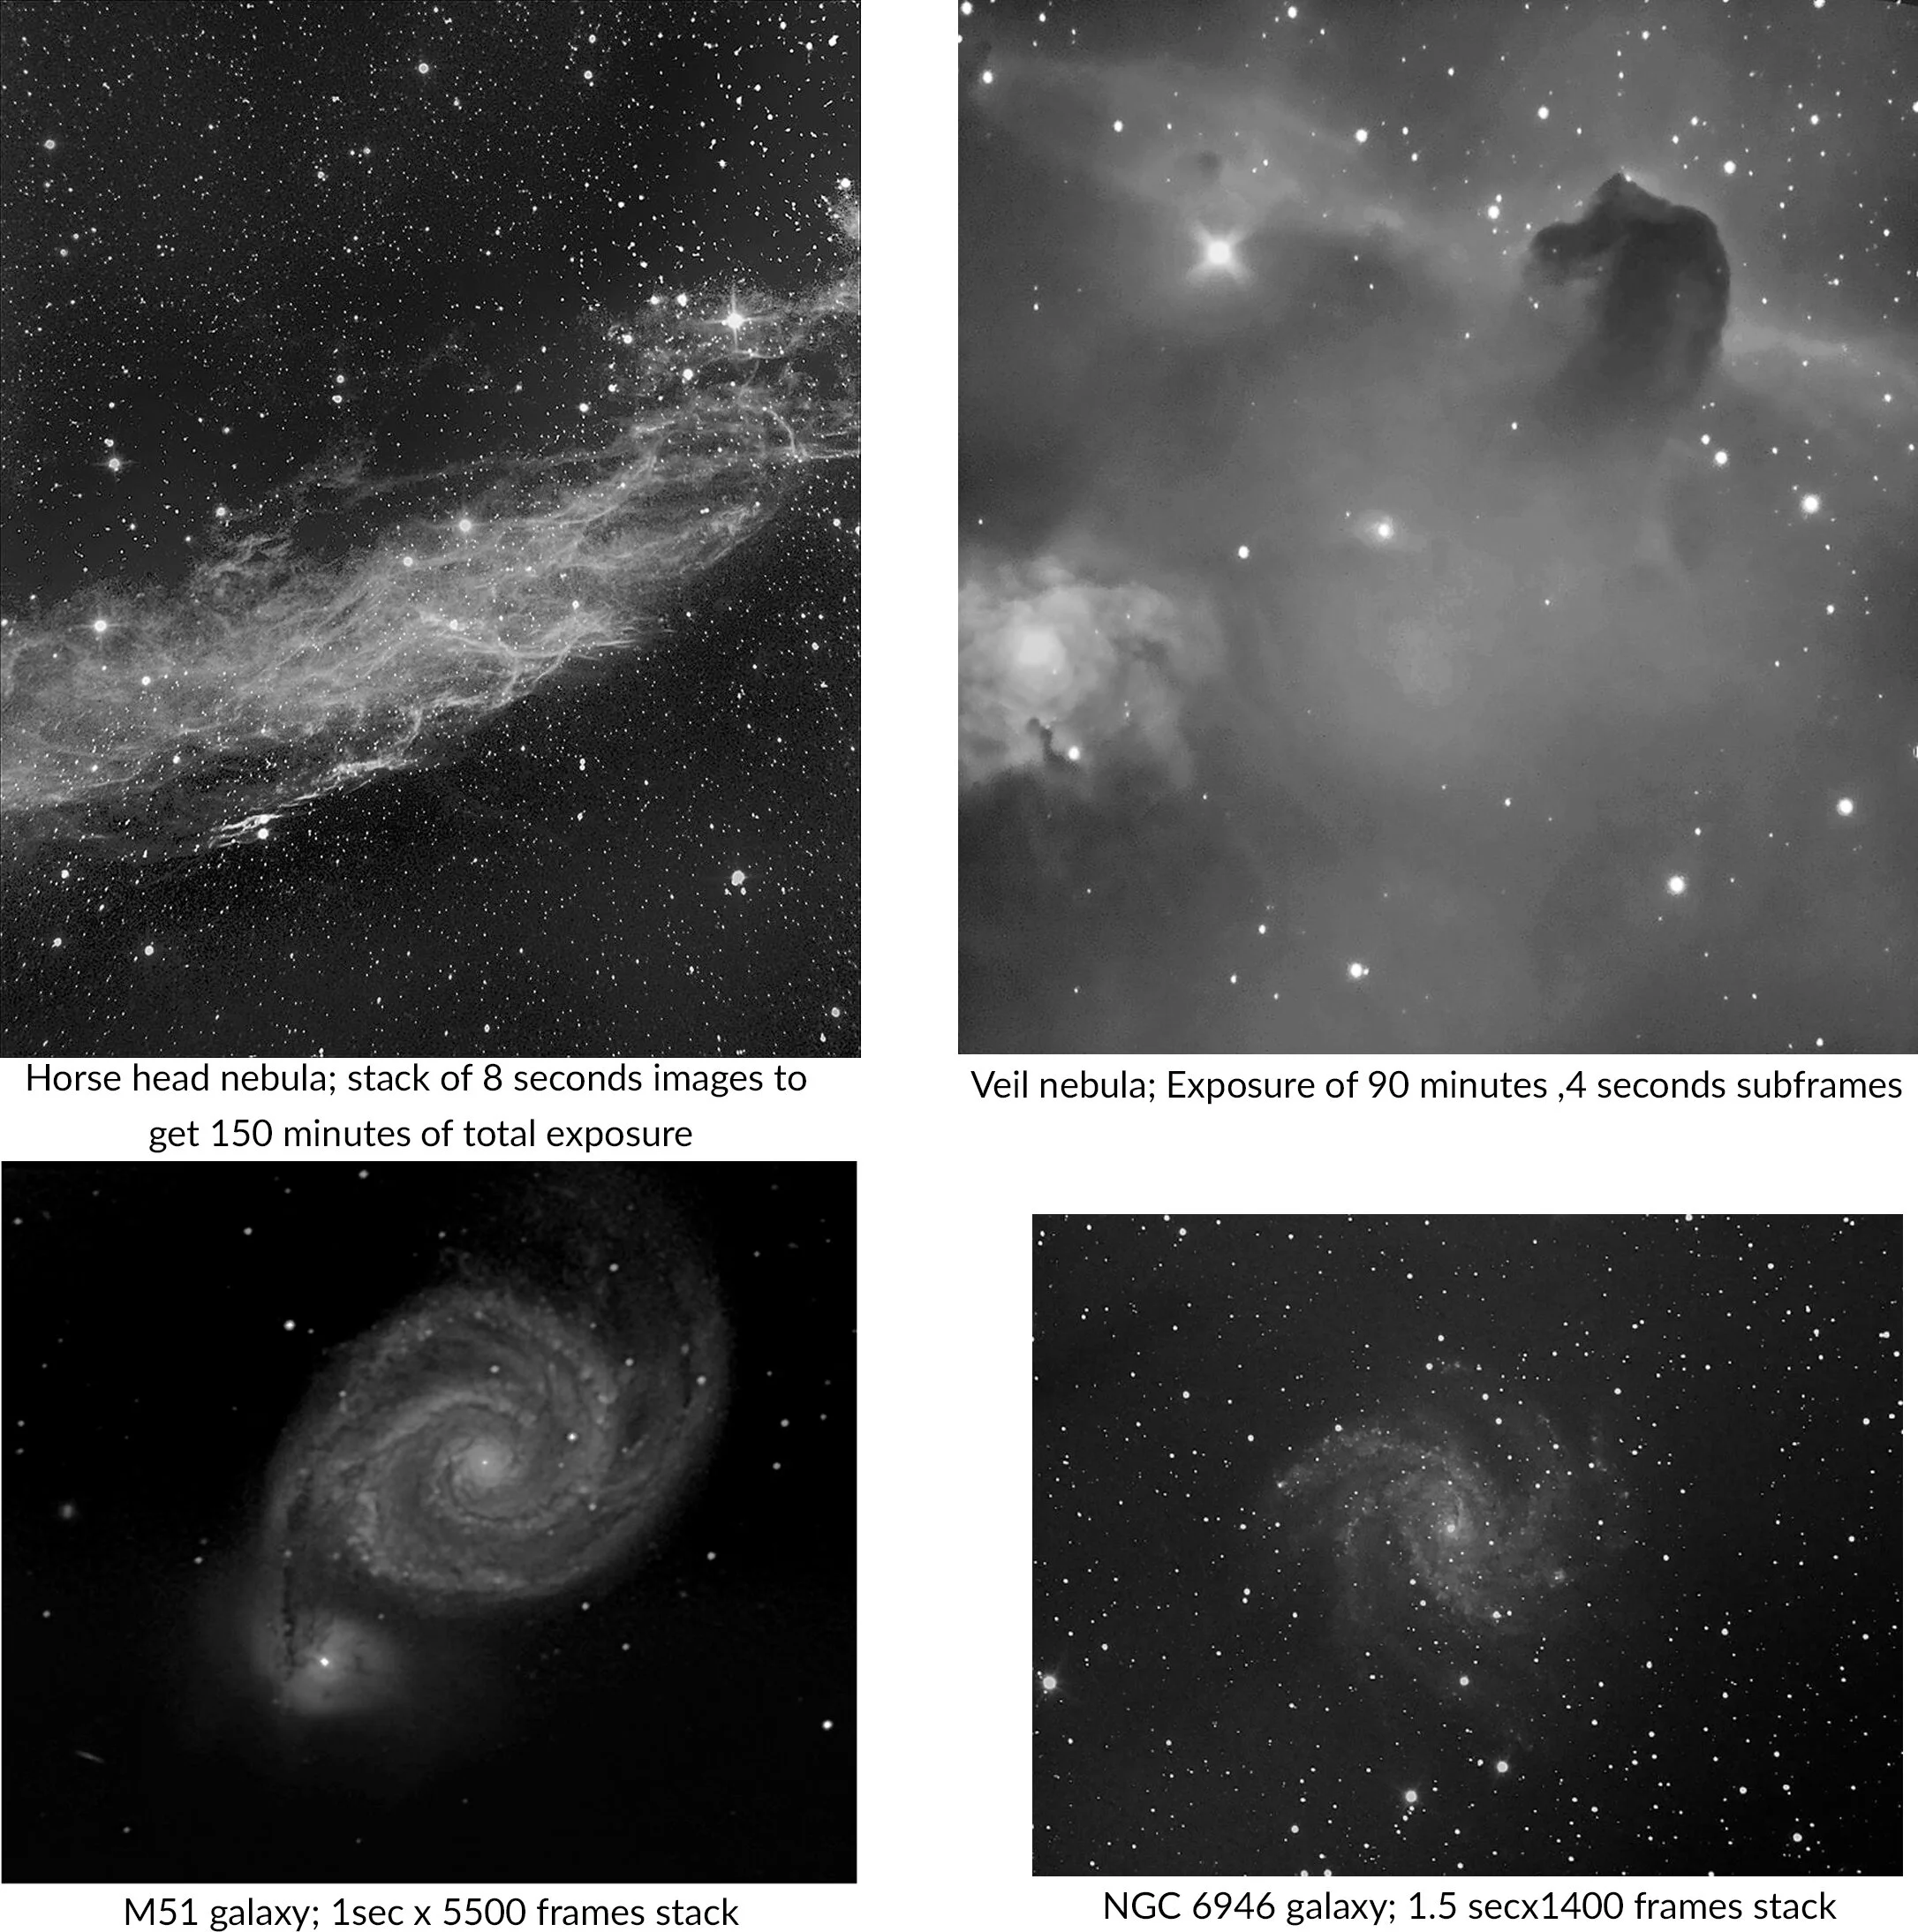
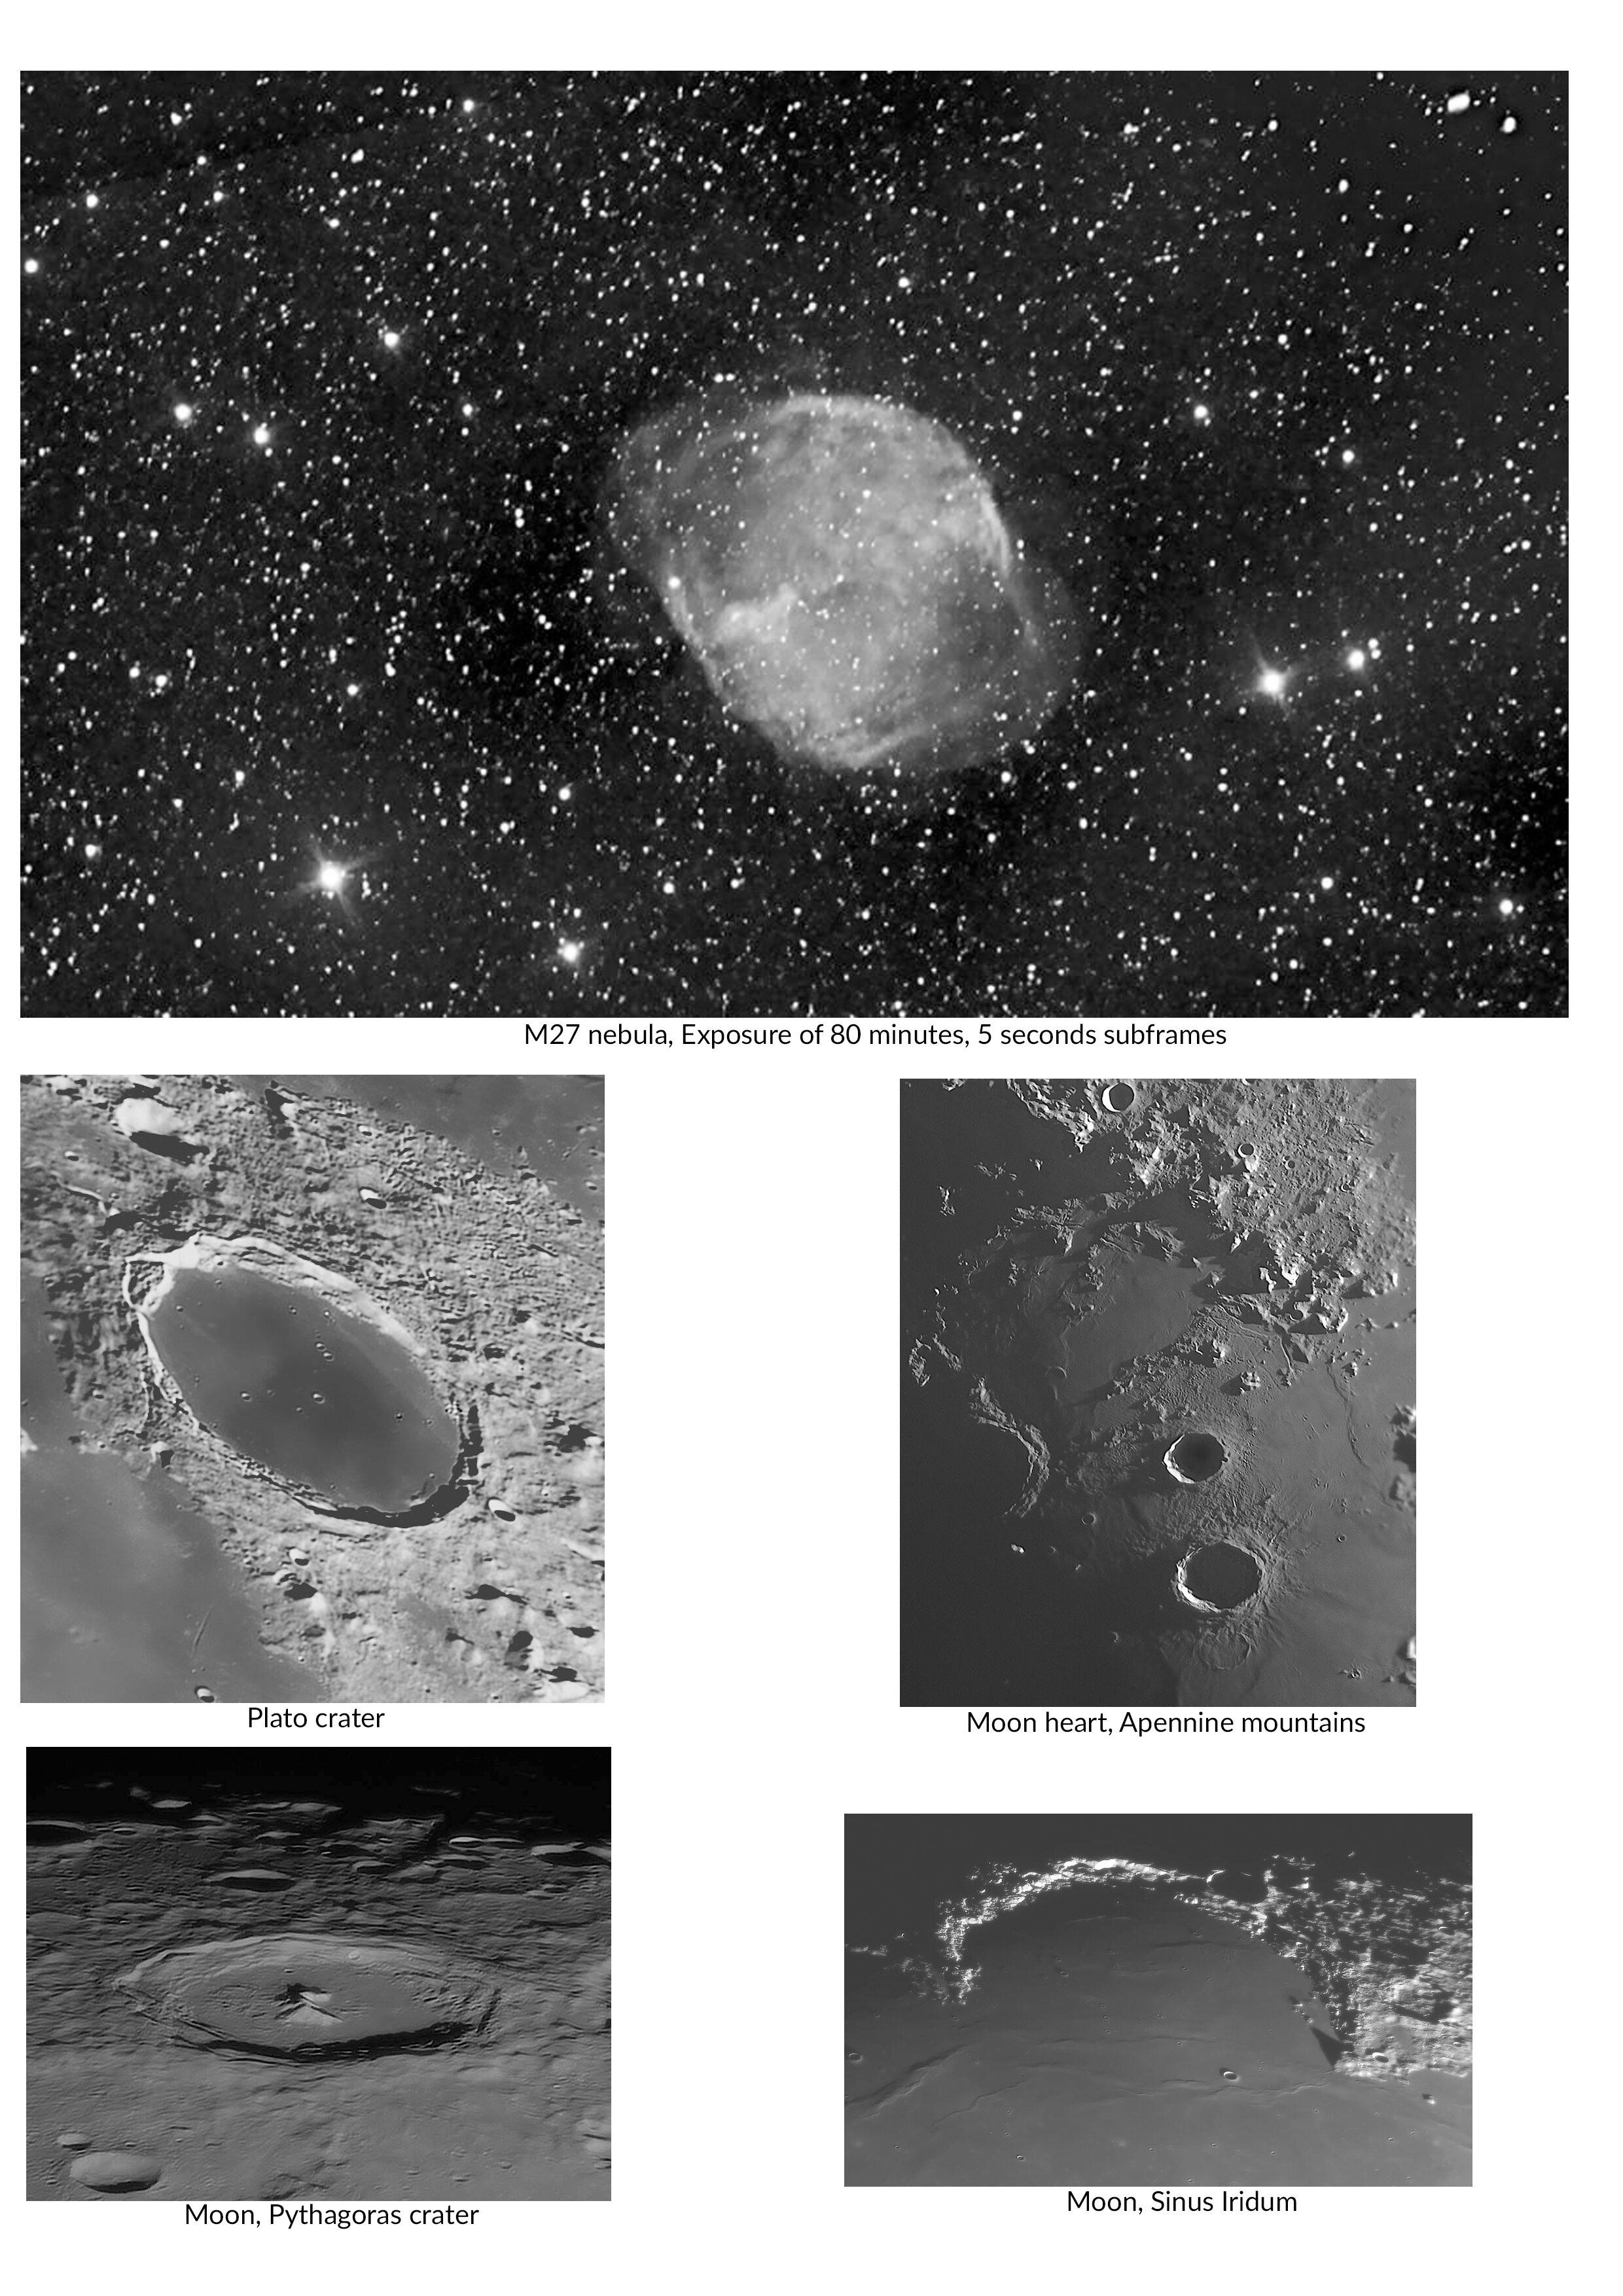
After acquisition is done, I have used Astroart to finally combine the set of stacked images in 32 fits format, into a final overall image which then is processed with a classical method. After a number of steps to filter, flatten, denoise, stretching, and sharpening I have been able to fine tune images of a number of the deep sky objects with size between 1 and 20 arc minutes, as as shown in the examples here attached.
All in all, I have obtained results better with the Goto Dobson than with mine 130 APO on EQ mount with auto-guide!(6) (7).
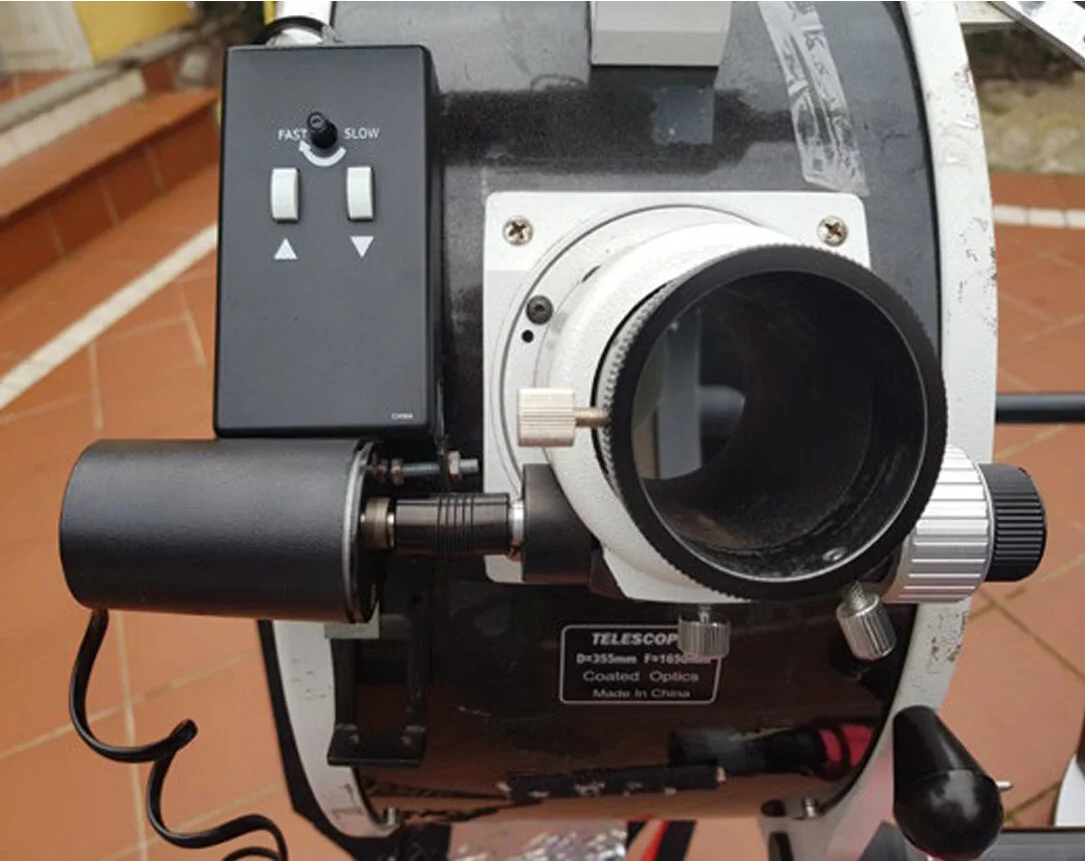
Focuser Motor
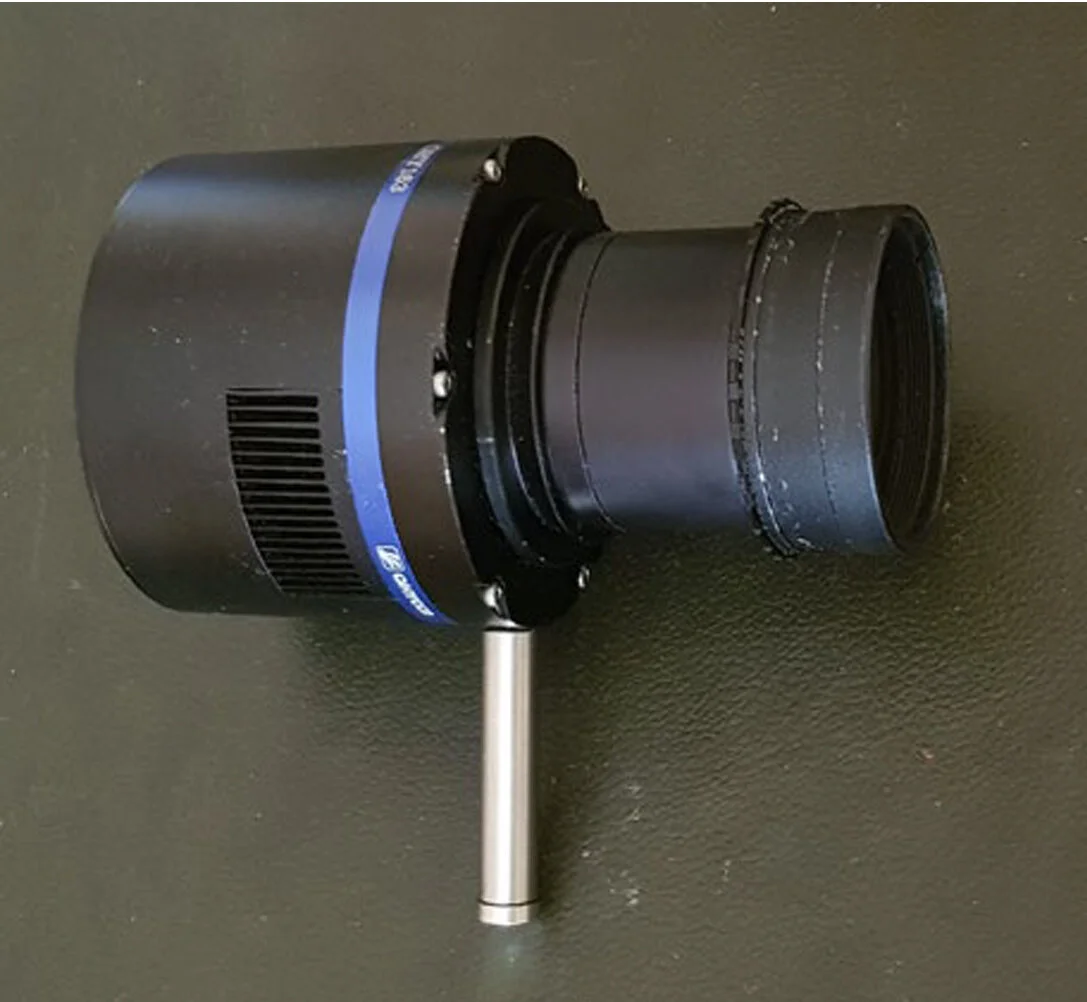
CMOS camera with coma corrector
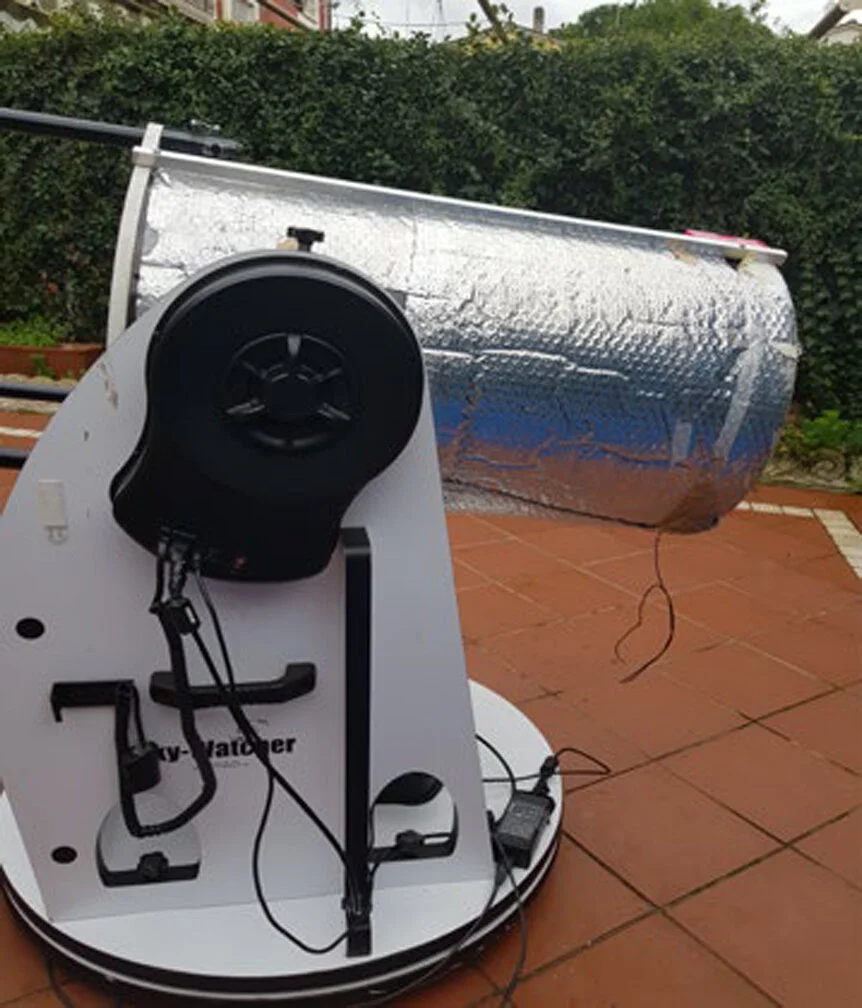
tube insulation coating
Lunar and planetary astrophotography setup
Normally, astrophotography planetary setup, is different deep sky objects, and a type telescope fit better one or the other. The choice of Dobson Goto, not only allows to get the deespky imaging by short exposures, but at the same time is also a fantastic tool to take high resolution images; it takes just an optics change at the focuser to swap from one to another setup. My choice went towards a Televue 5x Power mate lens to extend the telescope focal lens to right sampling with no aberrations. Configuration for lunar and planetary
14” Dobsonian Goto F 4.5 Skywatcher telescope
Accessory focuser motor
Focusing Bathimov mask
Wifi Skywatcher adapter
Filtro IR 690nm
Power mate Televue 5x
QHY163M camera
5 meters USB 3 cable
Computer Macbookpro2011 8MB
Windows 10
Cartes du ciel 3.2
Sharpcap 3.2
Autostakkert 3
Astroart 7
As said , basically it took only to replace the coma corrector with a Televue lens and a IR filter, and adjust focus properly to fit planetary or deep sky shooting. The same 163M Cmos camera provides both high speed and low read noise and performs very well at at 8 bit up to a frame rate of 50-60Hz with a exposure time between 0.05 and 0.01 seconds. Typically, I captured 5- 10 minutes of video in Ser format, and processed with Autostakkert.
The stacked imaged has been first of all sharpened by deconvolution, than finally processed in Astroart. The method I used to acquire and process lunar and planetary is a classical one and very well known, and does not need to be repeated in detail in this article. I just underline that the sharpest results are obtained by the use of a IR 650nm passband filter , the best compromise the reduce the blurring caused by atmospheric turbulence.

Final conclusions
The experience I had with a Skywatcher 14” Dobson goto telescope and the QHY163M camera as universal astrophotography telescope exceeded any expectations. By adding a focuser motorization to the Skywatcher original telescope, a CMOS camera connected to a fast PC and Sharpcap powerful software, I have been able to make fantastic images of the Moon, planets, galaxies, nebulas and many other sky objects. More than 500 astro-photographies published in my gallery (5)(6) witness the productivity of this method.
The telescope after the upgrade showed to be a good compromise between easy of use, quality, and versatility: a tool to enjoy not only for visual observations, but surprisingly, also for astrophotography of all types, with the only exception for narrow band filters imaging. This opens a chance to make good astrophotography also with cheap visual telescopes, with the advantage of higher resolution given by larger mirror aperture, but with the simplicity of the Dobson mount mechanics. Monochrome CMOS low read noise cameras are the main responsible of this result; further improvement will be possible with further release of 16 bit RGB back illuminated camera versions.
References (1) https://telescopemount.org/short-exposure-alt-az-astrophotography-learn-how-to-get-great-results/ (2) https://www.skyatnightmagazine.com/astrophotography/astrophoto-tips/imaging-planets-dobsonian-telescope (3) https://www.amateurastrophotography.com/dobsonian-astrophotography (4) http://www.astrokraai.nl/viewimages.php?t=y&category=7 (5) https://docs.sharpcap.co.uk/3.2/ (6) https://www.facebook.com/maurizio.mollinari (7) https://www.facebook.com/Sky.photography.MM/ Acknowledgements Thanks to Robin Glover, author of SharpCap, for his comments and suggestions whilst I was preparing this work.