
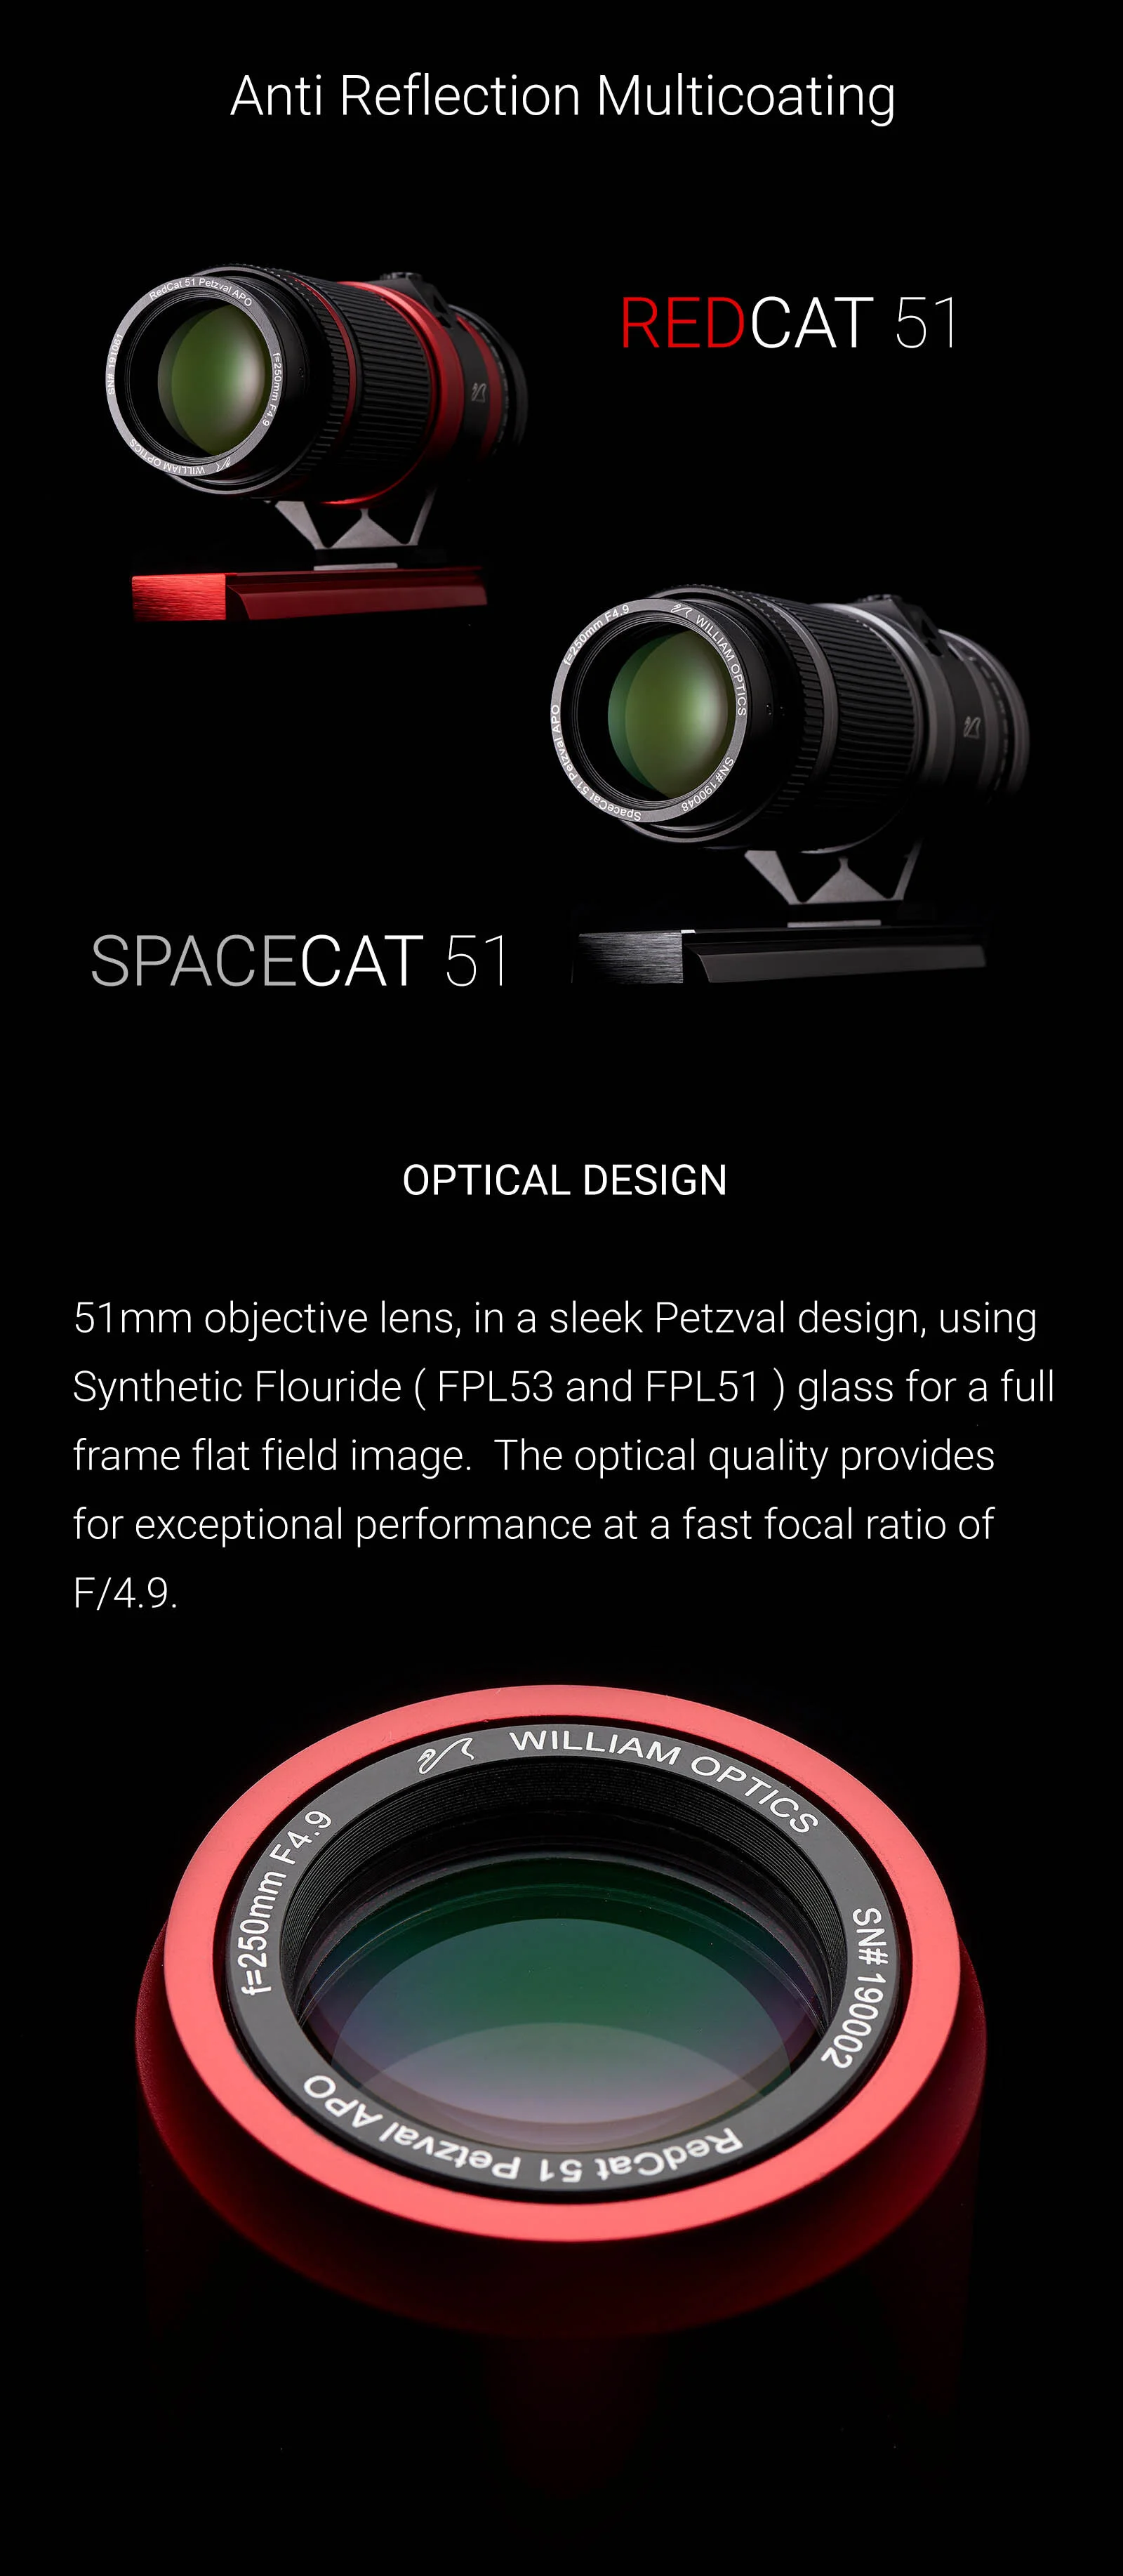
SVBONY SV105 Review
by Tim Cowell
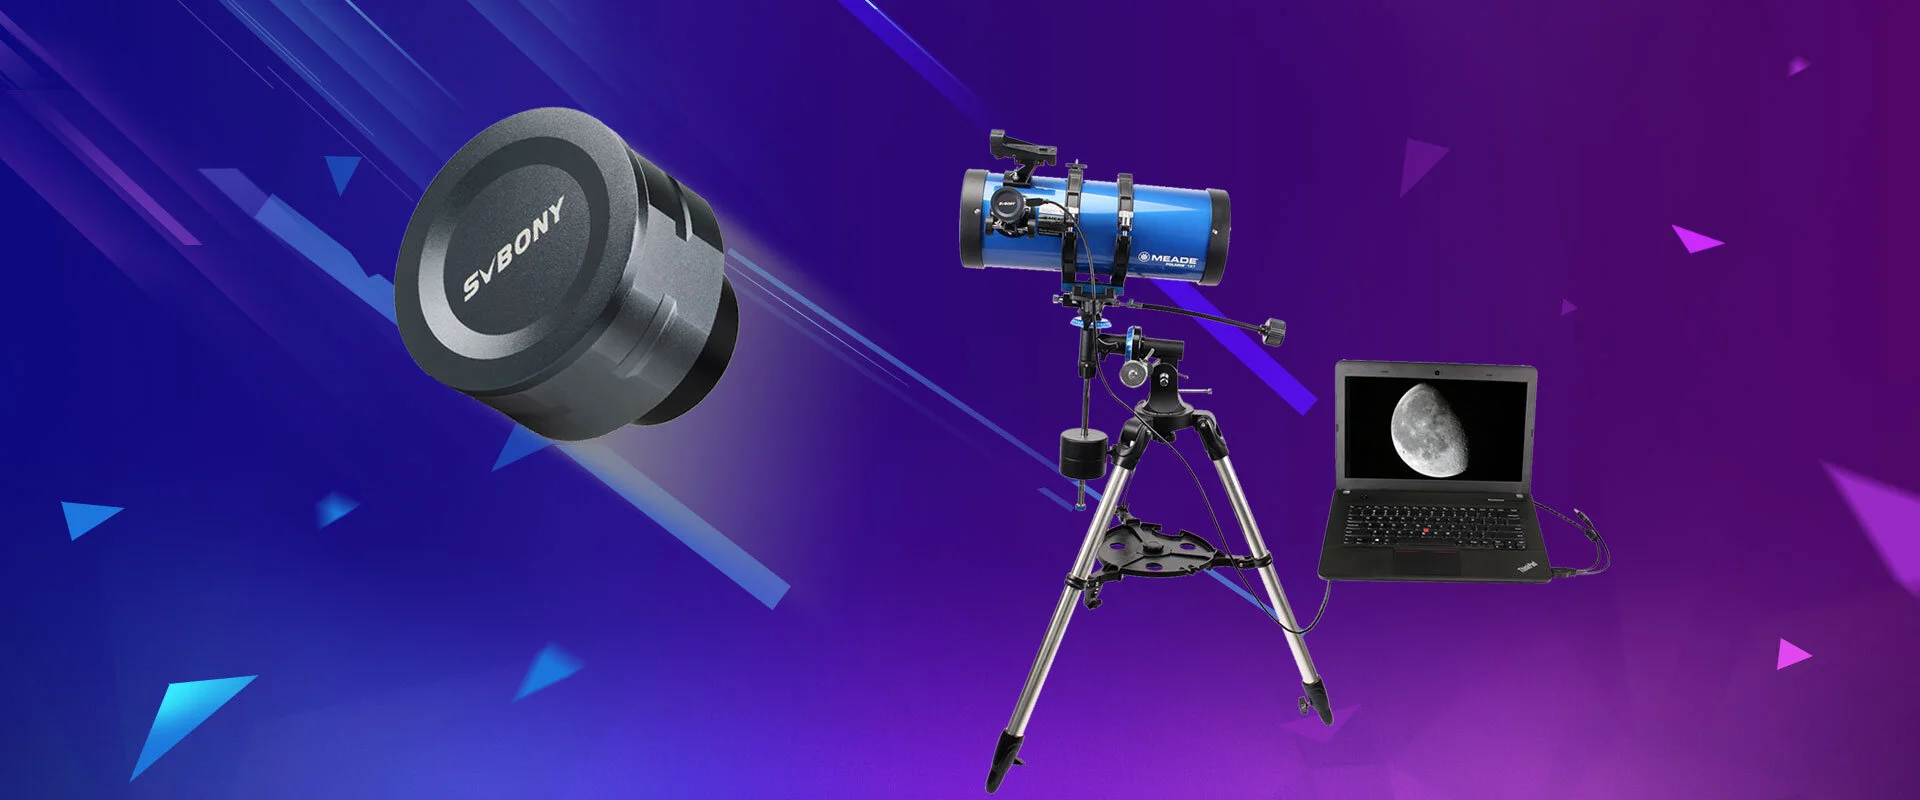
The SVBONY SV105 sits neatly at the business end of my 71mm refractor and from looking at the specifications I wondered initially where and how it would compliment a telescope set up.
It is sensitive, although its maximum stated exposure is just 500ms Supplied with a long USB2 'printer' type cable which is thoughtfully a 'double ender' type to ensure that there is enough power to run the camera from laptops and tablets, this camera is small and light. There is a paper instruction sheet included, a CD with a copy of SharpCap and it is packed in a neat box for safe storage. I think it is best practise to download drivers from the manufacturers website however this is a Plug N Play device and it loaded instantly for me.
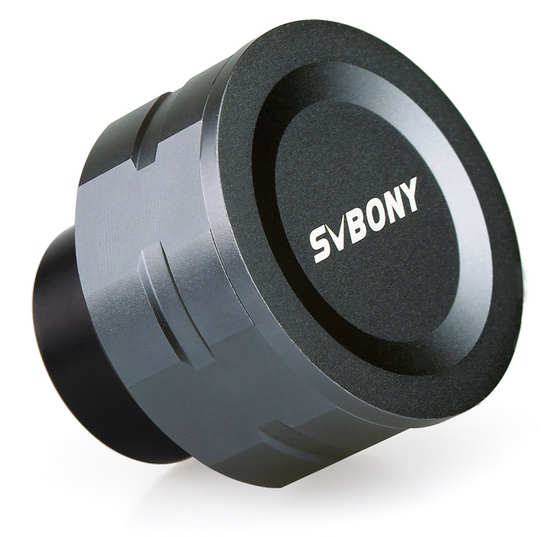
Fitting and using the SVBONY 105 is simplicity itself. I inserted the camera with the supplied nosepiece and once focused it produced a clear and crisp image of a distant tree on my PC screen. By rotating the camera until the USB connector is pointing straight down a 'right side up' image was gained and I was very impressed by how neutral the colours were and I became fascinated exploring the magnified images as I moved my scope by hand across the landscape. This instant gratification had me warming to the SVBONY 105.
With its generous 1920 x 1080 resolution, the output shared to a 42” HD screen was very, very nice and this became a regular feature of my office, as the view was changed through the day. I was watching insects crawl on daisy leaves as the breeze pleasantly swayed the flower too and fro with little stuttering or frame drop at 7 frames per second. I found myself aiming the '105' at anything, simply to see those tiny 3um x 3um pixels do their daytime thing.
Trying the camera on a longer focal length telescope meant even more of the same lushly coloured images and now I had the long range wildlife spotter I wished I'd had on a holiday to the Island of Skye a few years ago.
Darkness fell and try as I might I could not get a reasonable star field at 500ms, so my hopes of using this camera as a guide-cam were dashed. Perhaps the small aperture of my refractor was at fault, combined with the limitation of the very short maximum exposure.
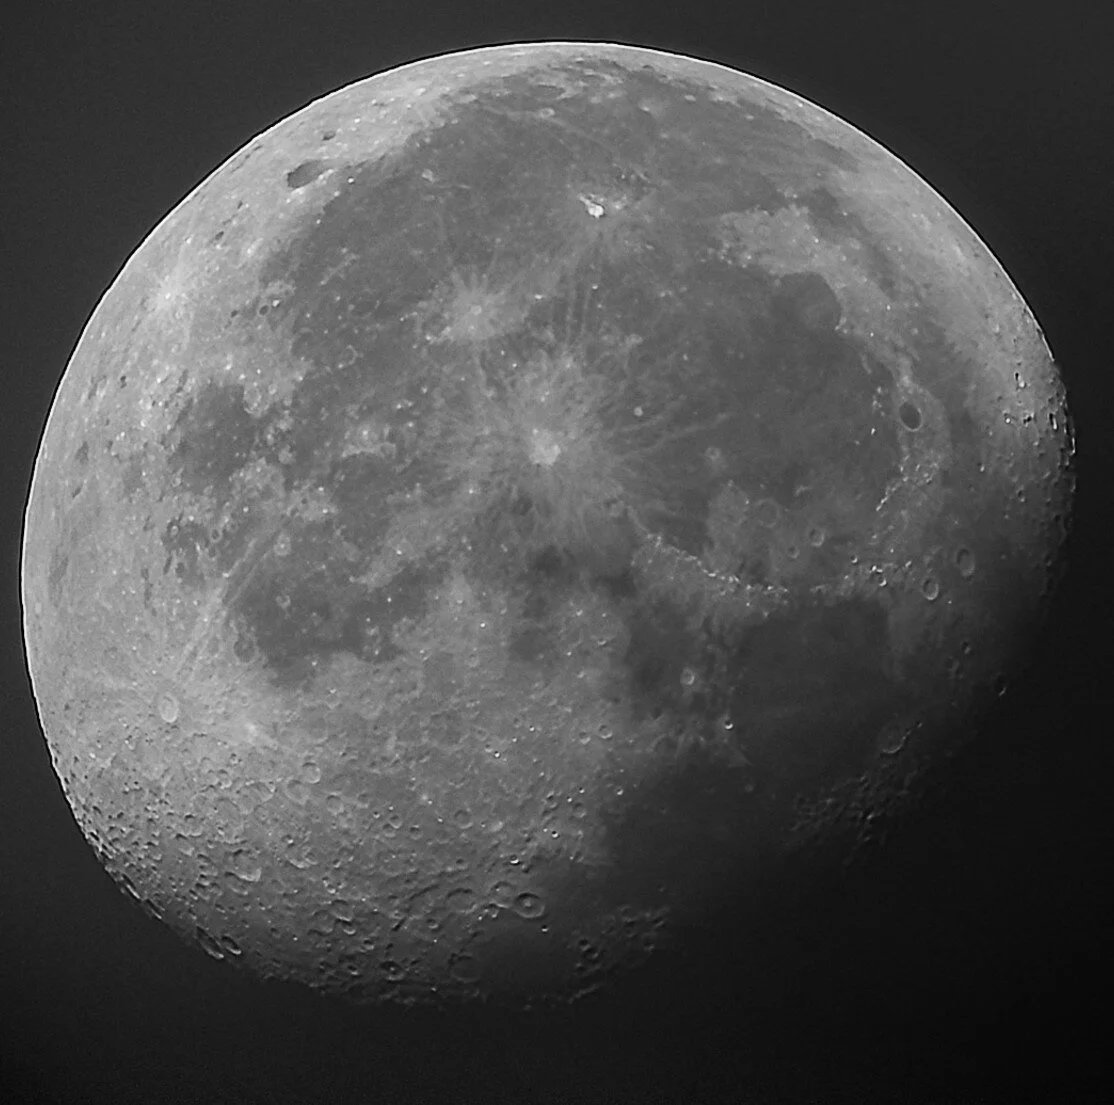
Turning my attention, then, to a fullish moon was very satisfying. Now the little camera performed beautifully, as it had done in the daylight. I expect its performance on Jupiter and Saturn would be good enough for a pleasant display and have seen some wonderful images posted by users. My little refractor doesn't have the reach for that, so I decided it would become my Moon and daytime friend and in those respects and at the price point, it serves me very nicely.
Within its limitations this camera makes a wonderful electronic eyepiece, but I was disappointed that the maximum exposure was limited to 500ms because I feel that it could be used for some live star field viewing and as a guide camera. In daylight it really excelled and for Moon imaging I found it to be a useful tool, especially for outreach or simply enjoying on a big screen. If the maximum exposure can be addressed in a firmware update I would rate it much more highly.
Overall, I like the SVBONY 105 because of the simplicity of operation, the natural colours it produced and the clarity of its live view of the moon. I will be considering upgrading to the longer exposure models in the future and also trying it on a longer focal length telescope where I can then enjoy Jupiter and Saturn too.

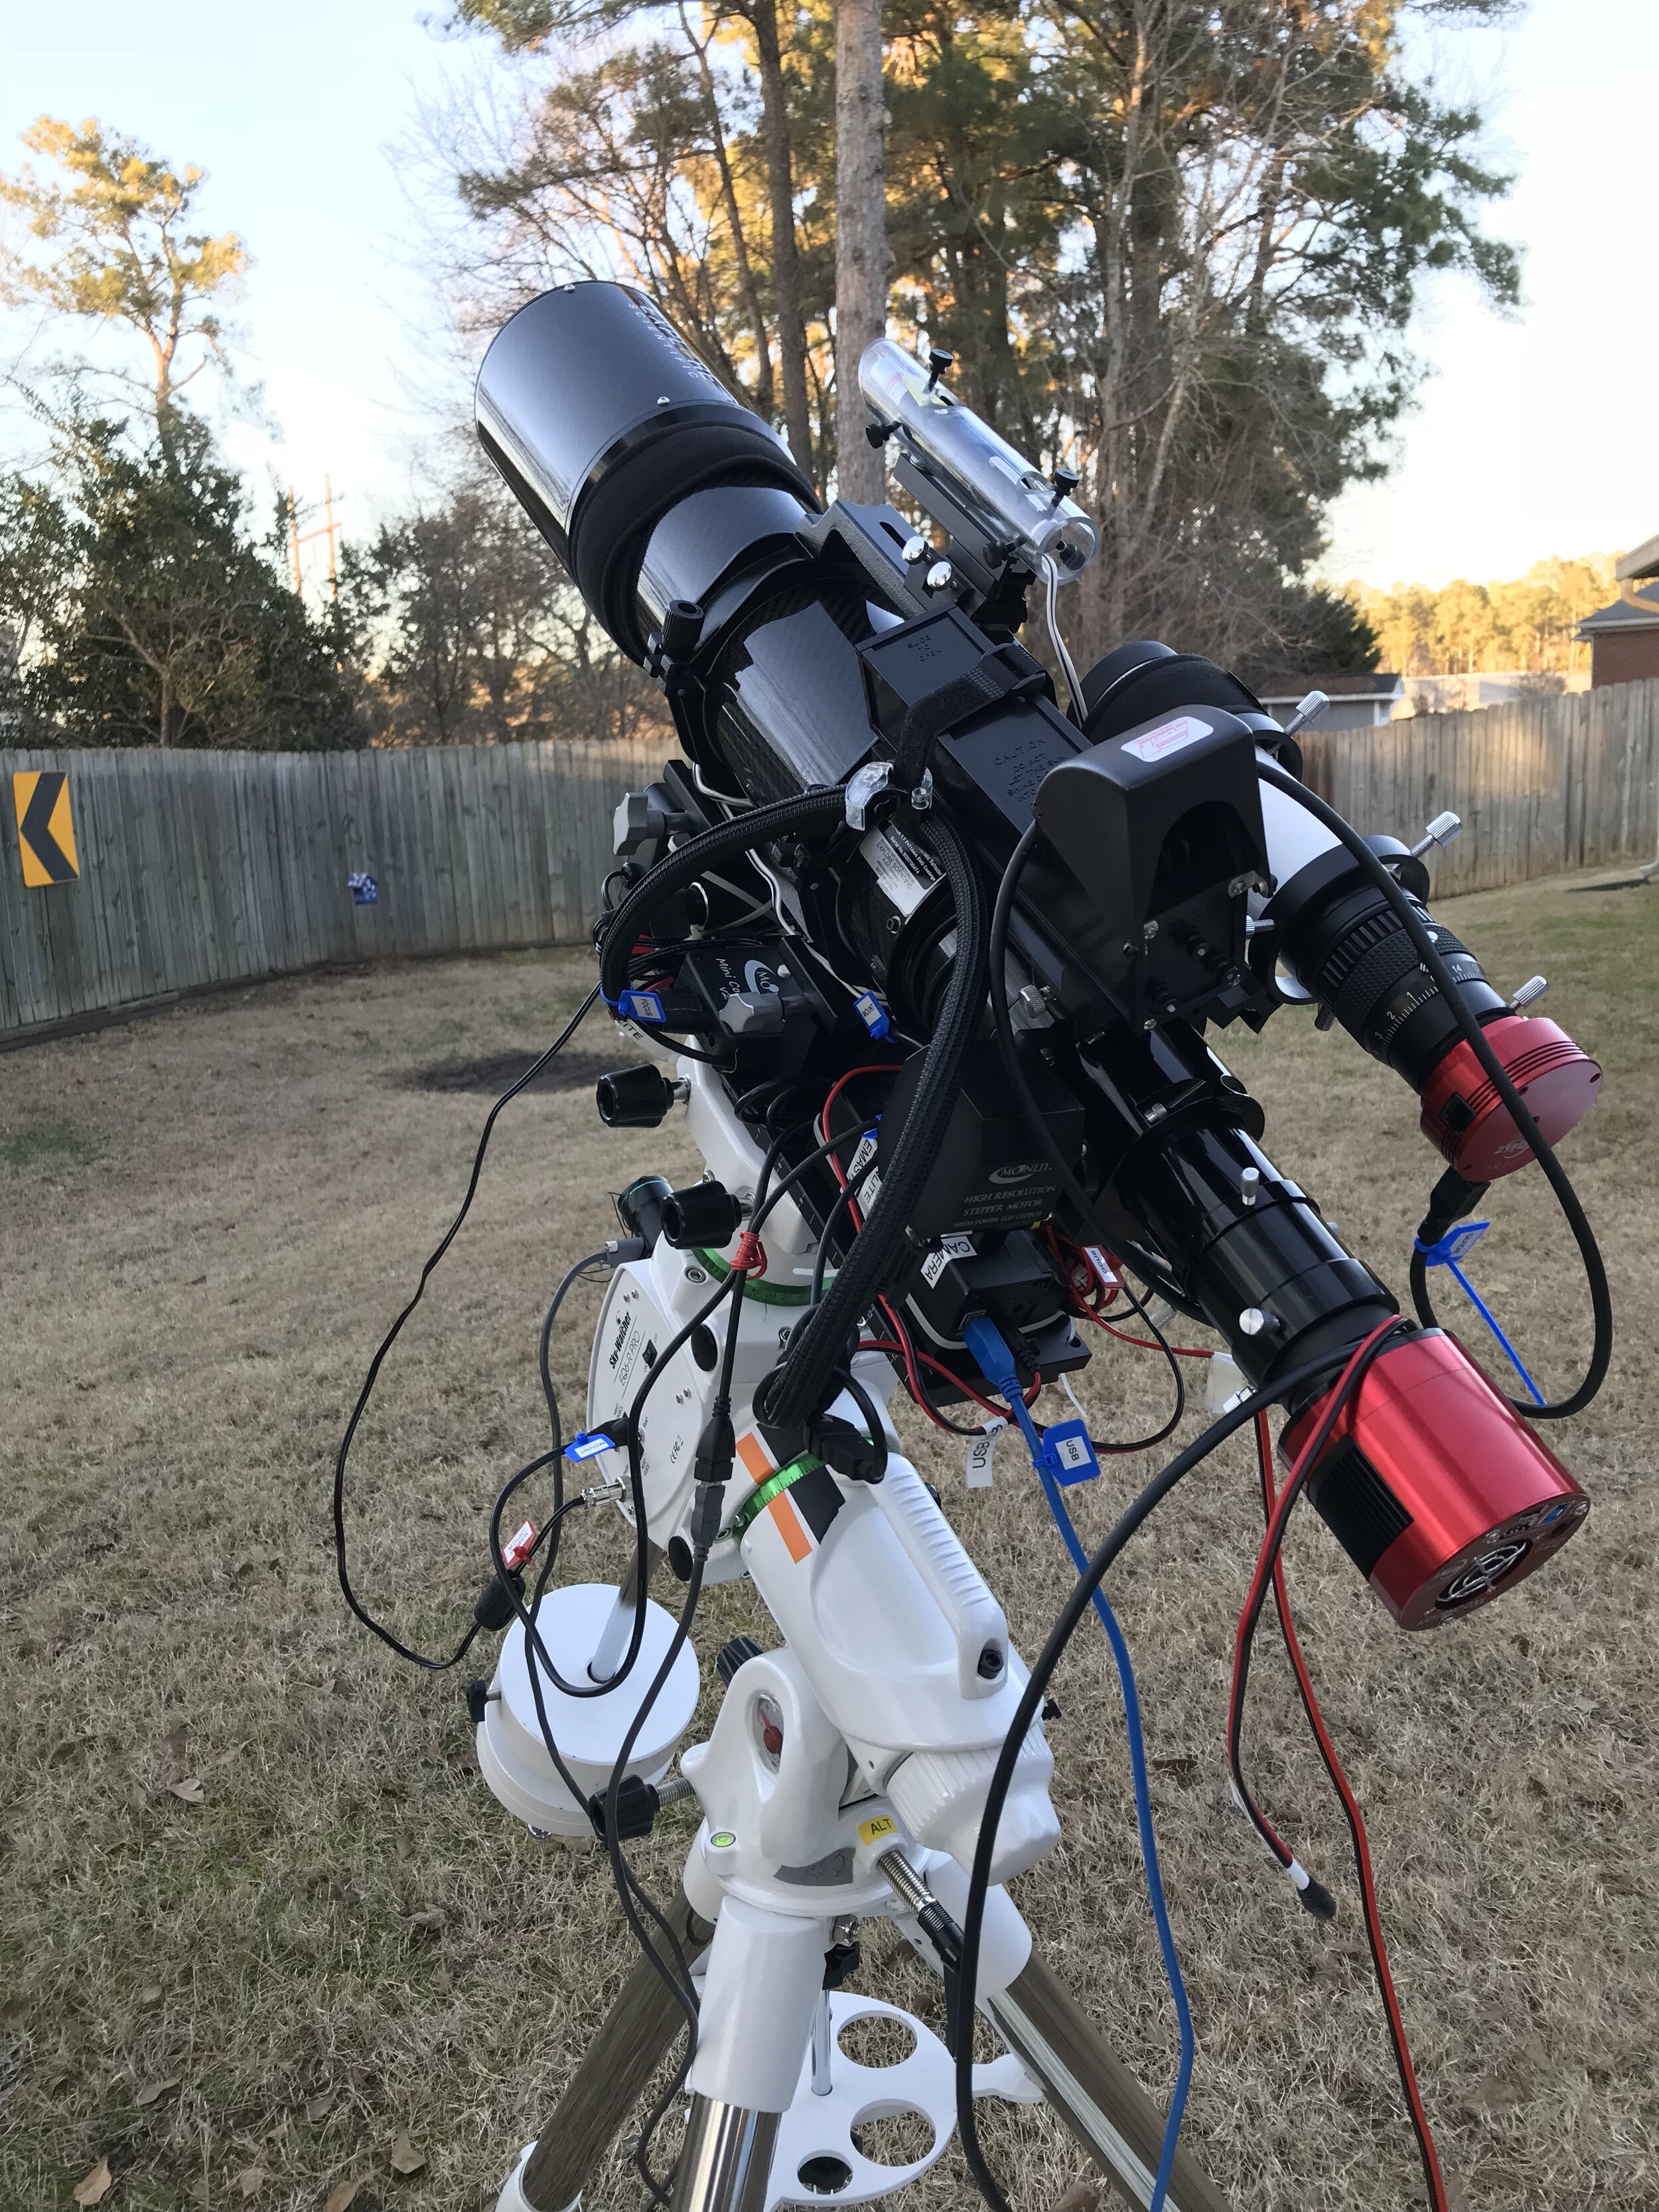
Astro Amy

Astro Amy
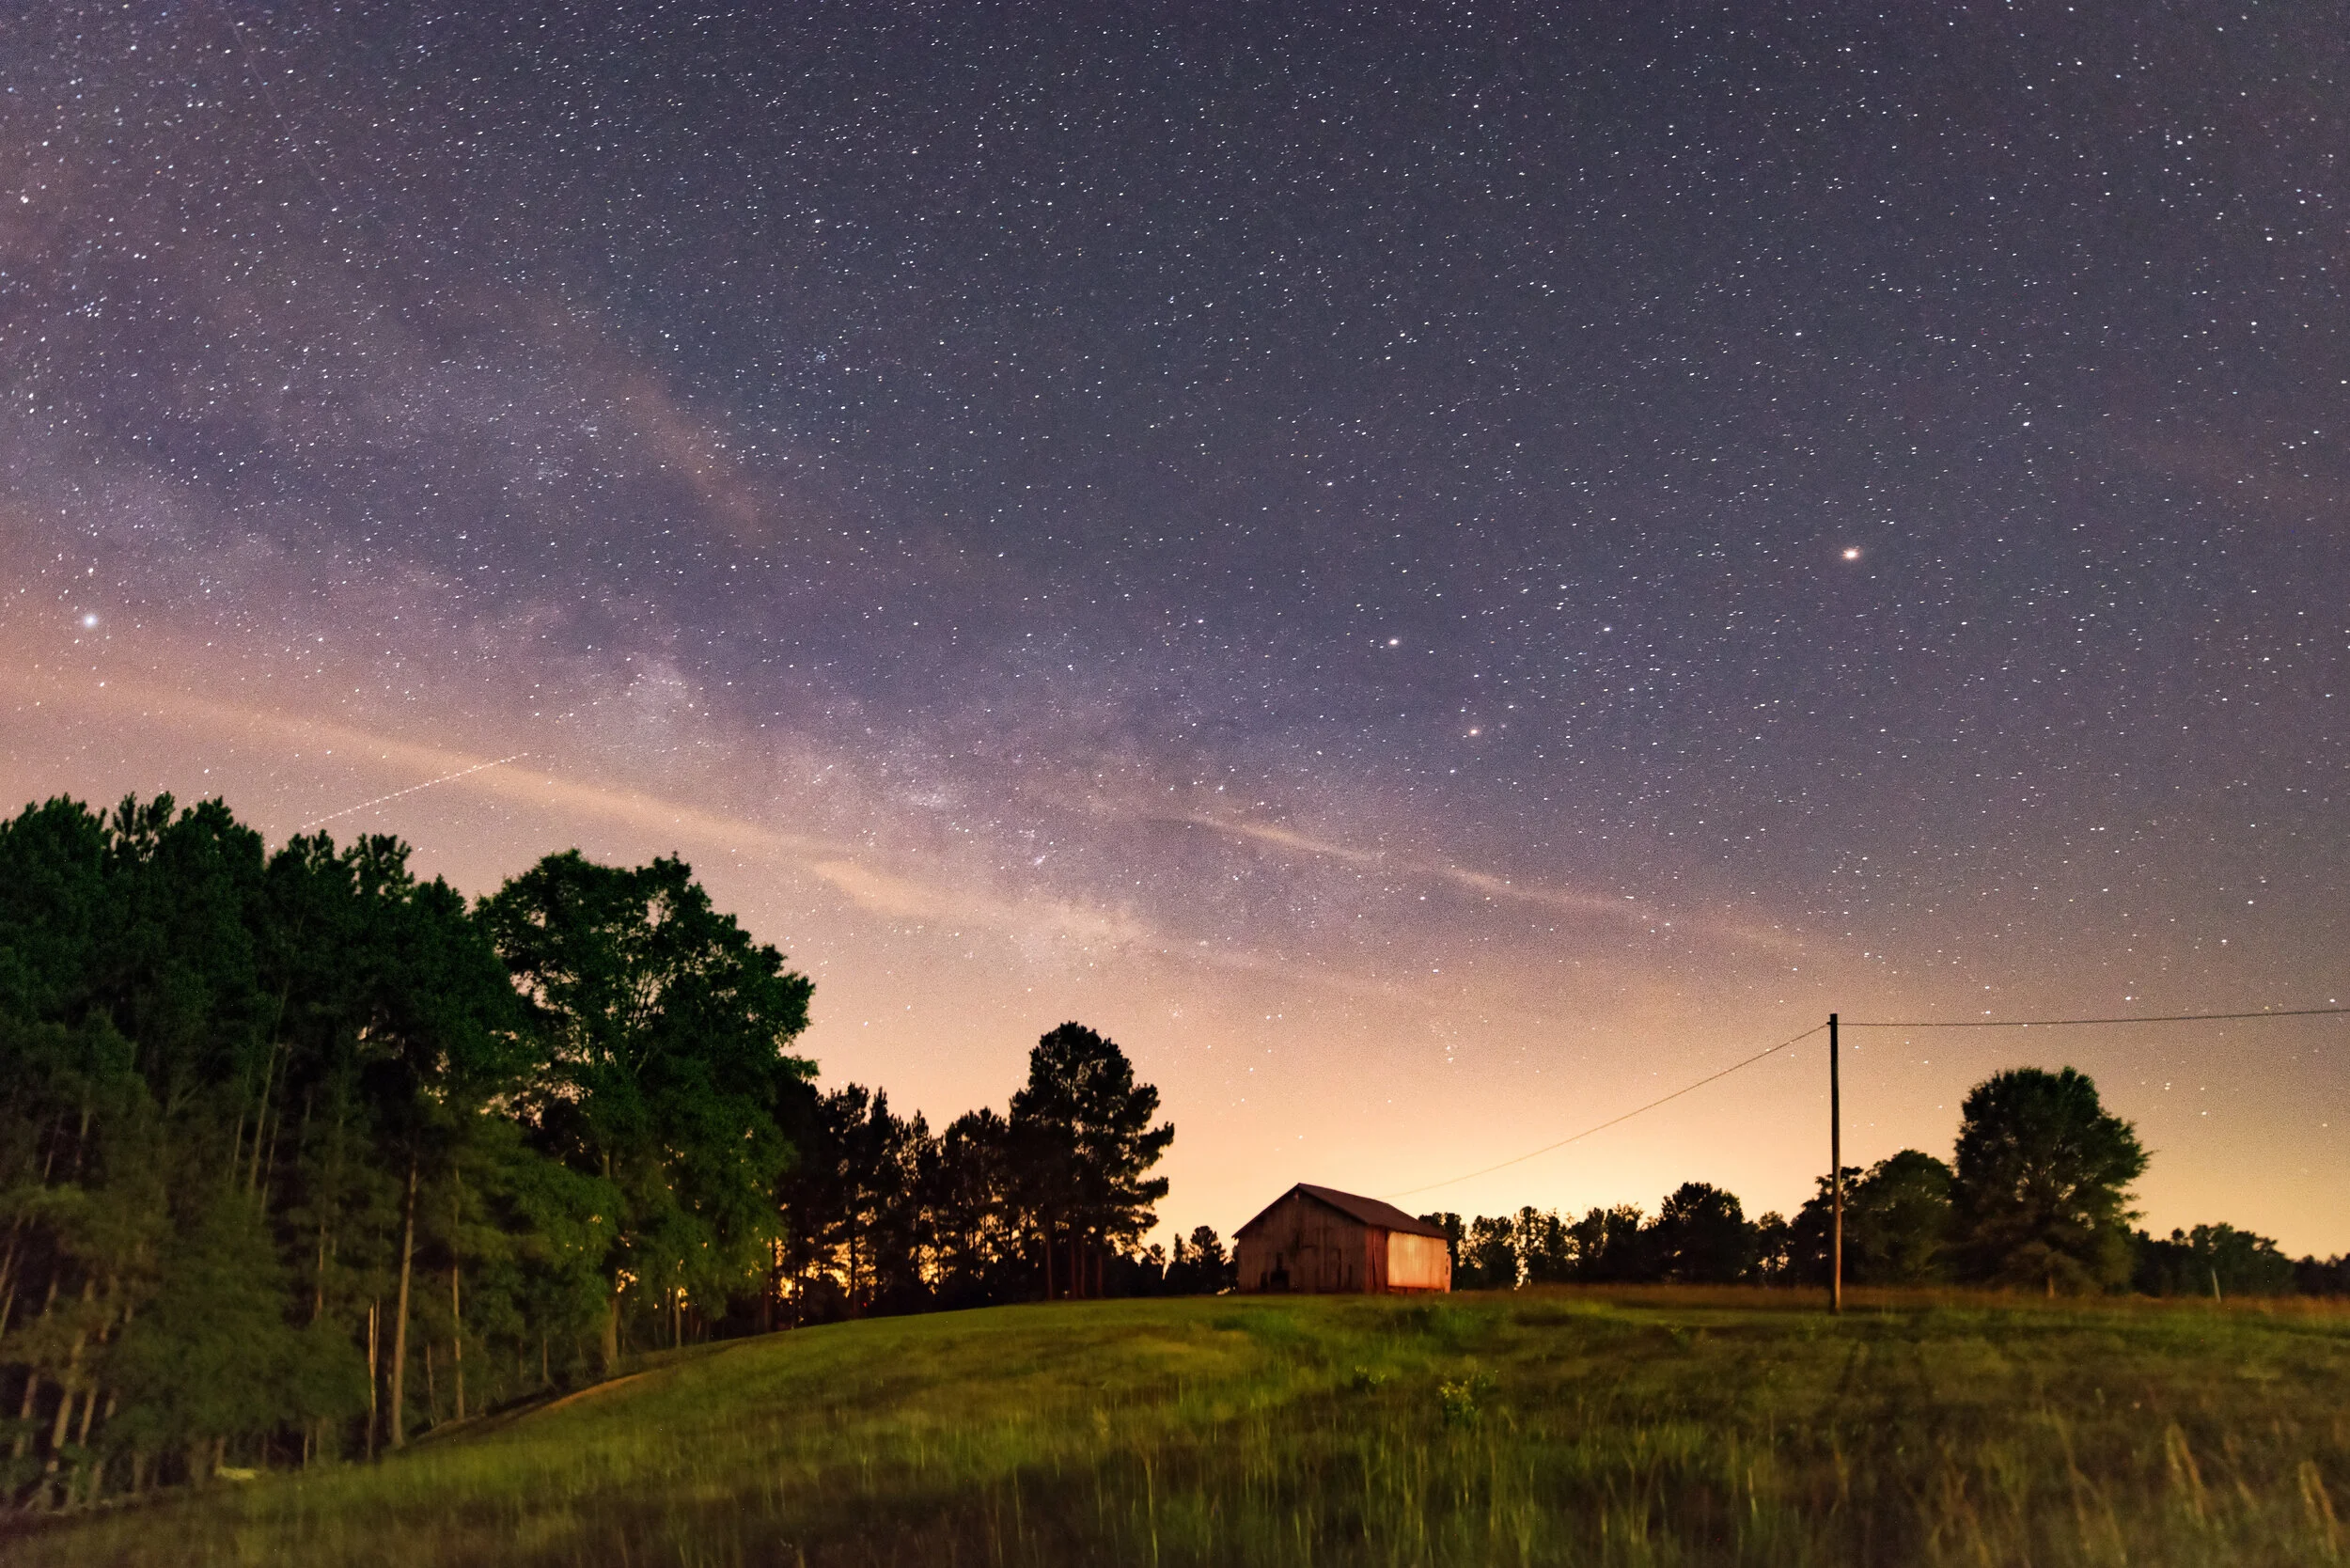
I did not wake up one morning and say I wanted to photograph deep space. It is something that evolved over time. I walked backwards into astrophotograpy from landscape photography. No science about it. The science is something I am still learning. I started as someone with a new DSLR and wanted to learn how to use it. So I joined a photography club. One of the first events I attended with the club was a night shoot. We landed in a field in the middle of peach country South Carolina. We arrived after dark and fumbled with our cameras and tripods. This was new to all of us. At some point we figured out how to focus our cameras on a distant light, and found a camera setting that worked. This was January 2014 and it was freezing outside. I settled in a chair wrapped in a blanket next to my tripod with a cabled shutter release in one hand and hot chocolate in the other. I took a 30 second photo every time I saw an image appear on my screen. I decided then my first image would be a star trail. That was the night I fell in love with the night sky.
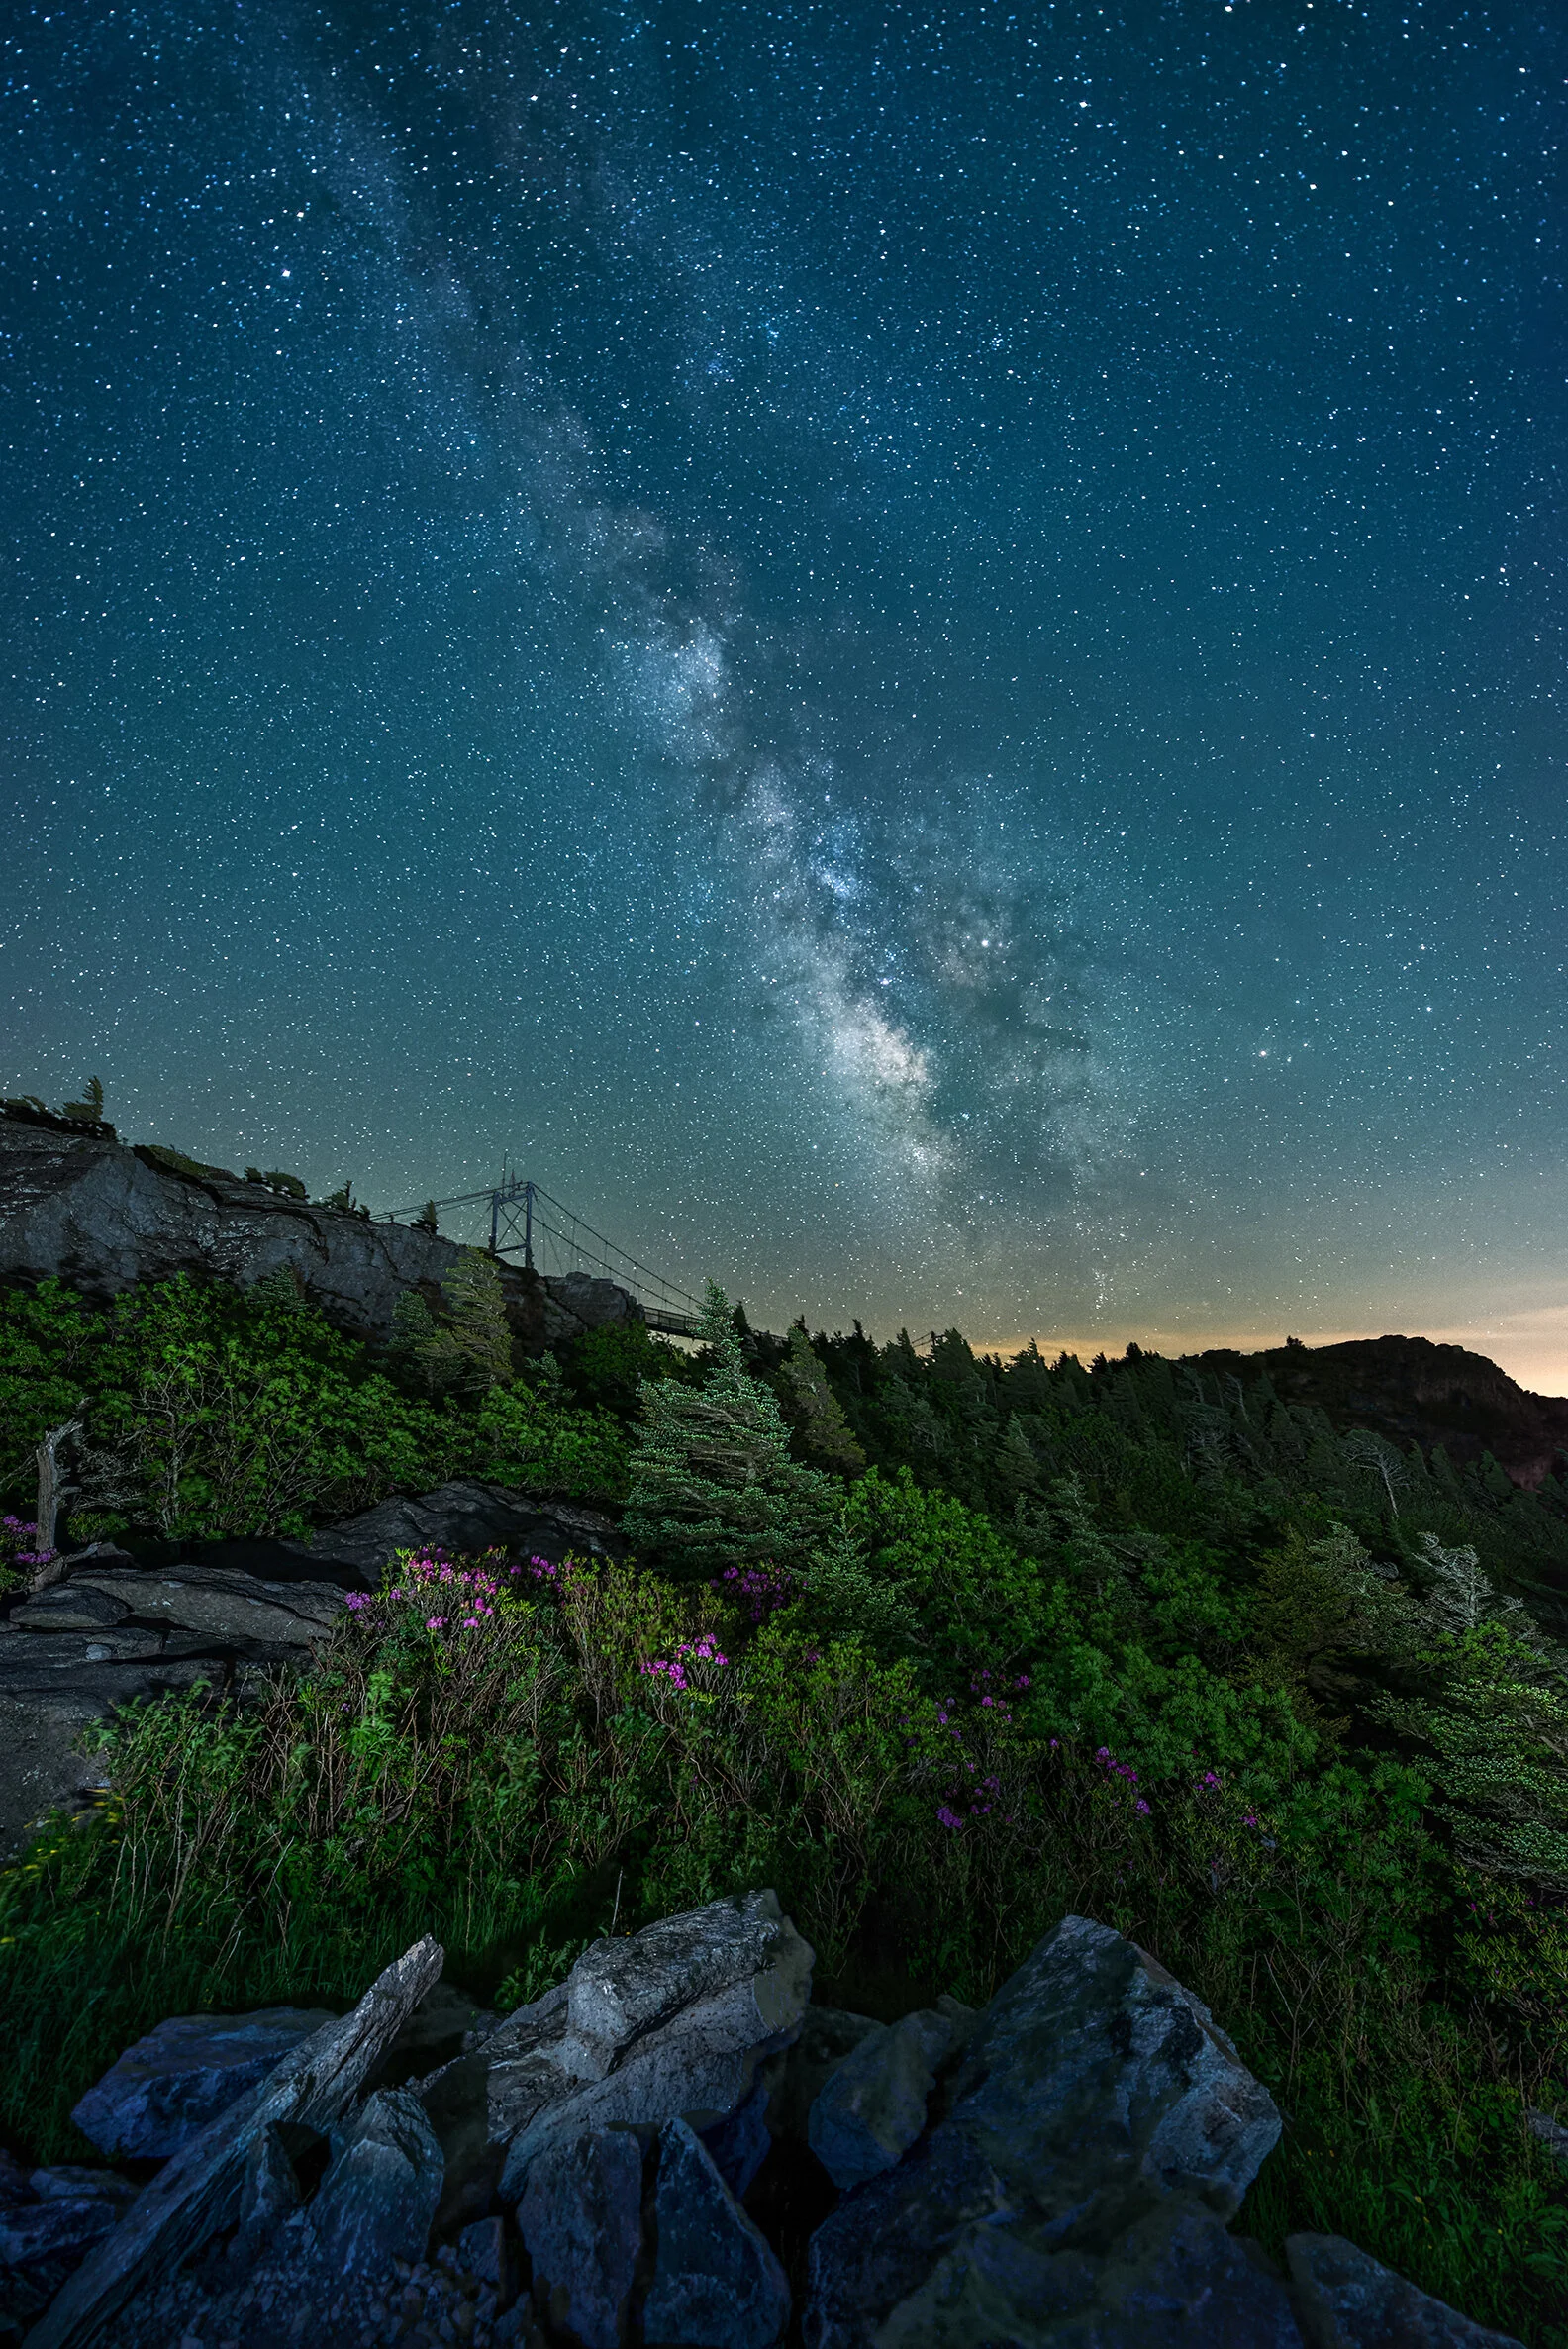
It did not take long for me to realize that in this photography club everyone took turns teaching a skill. I needed a skill that I could share with the group. Remembering that first night. I chose the Milky Way. Problem is I had no clue how to find it. I have never seen it. For a few months I surfed the internet for everything I could. I studied photos, locations, settings, gear. Now I needed practice. My father knew a landowner about an hour from town who had some secluded land. The land was perfect and the owner loved having a visitor every month to shoot his stars.
I have never seen so many stars. At the back of his property he had an old International Harvester drill rig. I used the drill rig as my foreground as I chased the milky way. I spent a whole milky way season on his property practicing till I felt I could produce a solid image and teach the rest of the club. I spent 2 years roaming this property taking Milky way images.

I attended several astrophotography landscape workshops. They took me along the Blue Ridge Highway in North Carolina, Roan Mountain and the Appalachian Trail, The barrier islands of South Carolina, The Outer Banks, North Carolina. My motto was "Have camera will travel for stars" it was a great time.
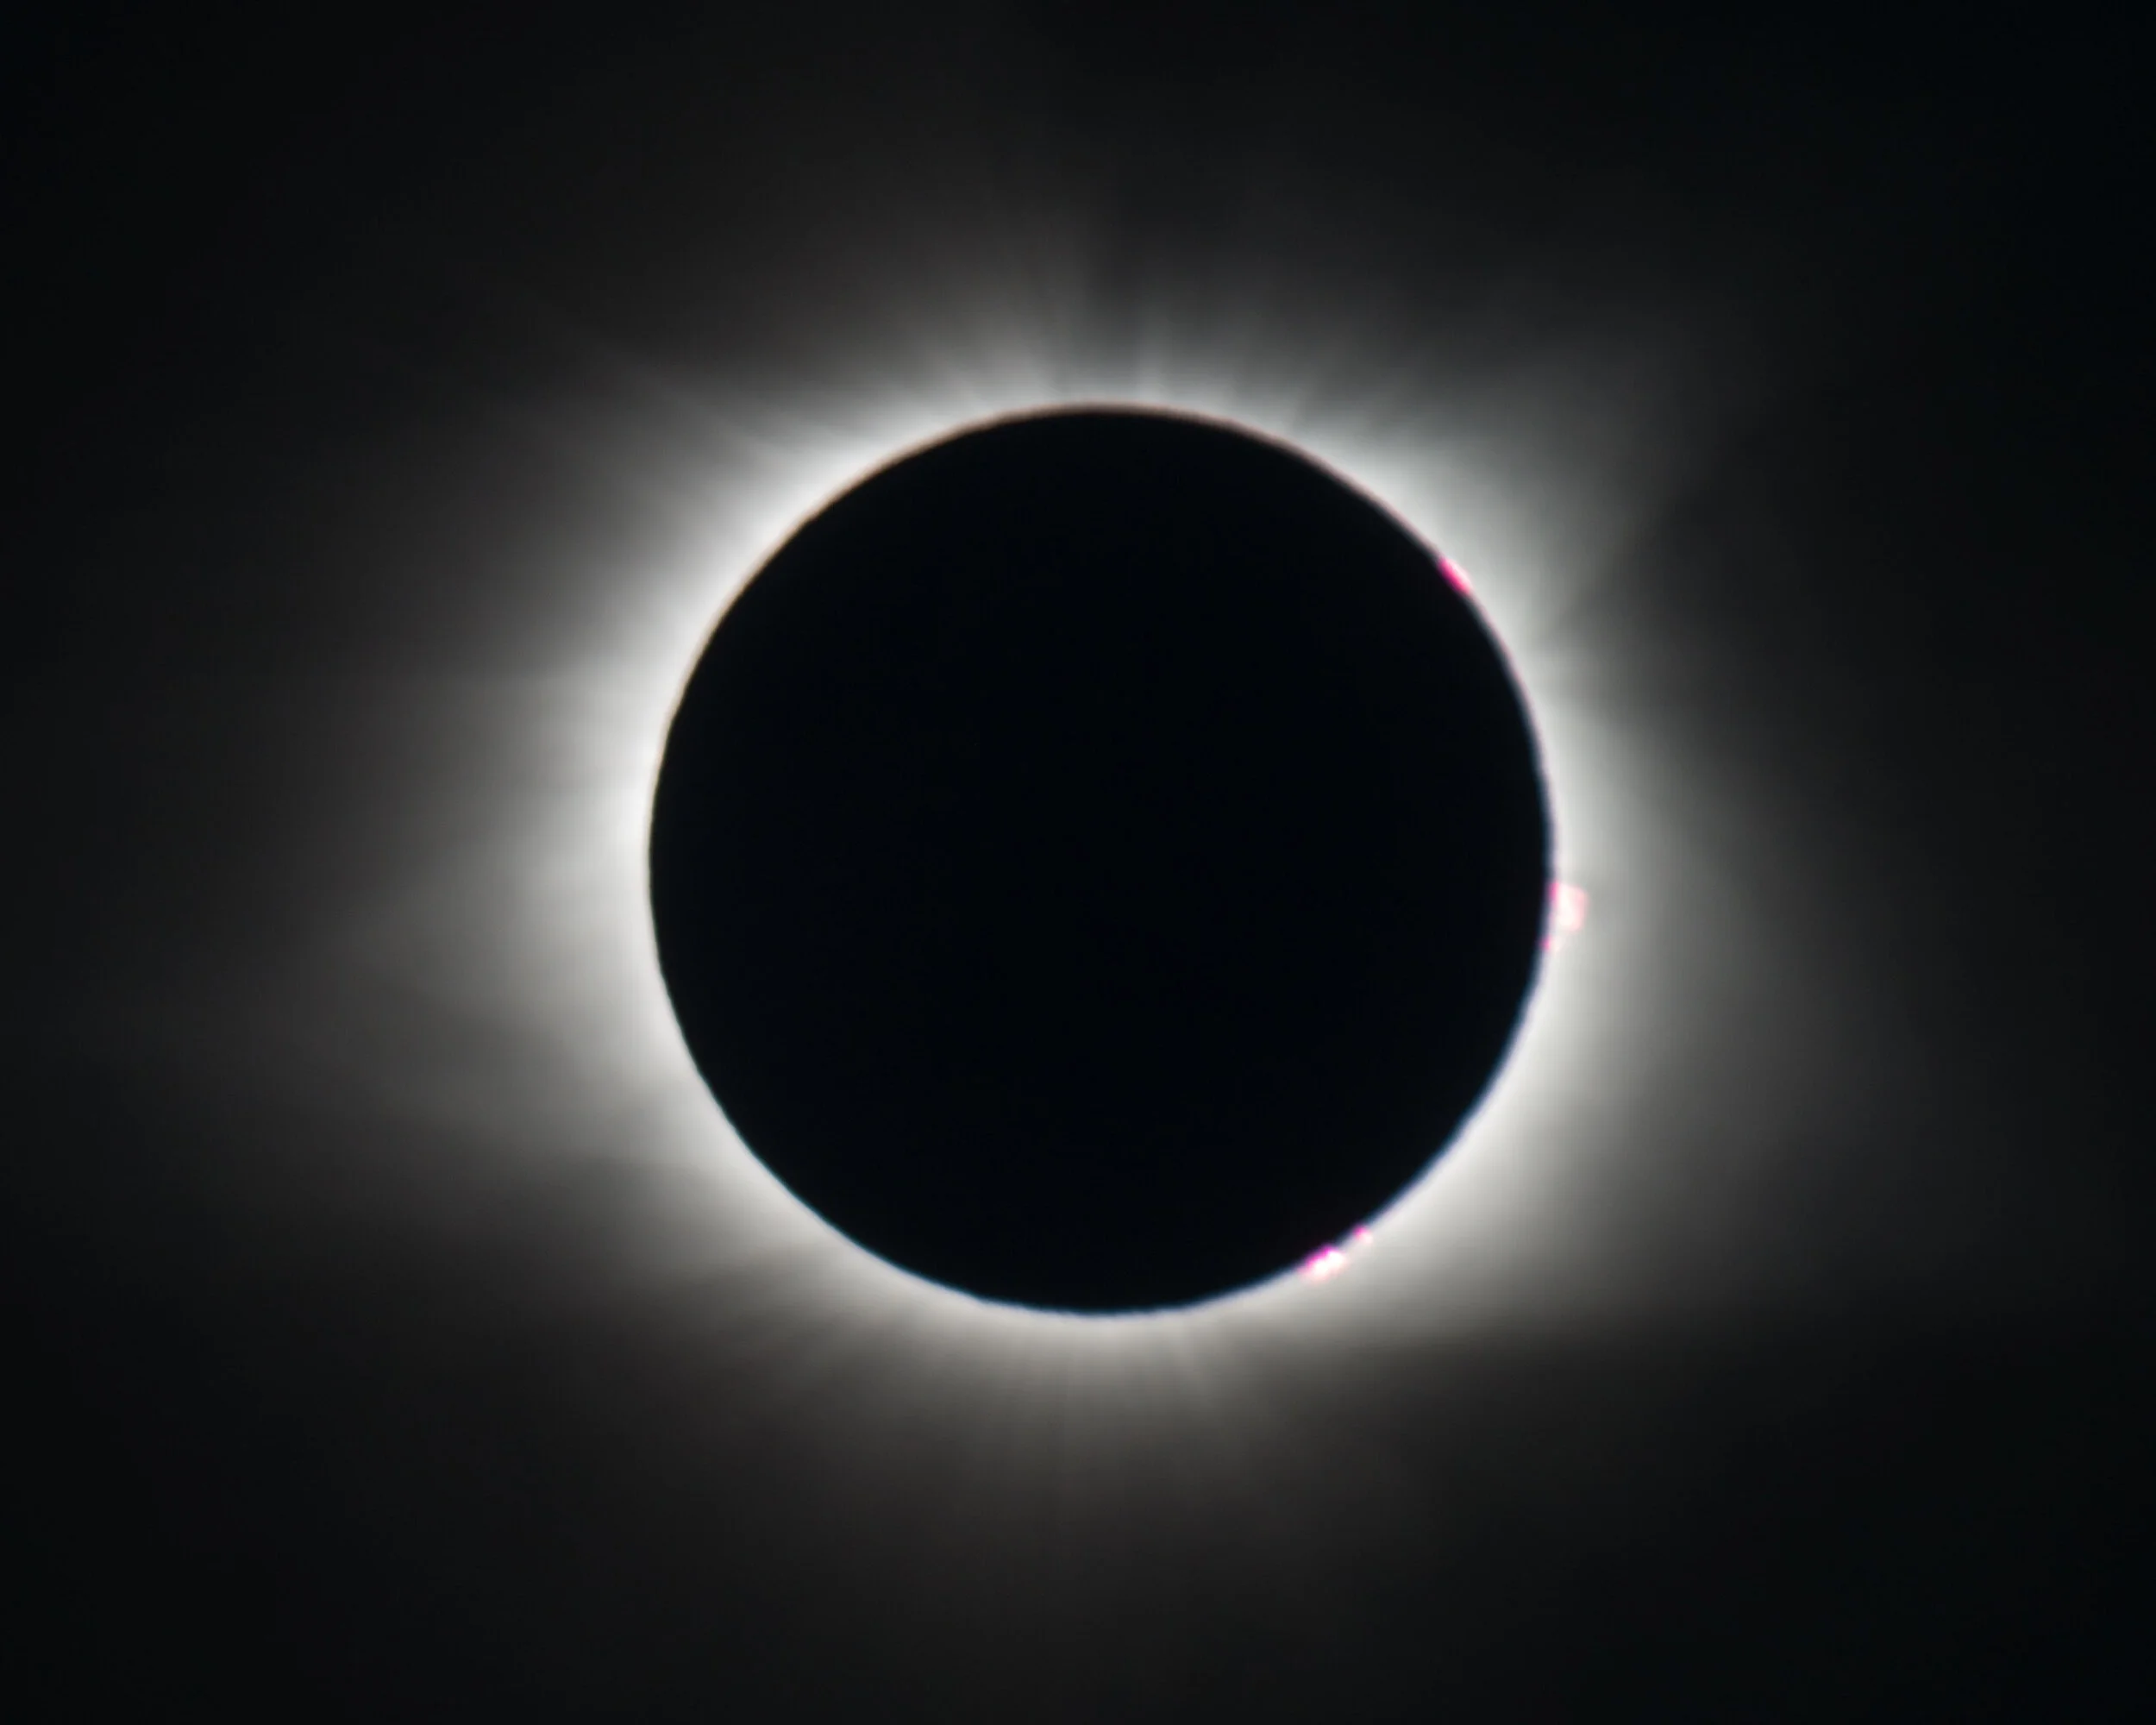
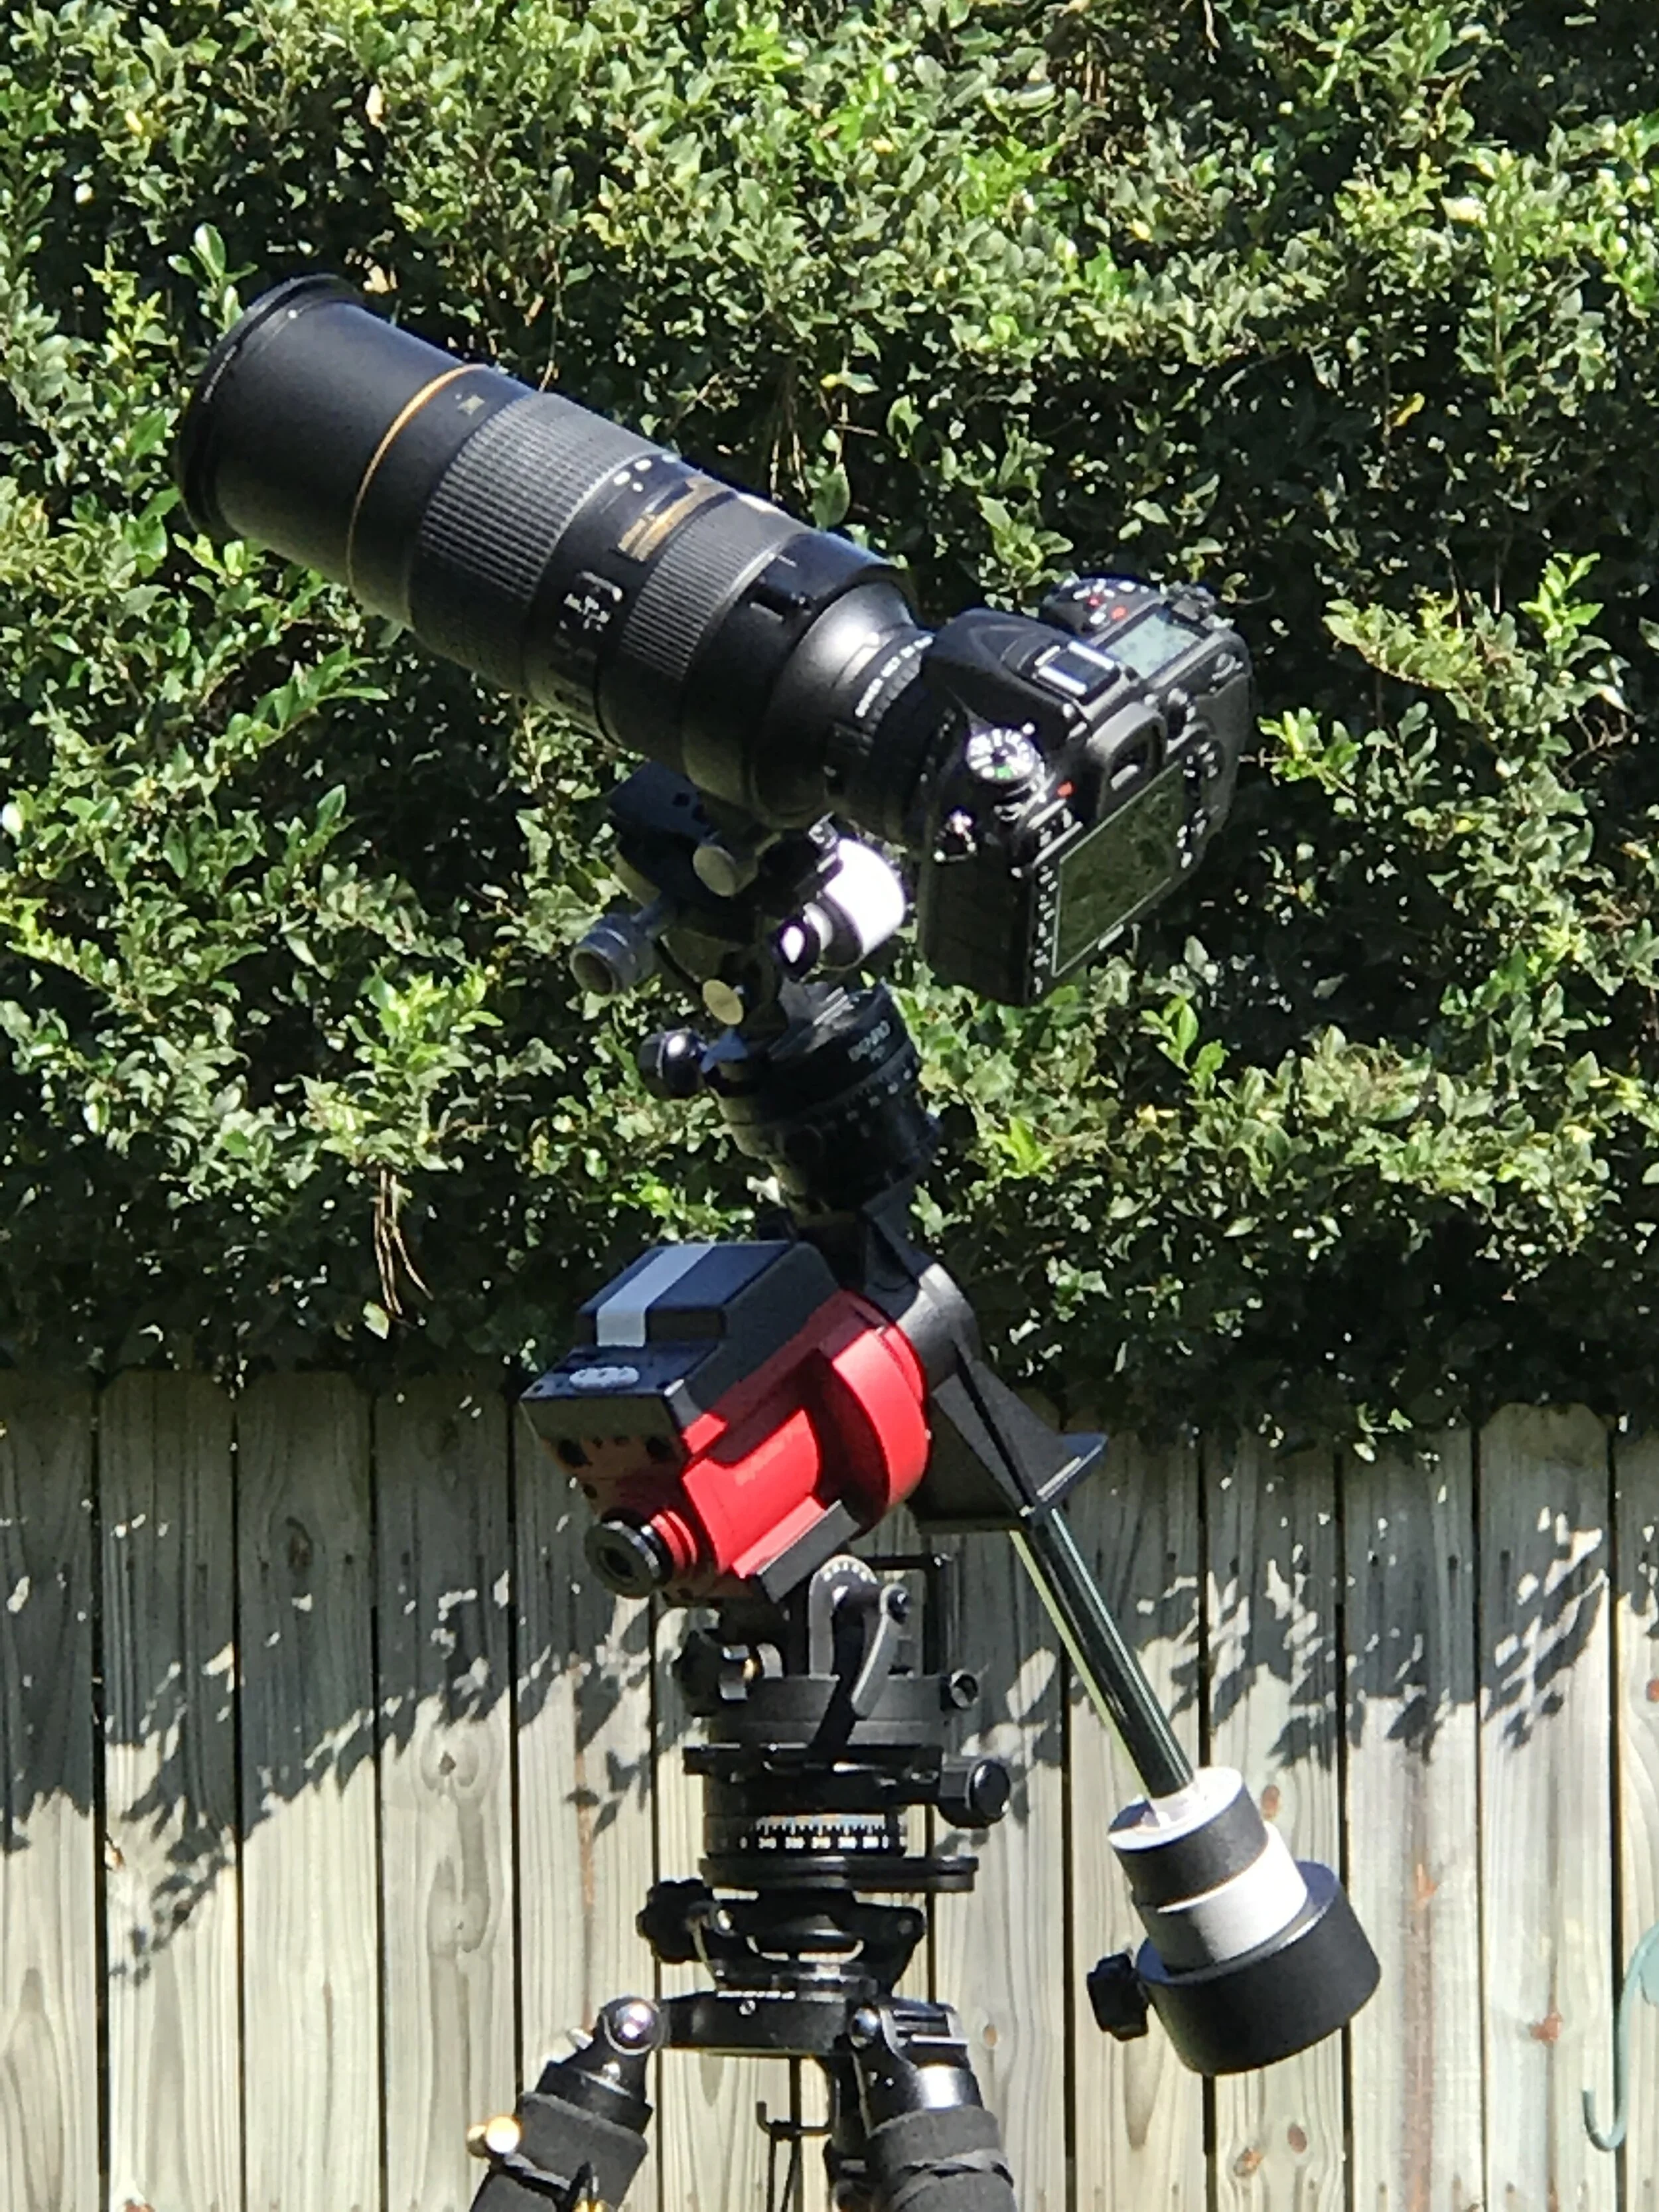
Fast forward to January 2017 and all everyone was talking about for the next 8 months was the summer total solar eclipse. Again clueless, I was going to skip it. I was happy shooting the stars. Then a wise friend said I would regret missing it. He had seen several in his life time and it was special. For 8 months the eclipse was my target. I learned filters, camera settings. I learned the sun had sun spots, who knew? I didn't. I went on the internet every day to see if there were spots and I photographed them every afternoon. The spot was great to focus on. A couple months into my research I realized a tracker would make life so much easier. Chasing the sun with a ball head on my tripod was a pain. I ended up purchasing the iOptron Sky Guider Pro. I learned polar alignment, balance. I was always trying to find a way to keep the camera gear out of the direct sun and burning up.
August 21, 2017 the big day. I set up on a closed golf course in Waterloo, South Carolina right on the center line. It did not take long and the golf course was full of people waiting on the eclipse. We had some clouds, but enough gaps to watch each phase. You could almost hear a pin drop as the last bit of the sun disappeared then the crowd erupted in cheers. Birds were silent, Crickets began to chirp. It was breathtaking, and I was going crazy taking images and changing settings. Wow. I am so glad I listened. Just after the main event finished, a cloud moved in and the rain started. I was so grateful the rain held off till the eclipse finished the main event.
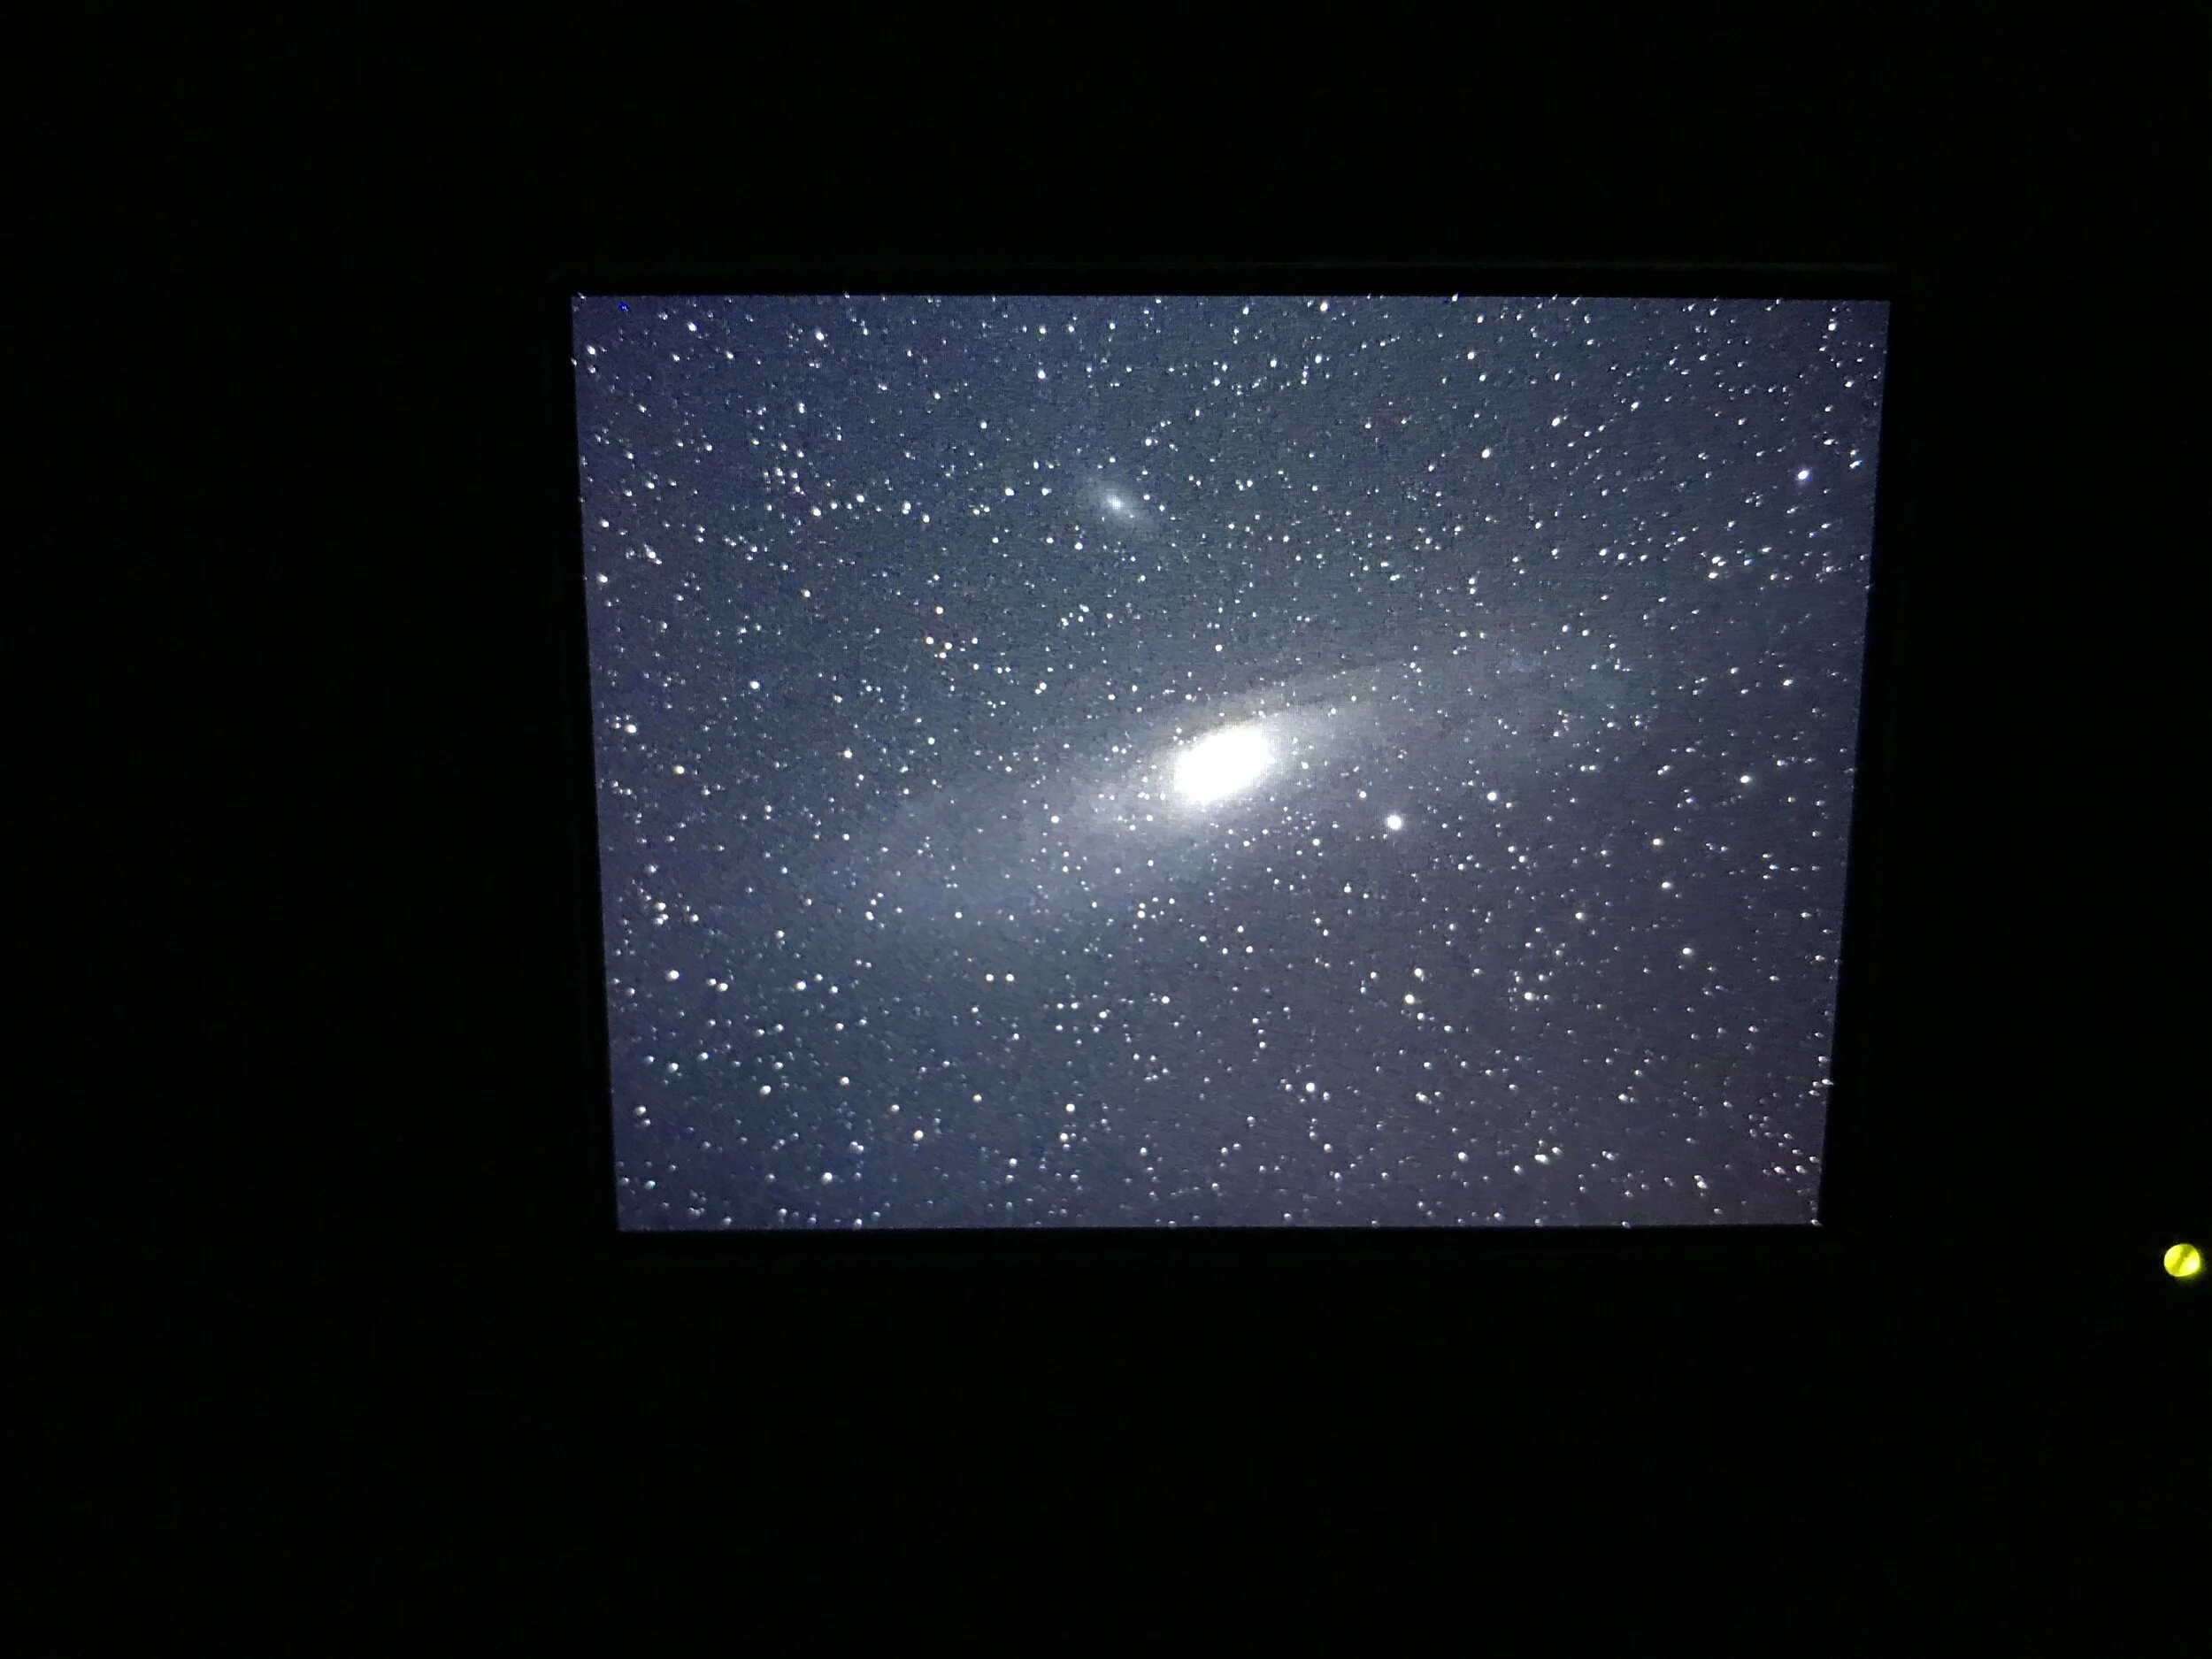
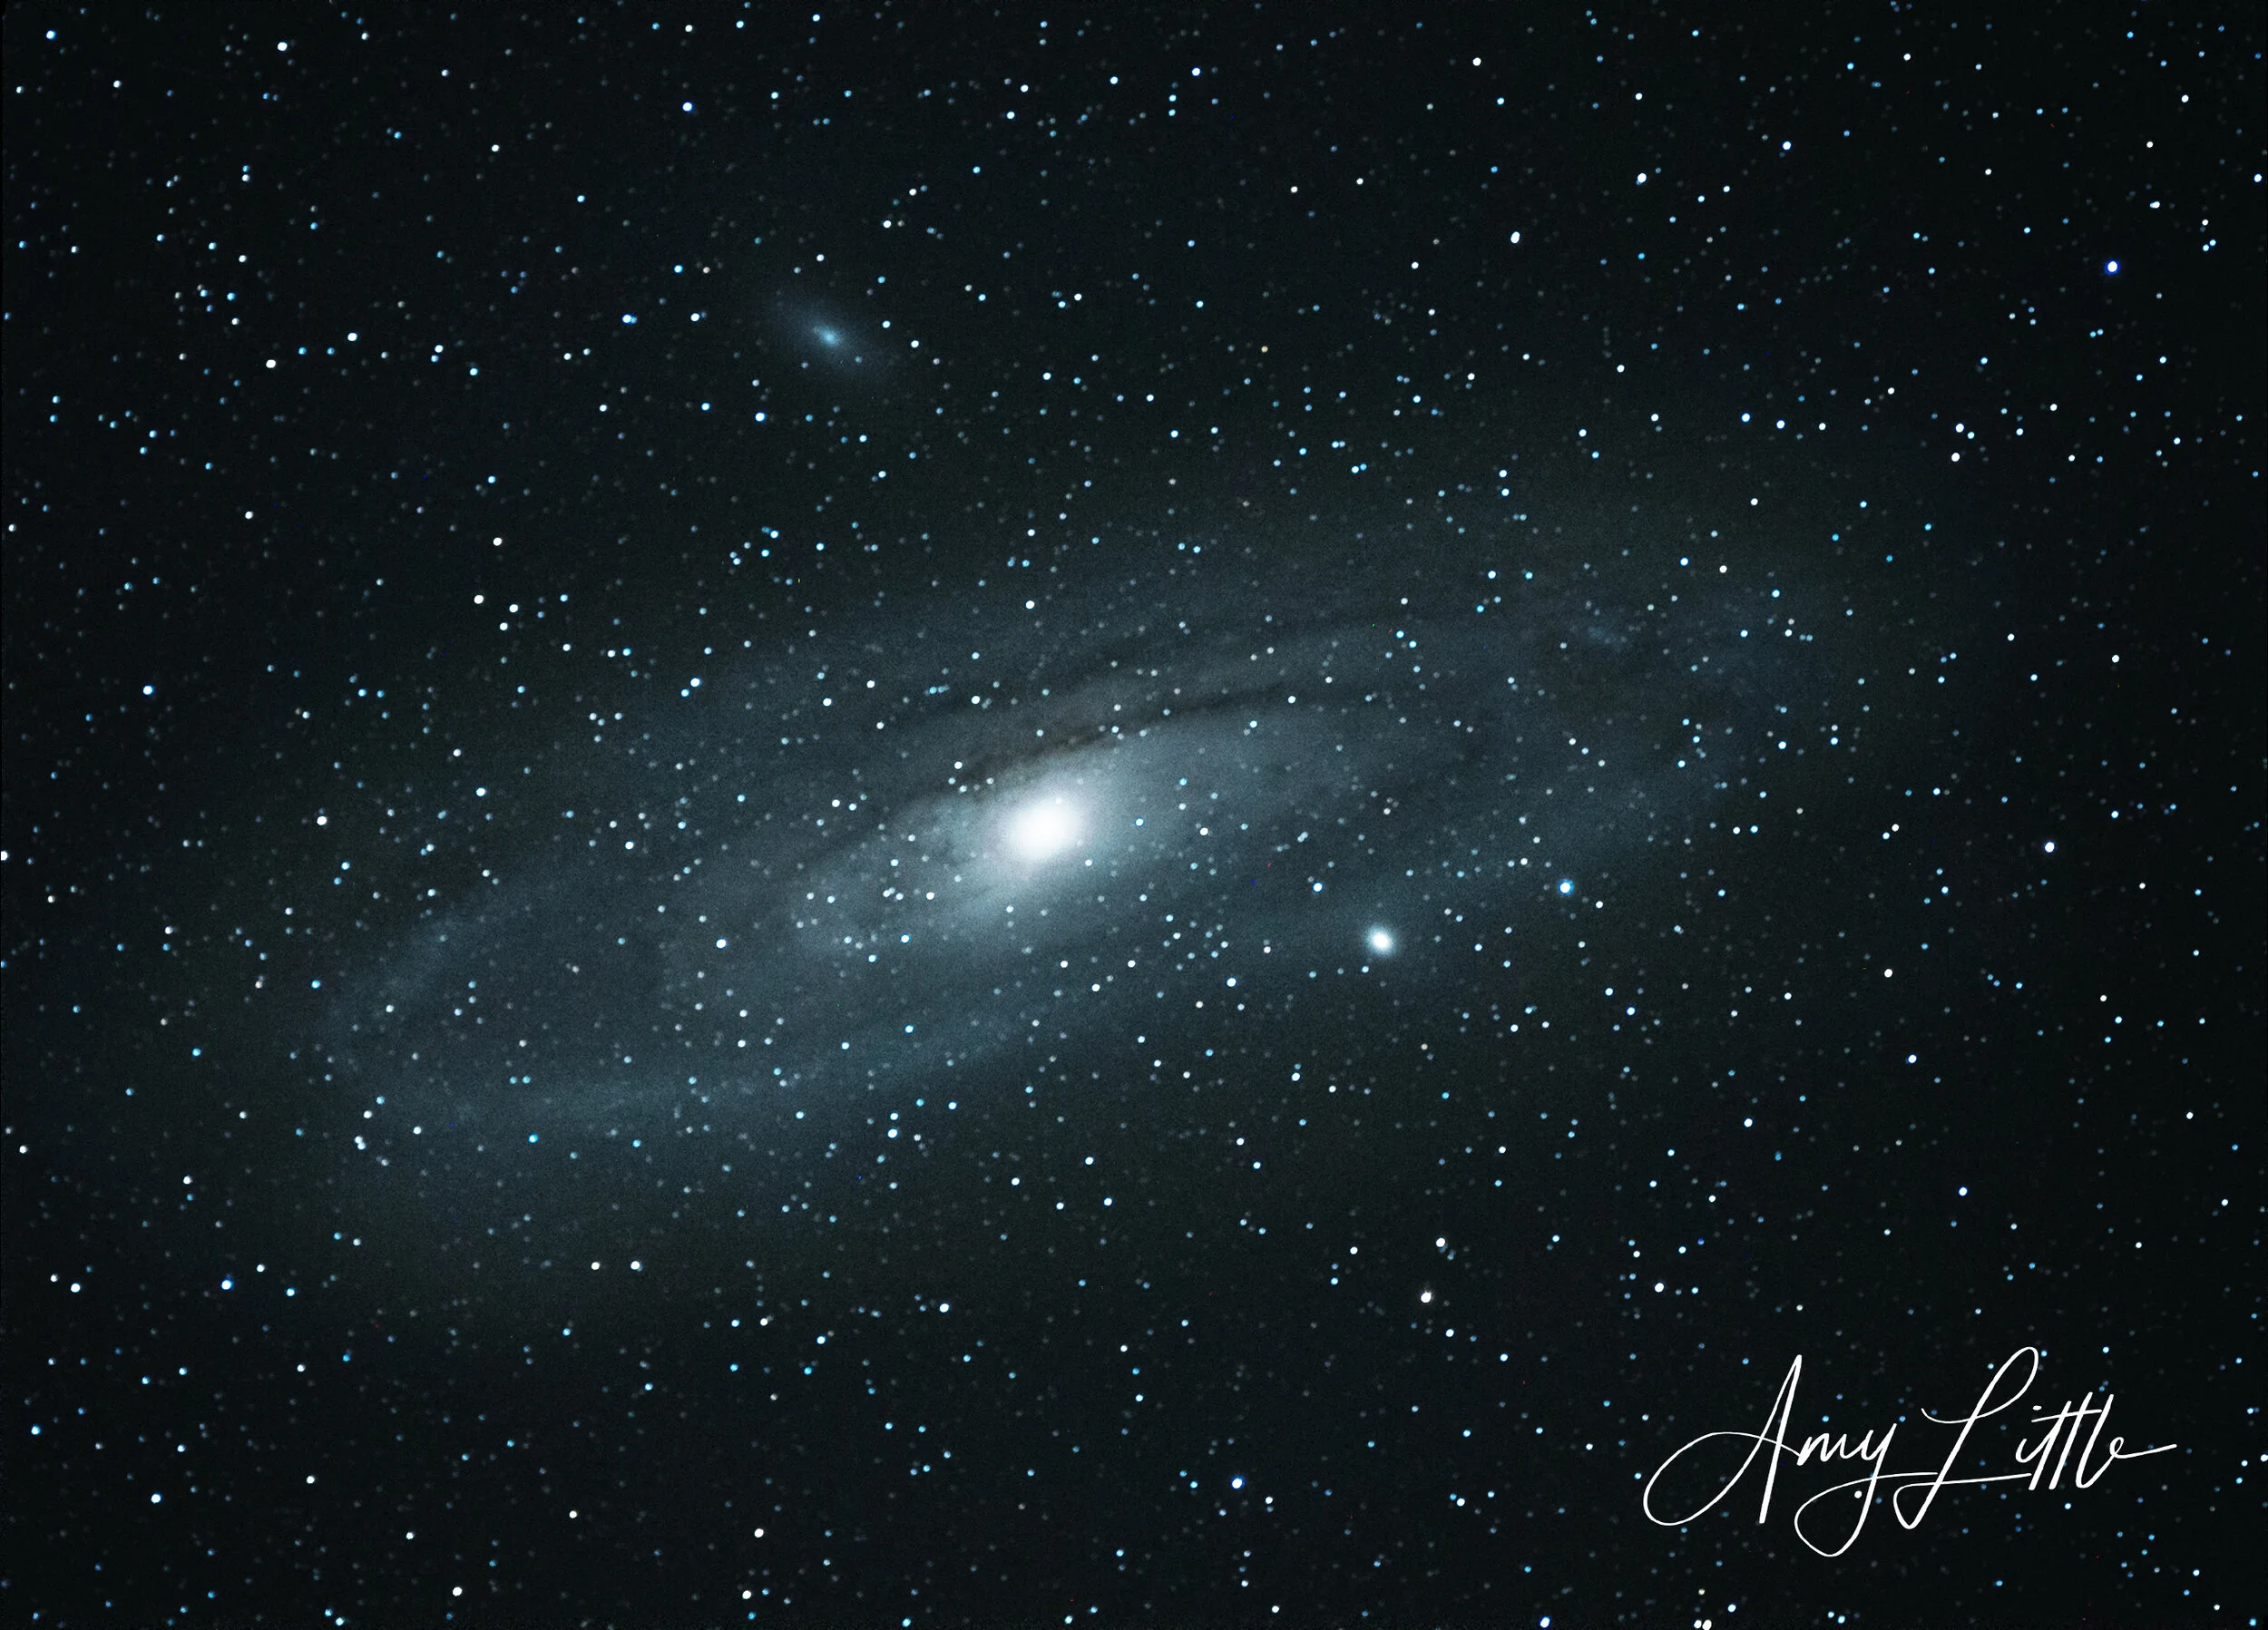
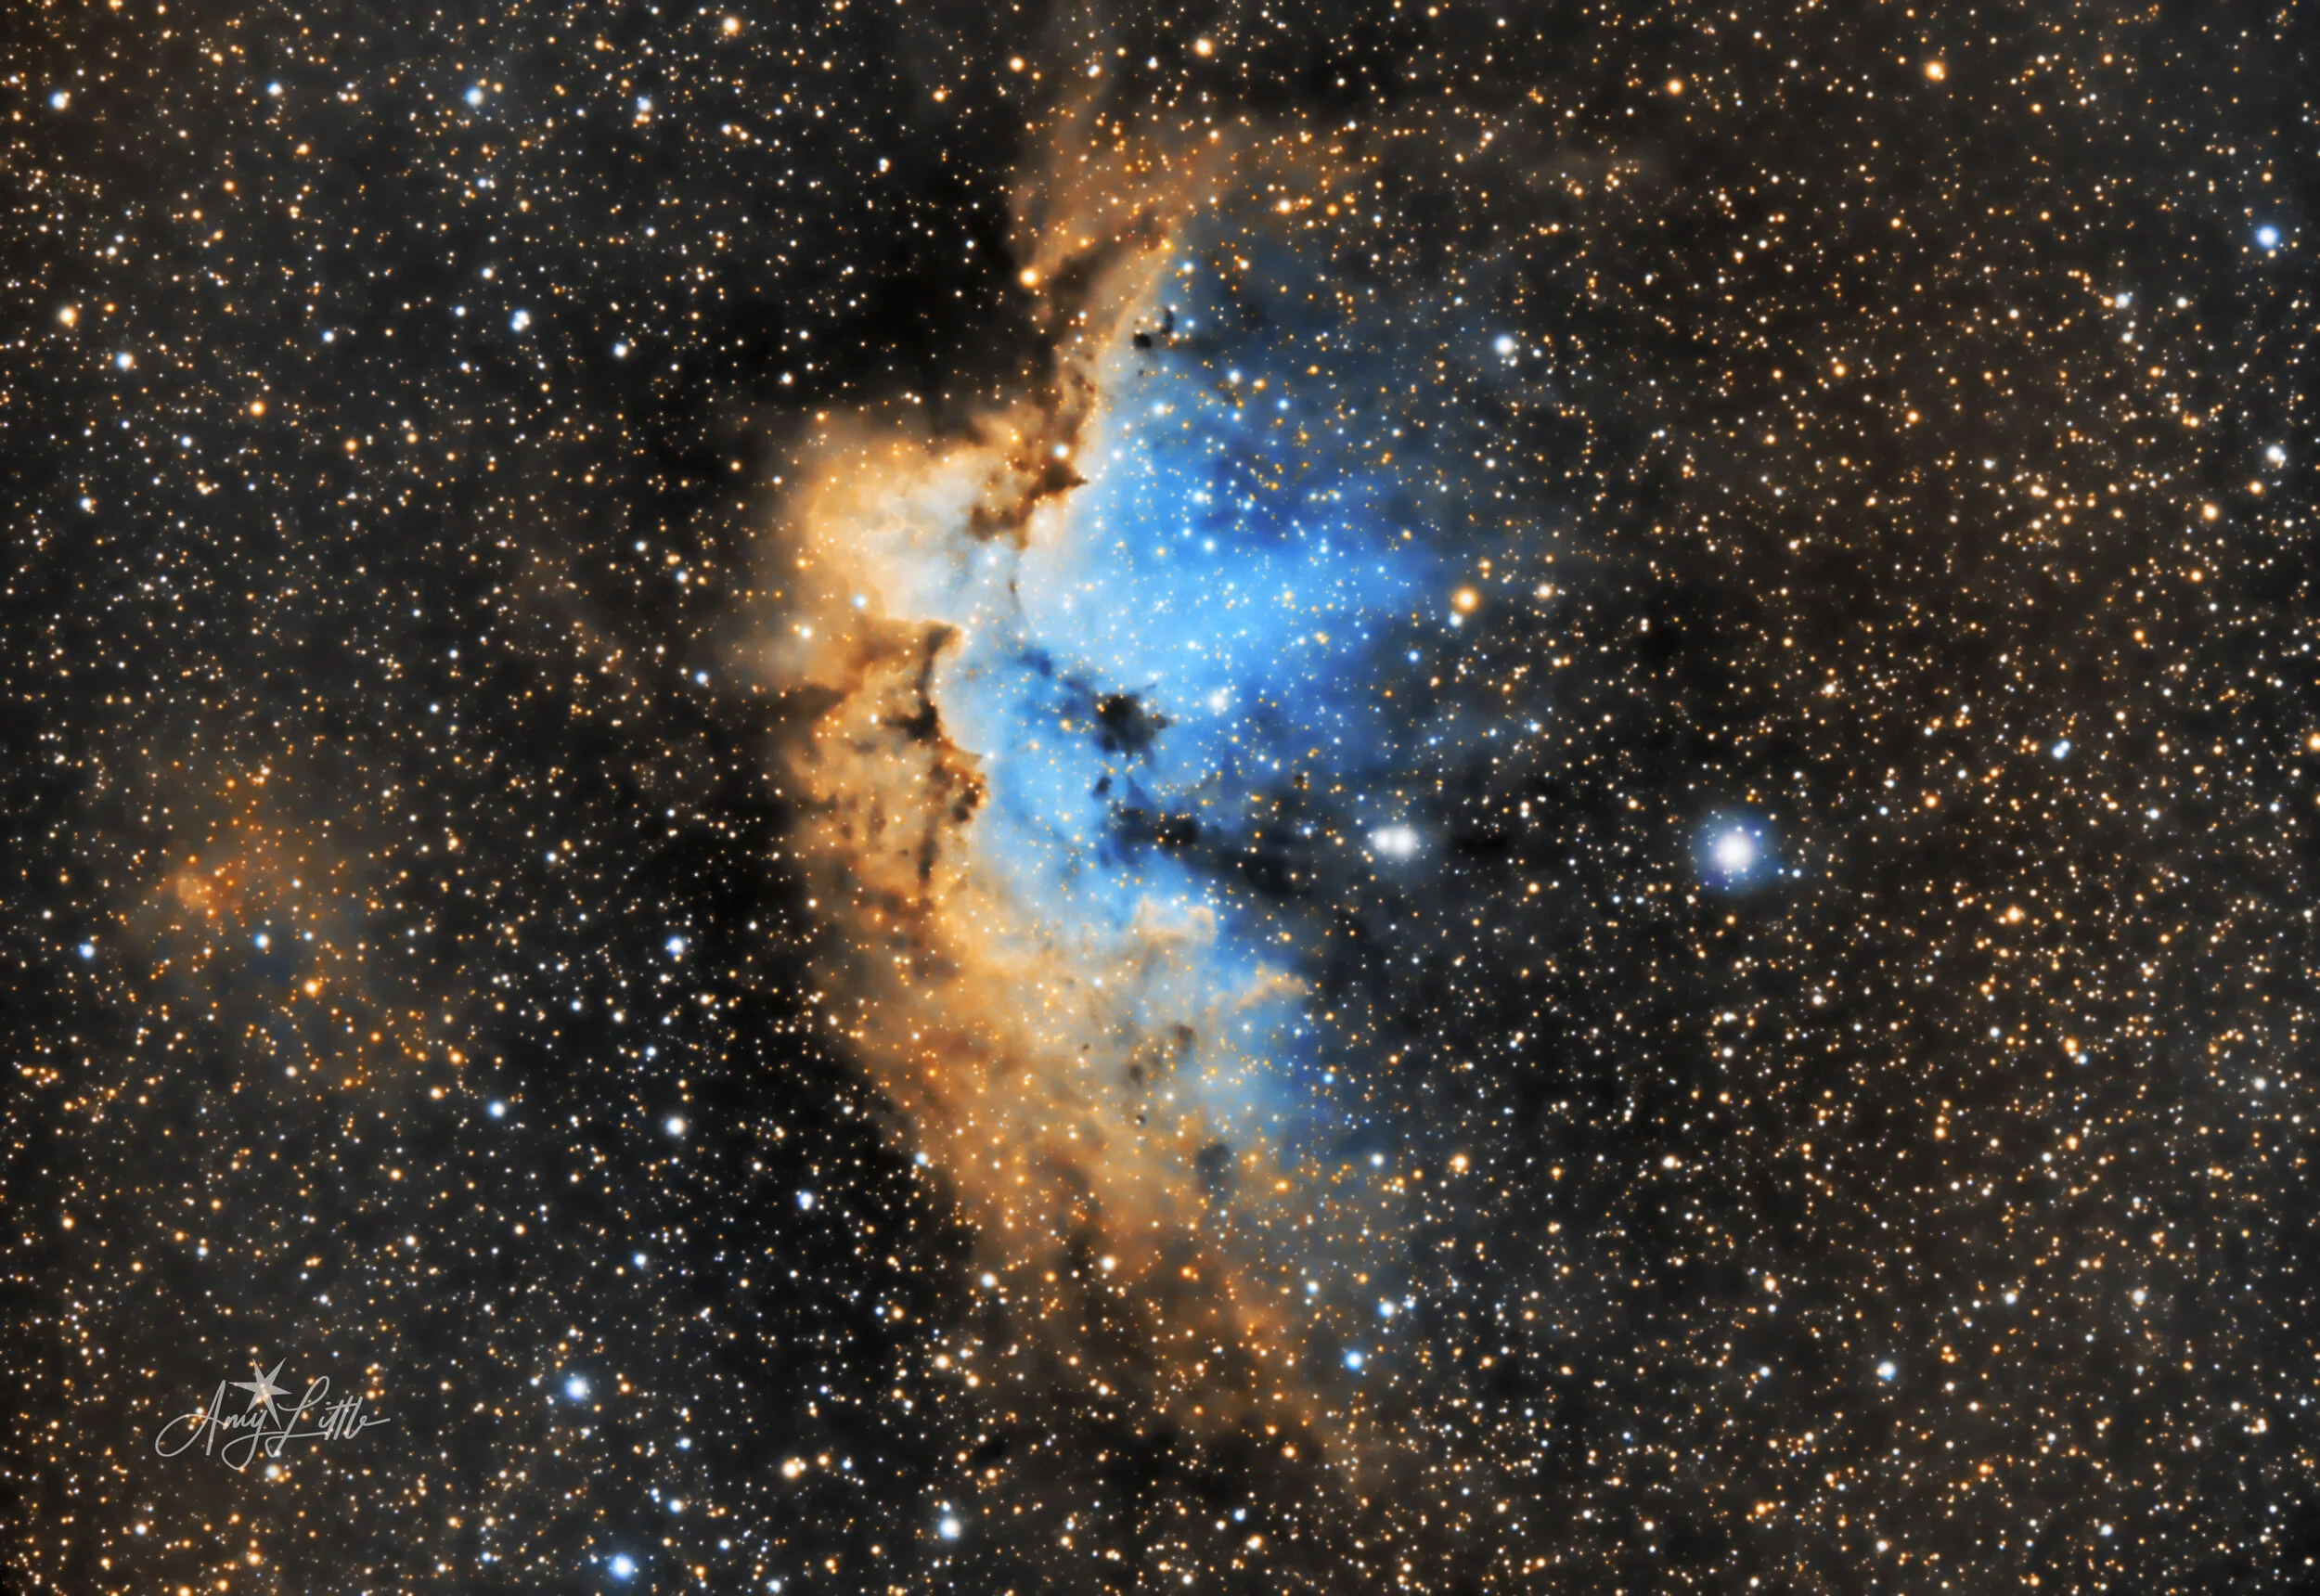
With the eclipse over what was I to do with the star tracker? I did a few long exposure milky way photos. Then my friend told me one night when we were out that I could capture deep space with the tracker, DSLR and telephoto lens. At this point I have never seen an outer space image unless it was in a text book. He taught me how to star walk to Andromeda.
When I took that first image I was hooked.
Today I look back and I see a bad image, but on that night I was the dancing fool under the stars. I photographed SPACE!
The next day I started to research space. I landed on AstroBackyard's YouTube Channel. Trevor Jones was showing a video of the iOptron Sky guider pro with a Williams Optic Telescope on it. The size was within the weight capacity of the mount. Late on a Friday night I ended up on the Williams Optic website. I found the GranTurismo GT71 and it was within my budget. I saw the Chat was open and started to ask questions and was surprised when William himself started replying. He eventually turned me over to his son as he was the astrophotographer. That night I learned that if I purchased a telescope I also needed a field flattener. The flatteners were on backorder, but they let me purchase one and
promised to ship it when it came in. To my pleasant surprise the telescope arrived a week later with the field flattener in the package. Serious customer service!
I was surprised when
William
himself started replying.

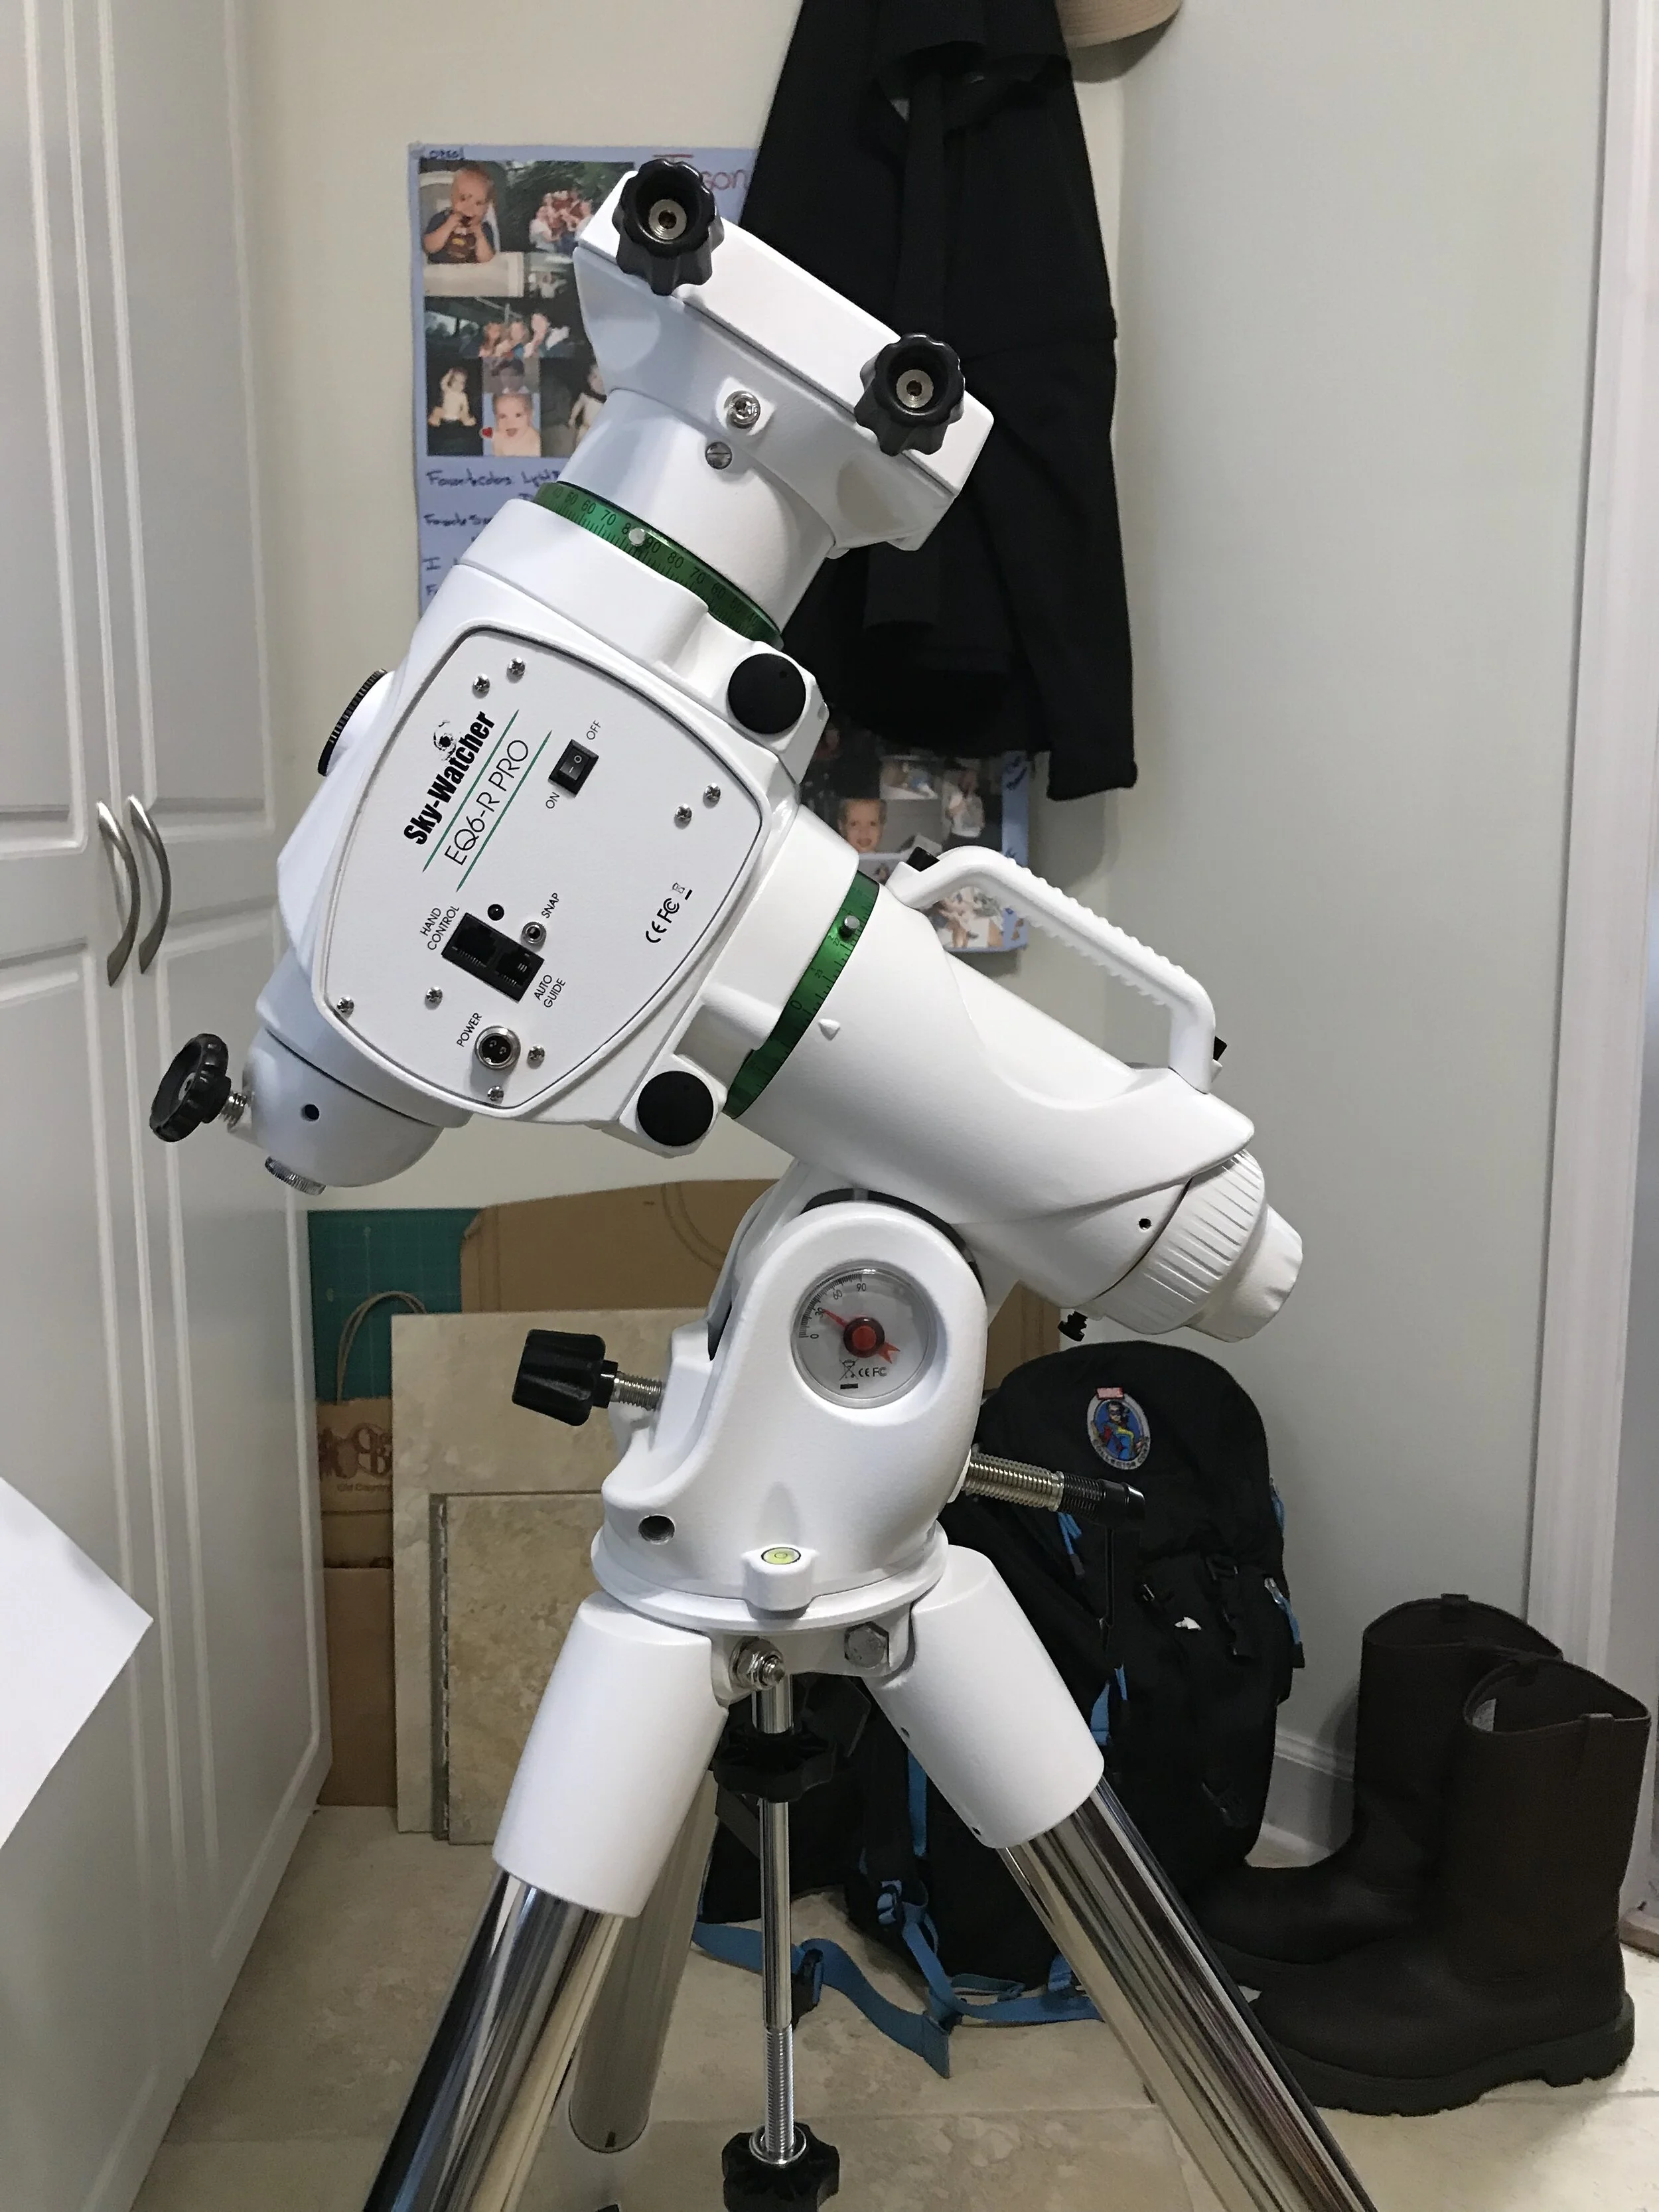
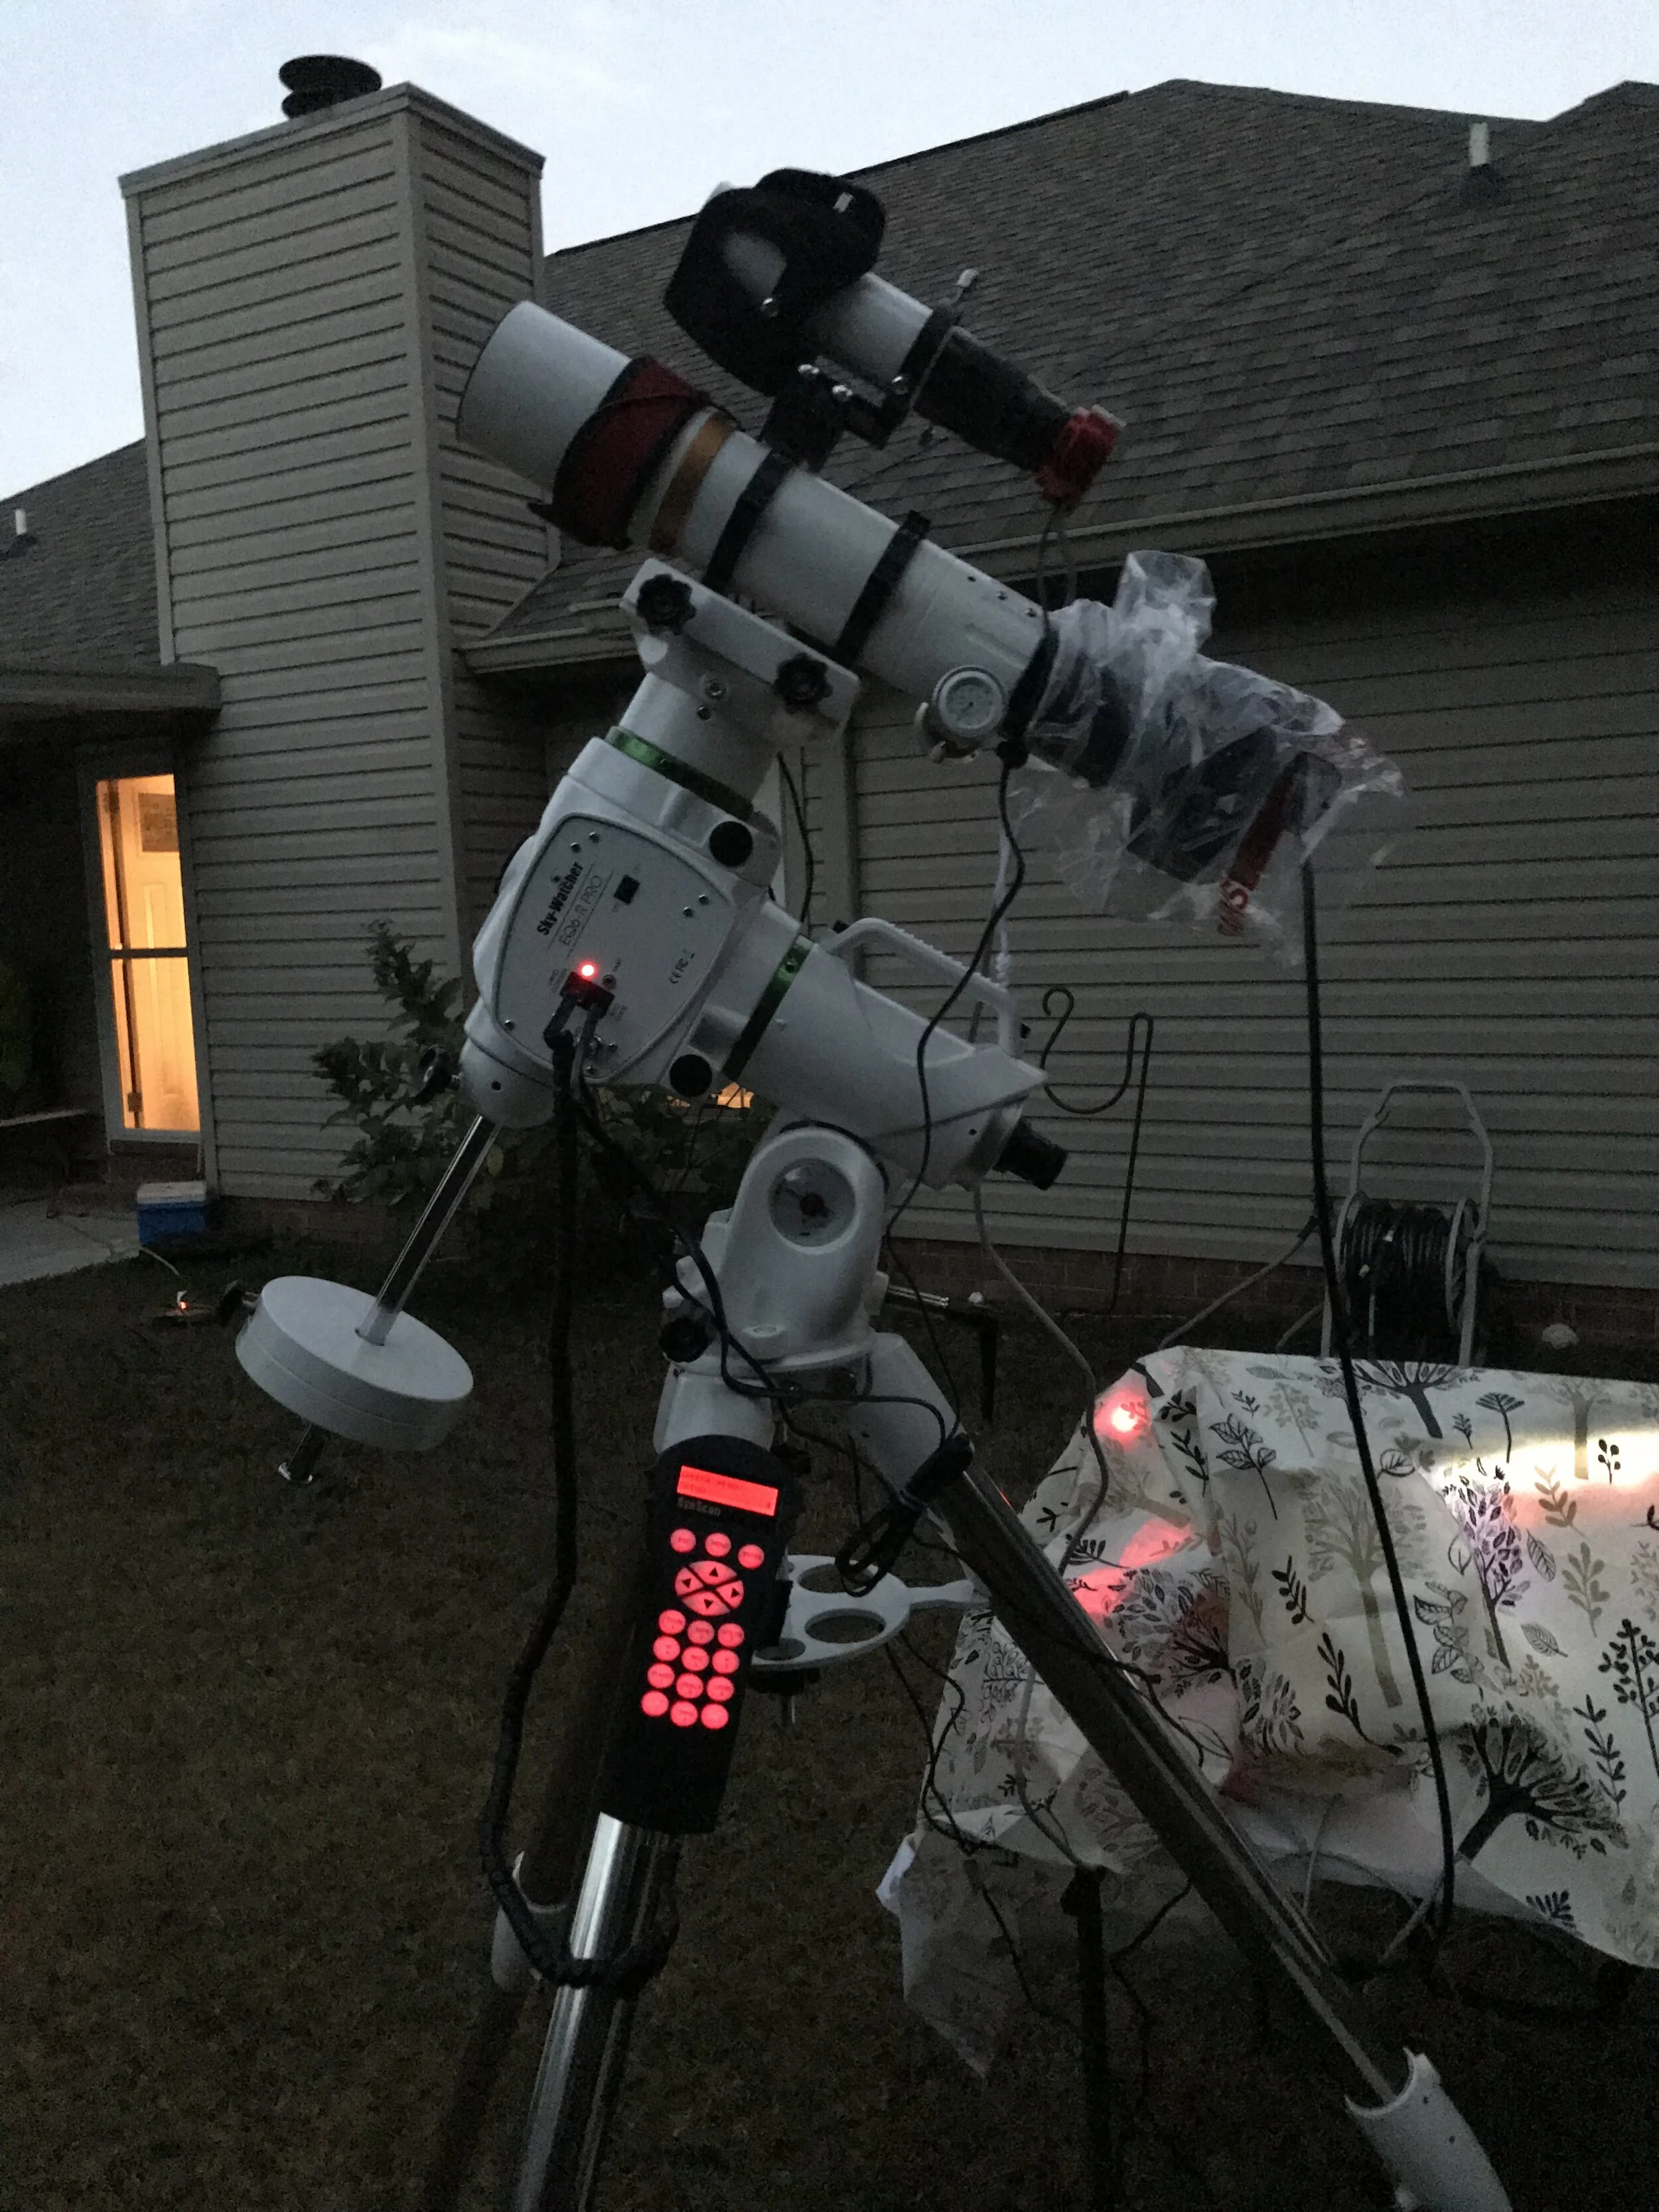
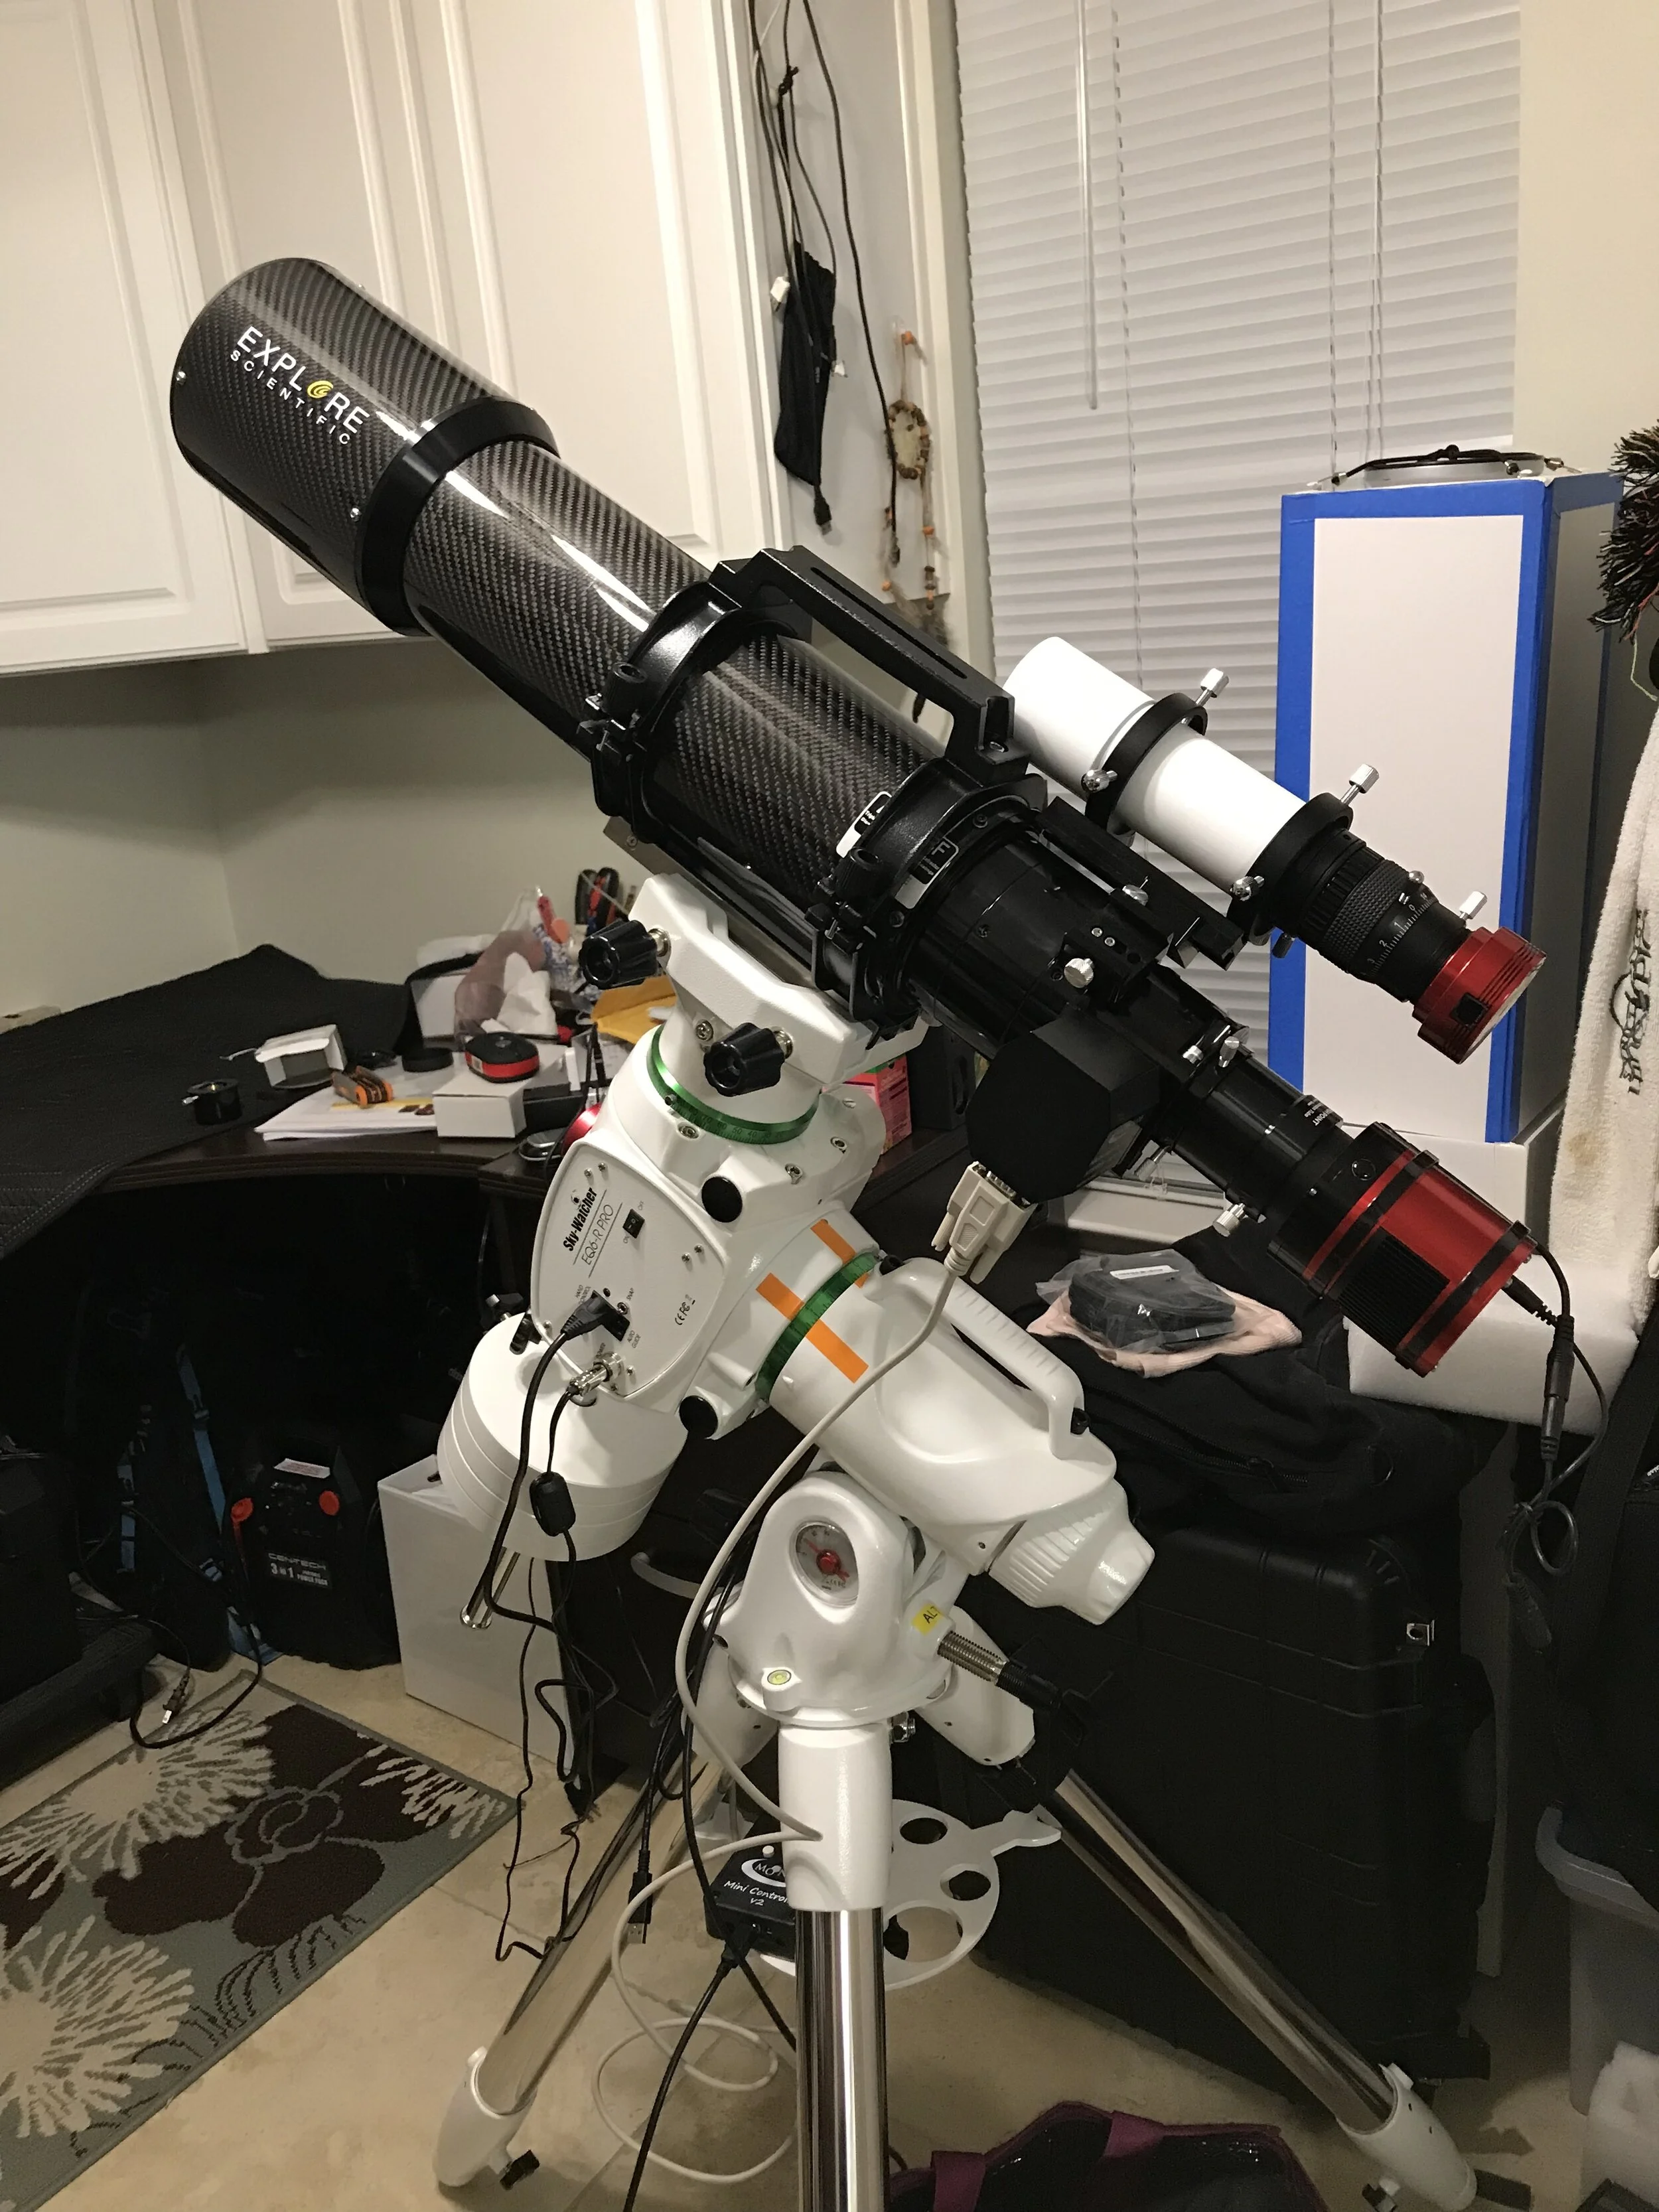
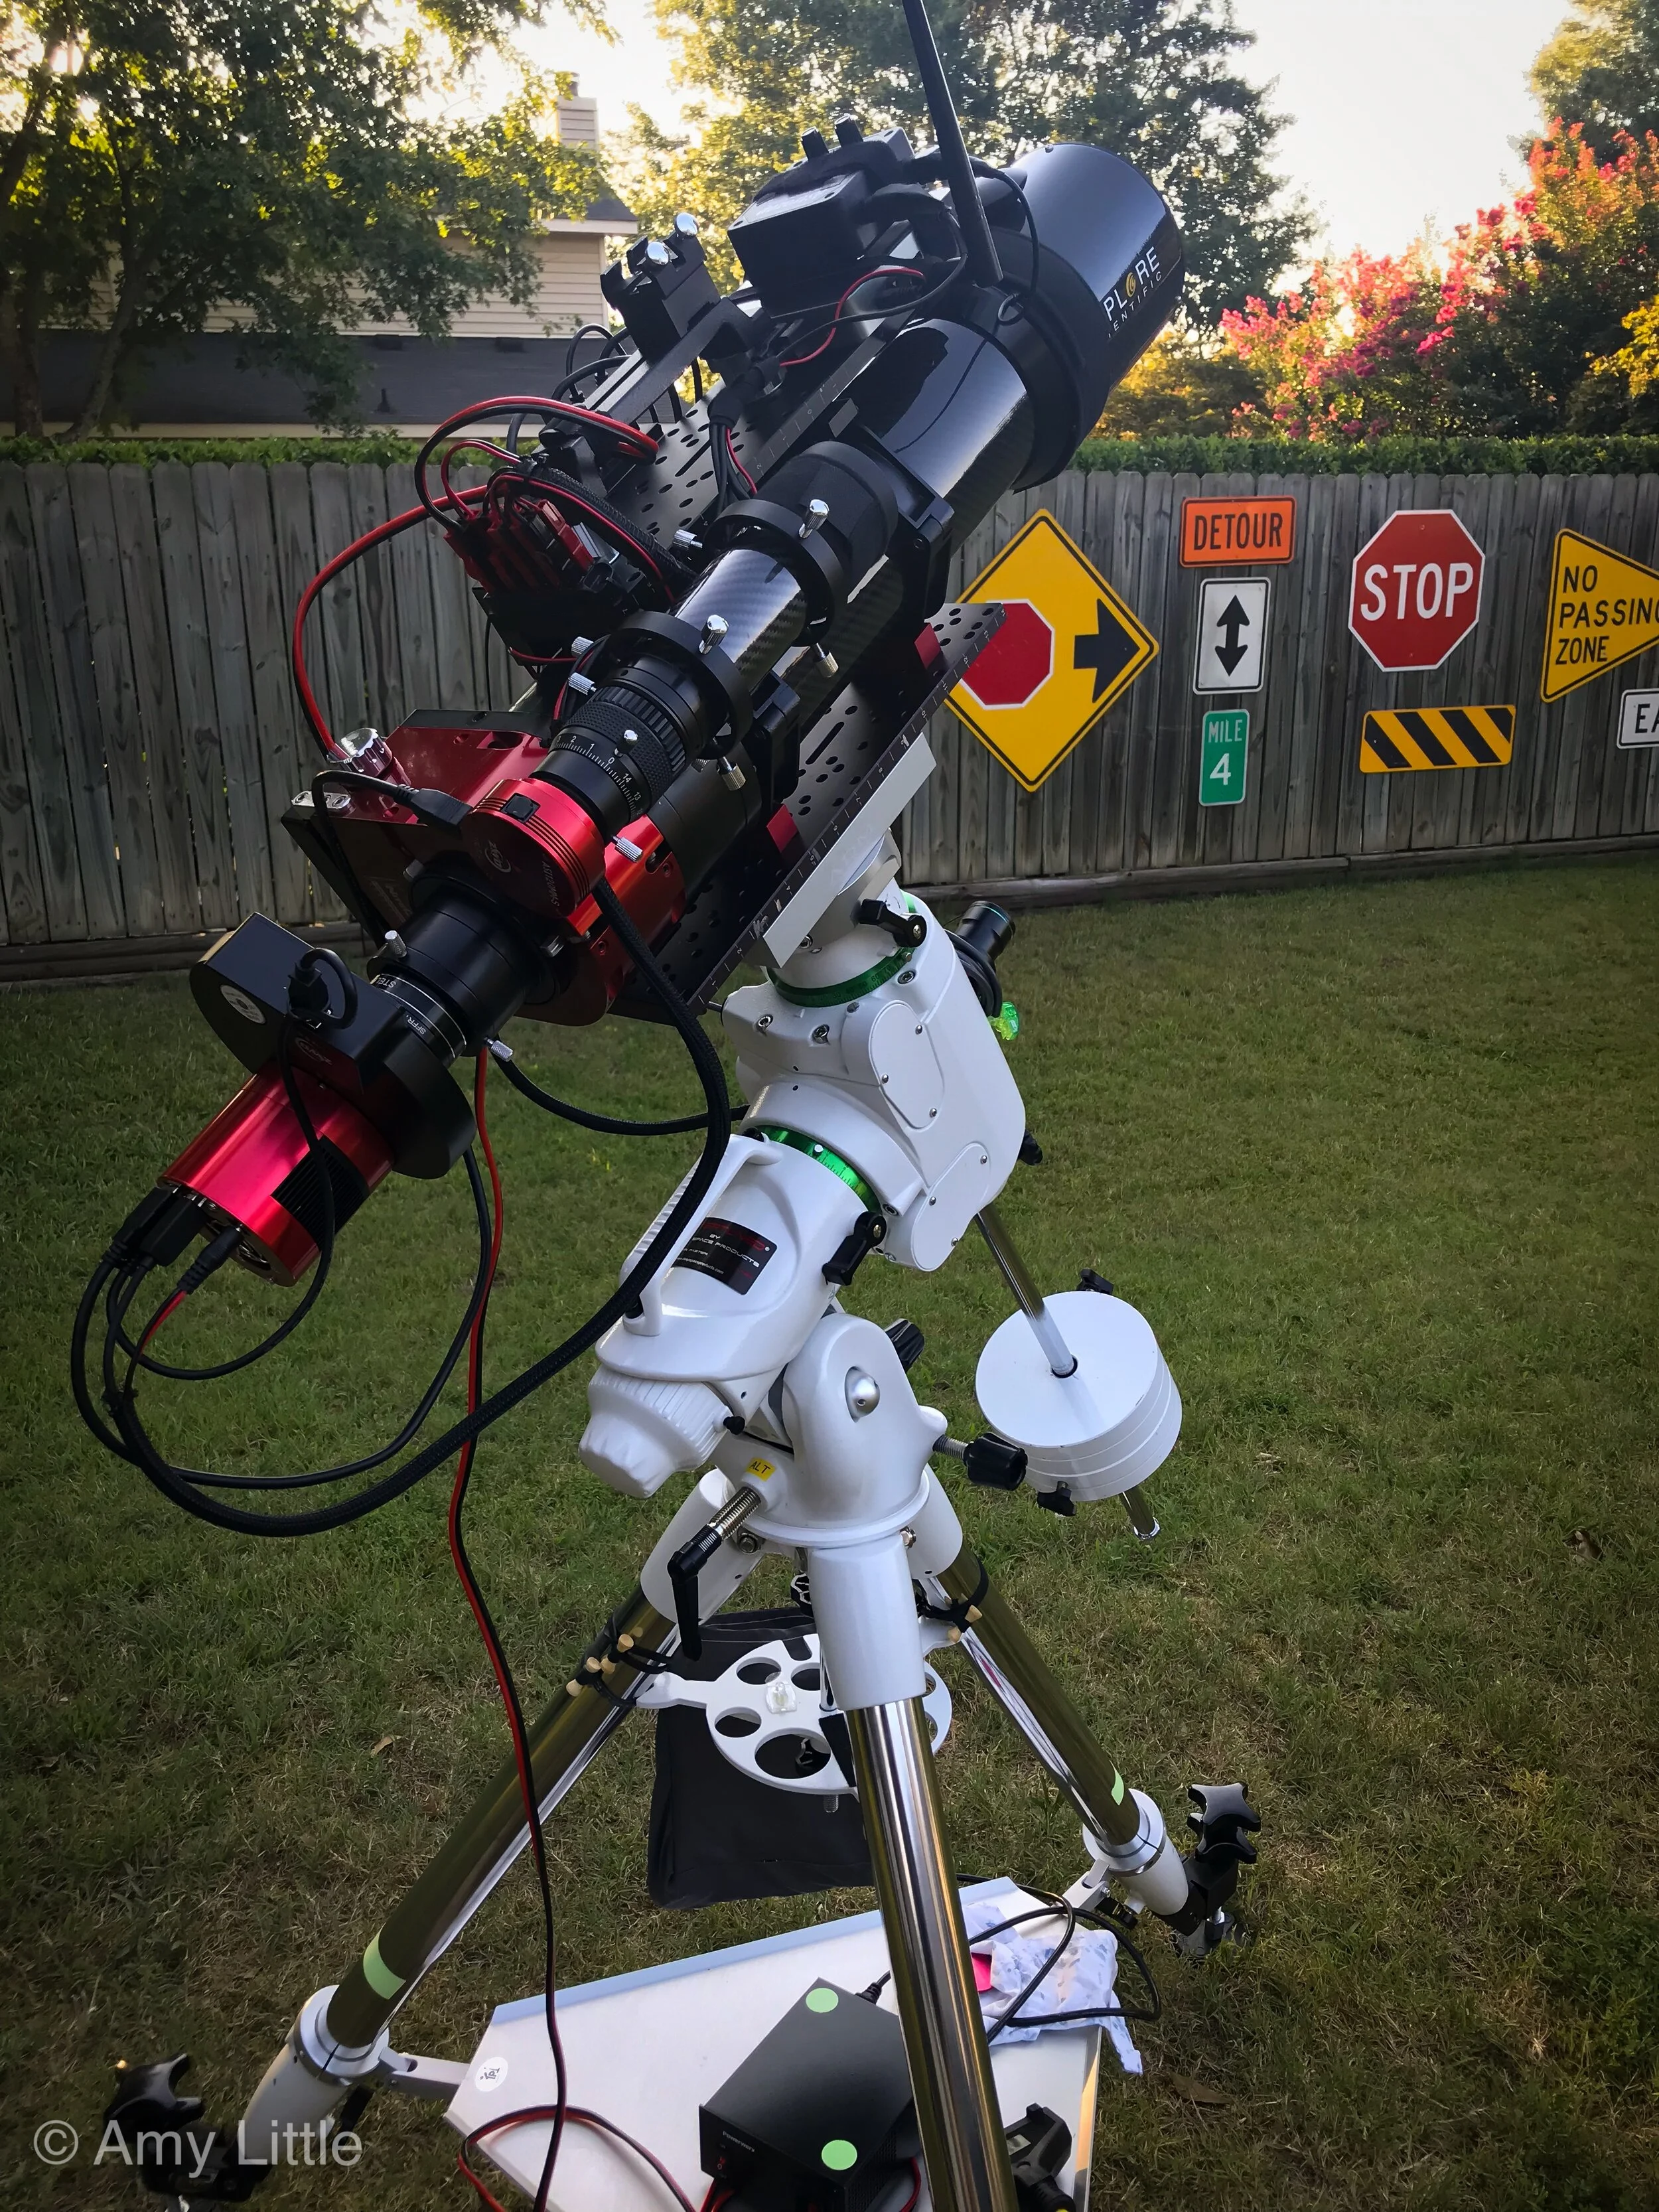
I imaged with the iOptron sky guider and the WO GT71 for a couple months. I quickly learned my limitations and what I wanted to accomplish. Back to Google. I did a lot of research on mounts. Finally I selected one, I called High Point Scientific to verify this is what I needed for my goals. We had a great conversation and I quickly learned that my selection would limit me quickly and I needed to look at something else. No pressure to purchase, just some solid advice. A week later I purchased the Sky Watcher EQ6R-Pro. What a beast compared to my little iOptron. I just jumped into the deep end of the pool.
There was a huge learning curve with the new mount. I joined several facebook like “The BackyardAstro Imaging Club” & “Telescope Addicts” groups and asked a ton of questions. Everyone is so helpful and friendly. A local club notice a post and recommended that I stop by a meeting. I did and joining the club was the best decision I made. I joined them on an outing and they had all my gear up and running in no time and showed me how to do it! Having friends in the hobby is so helpful.
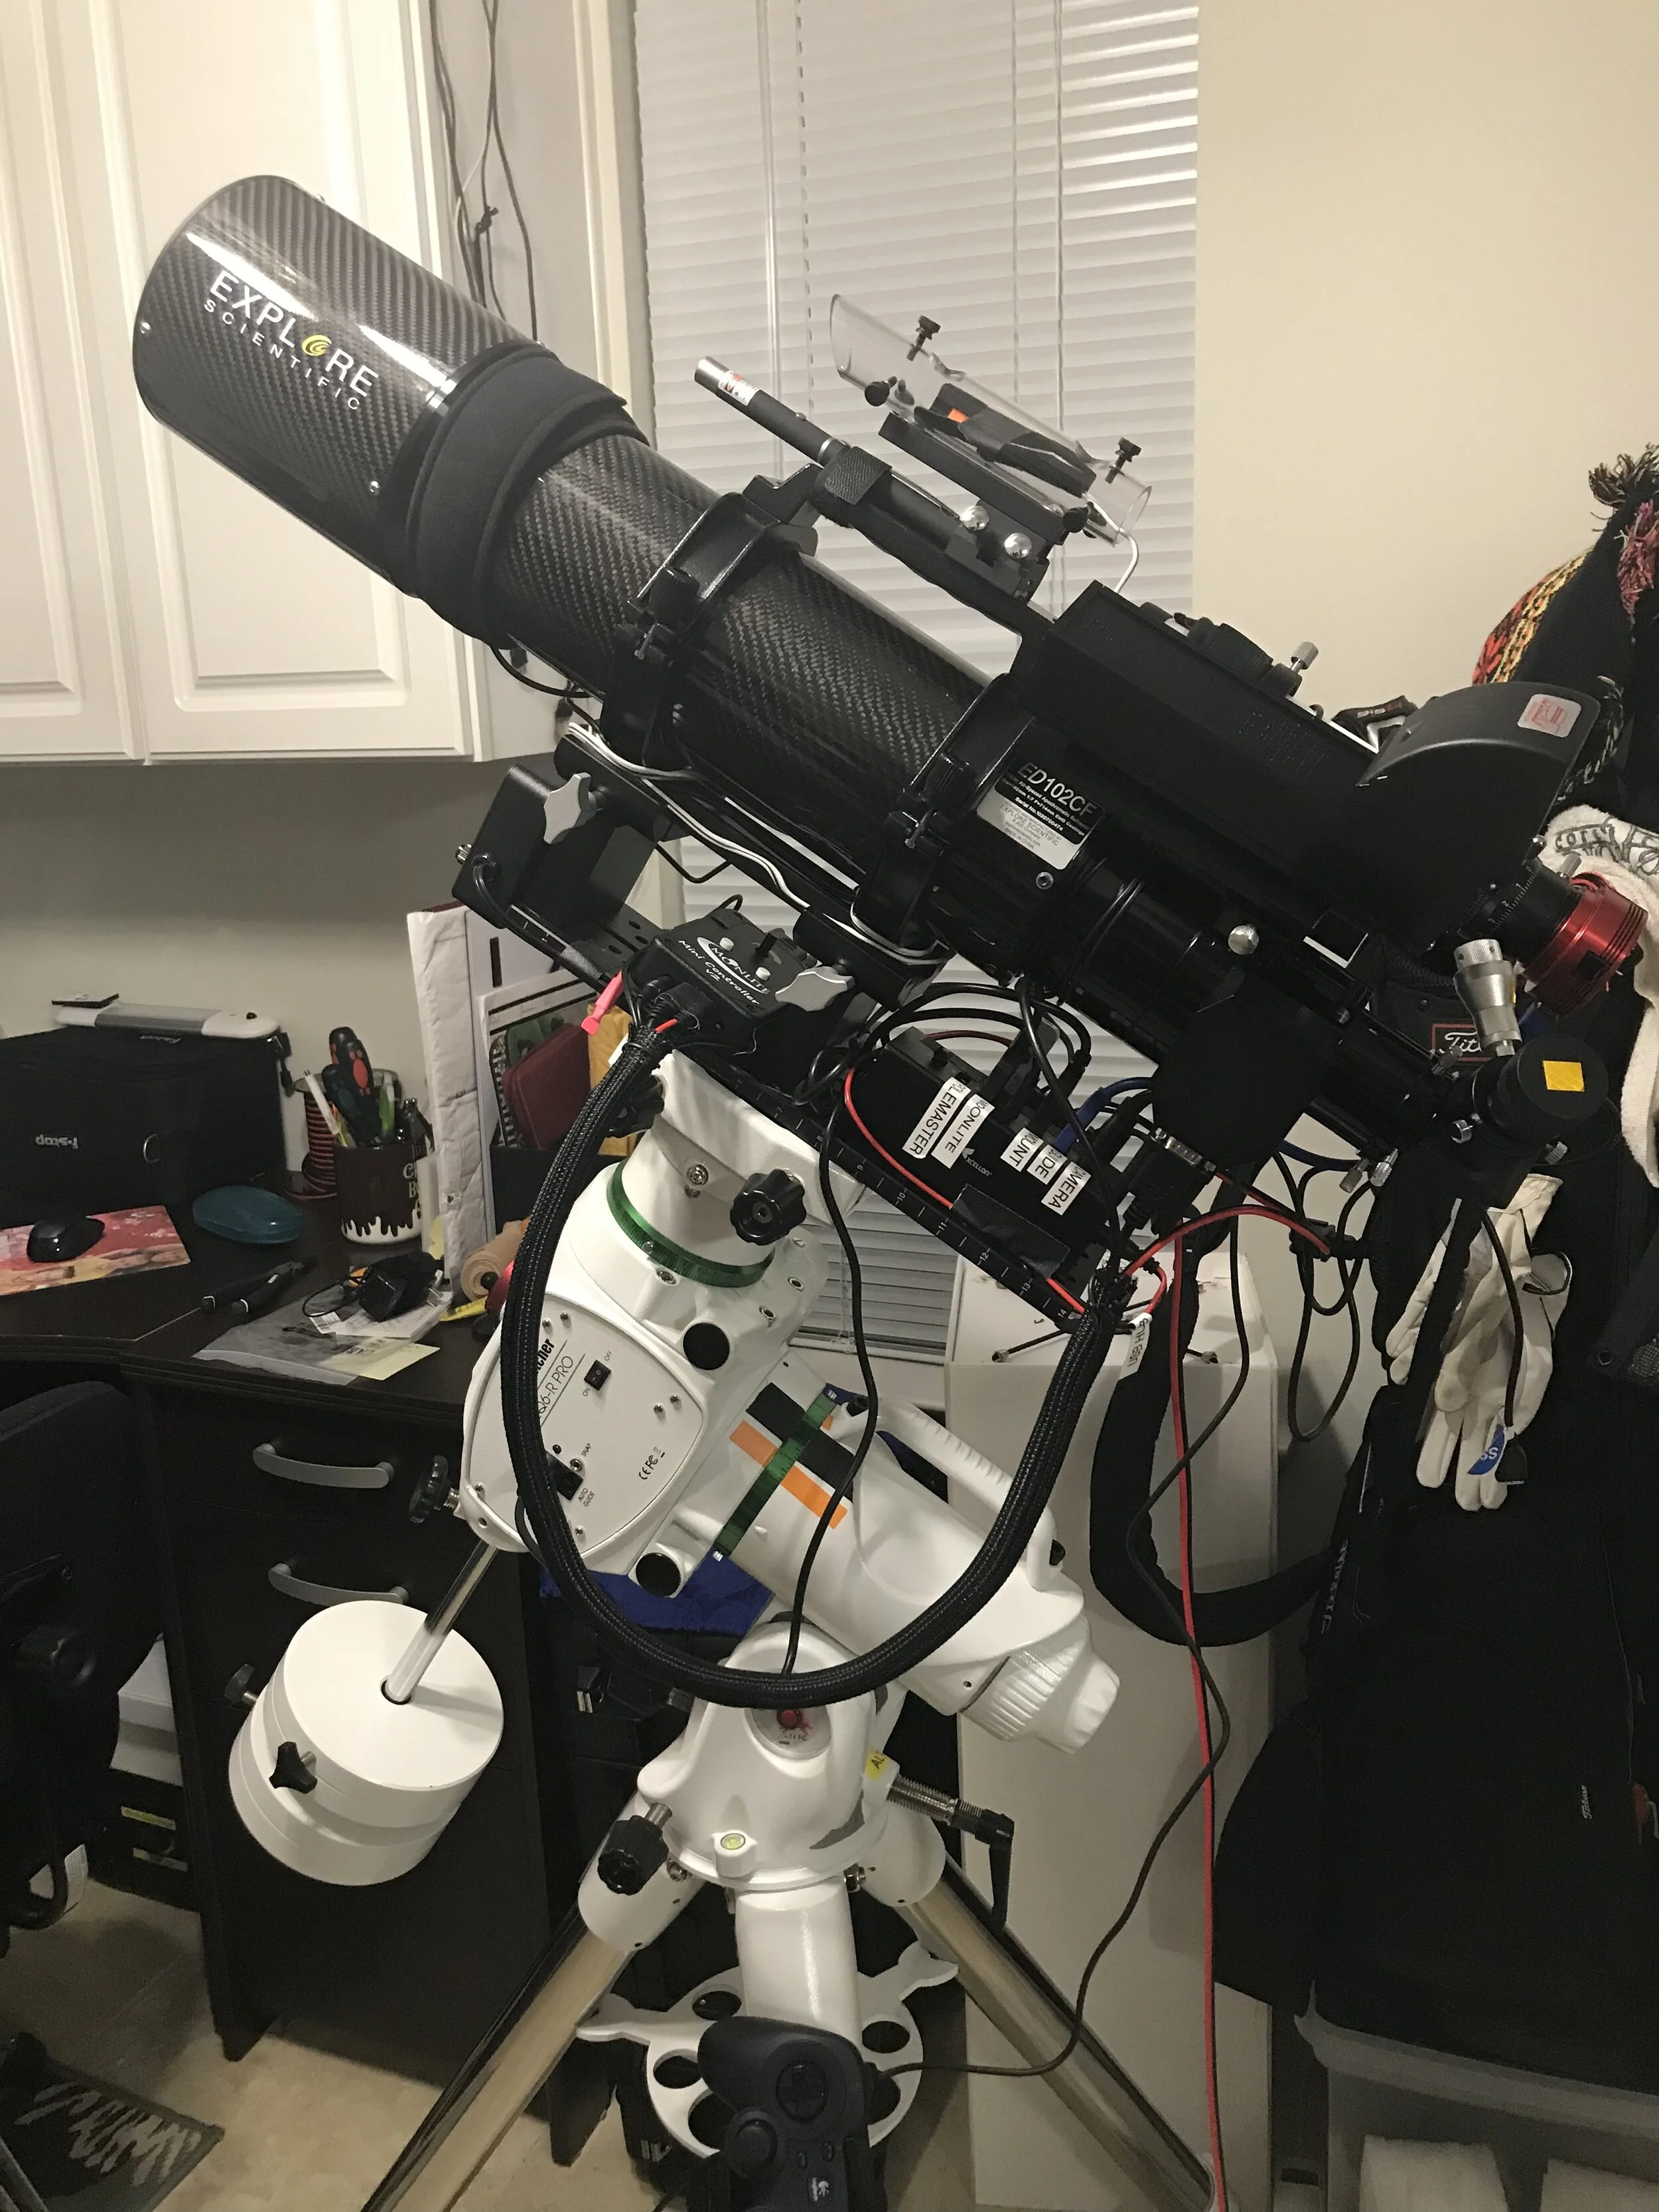
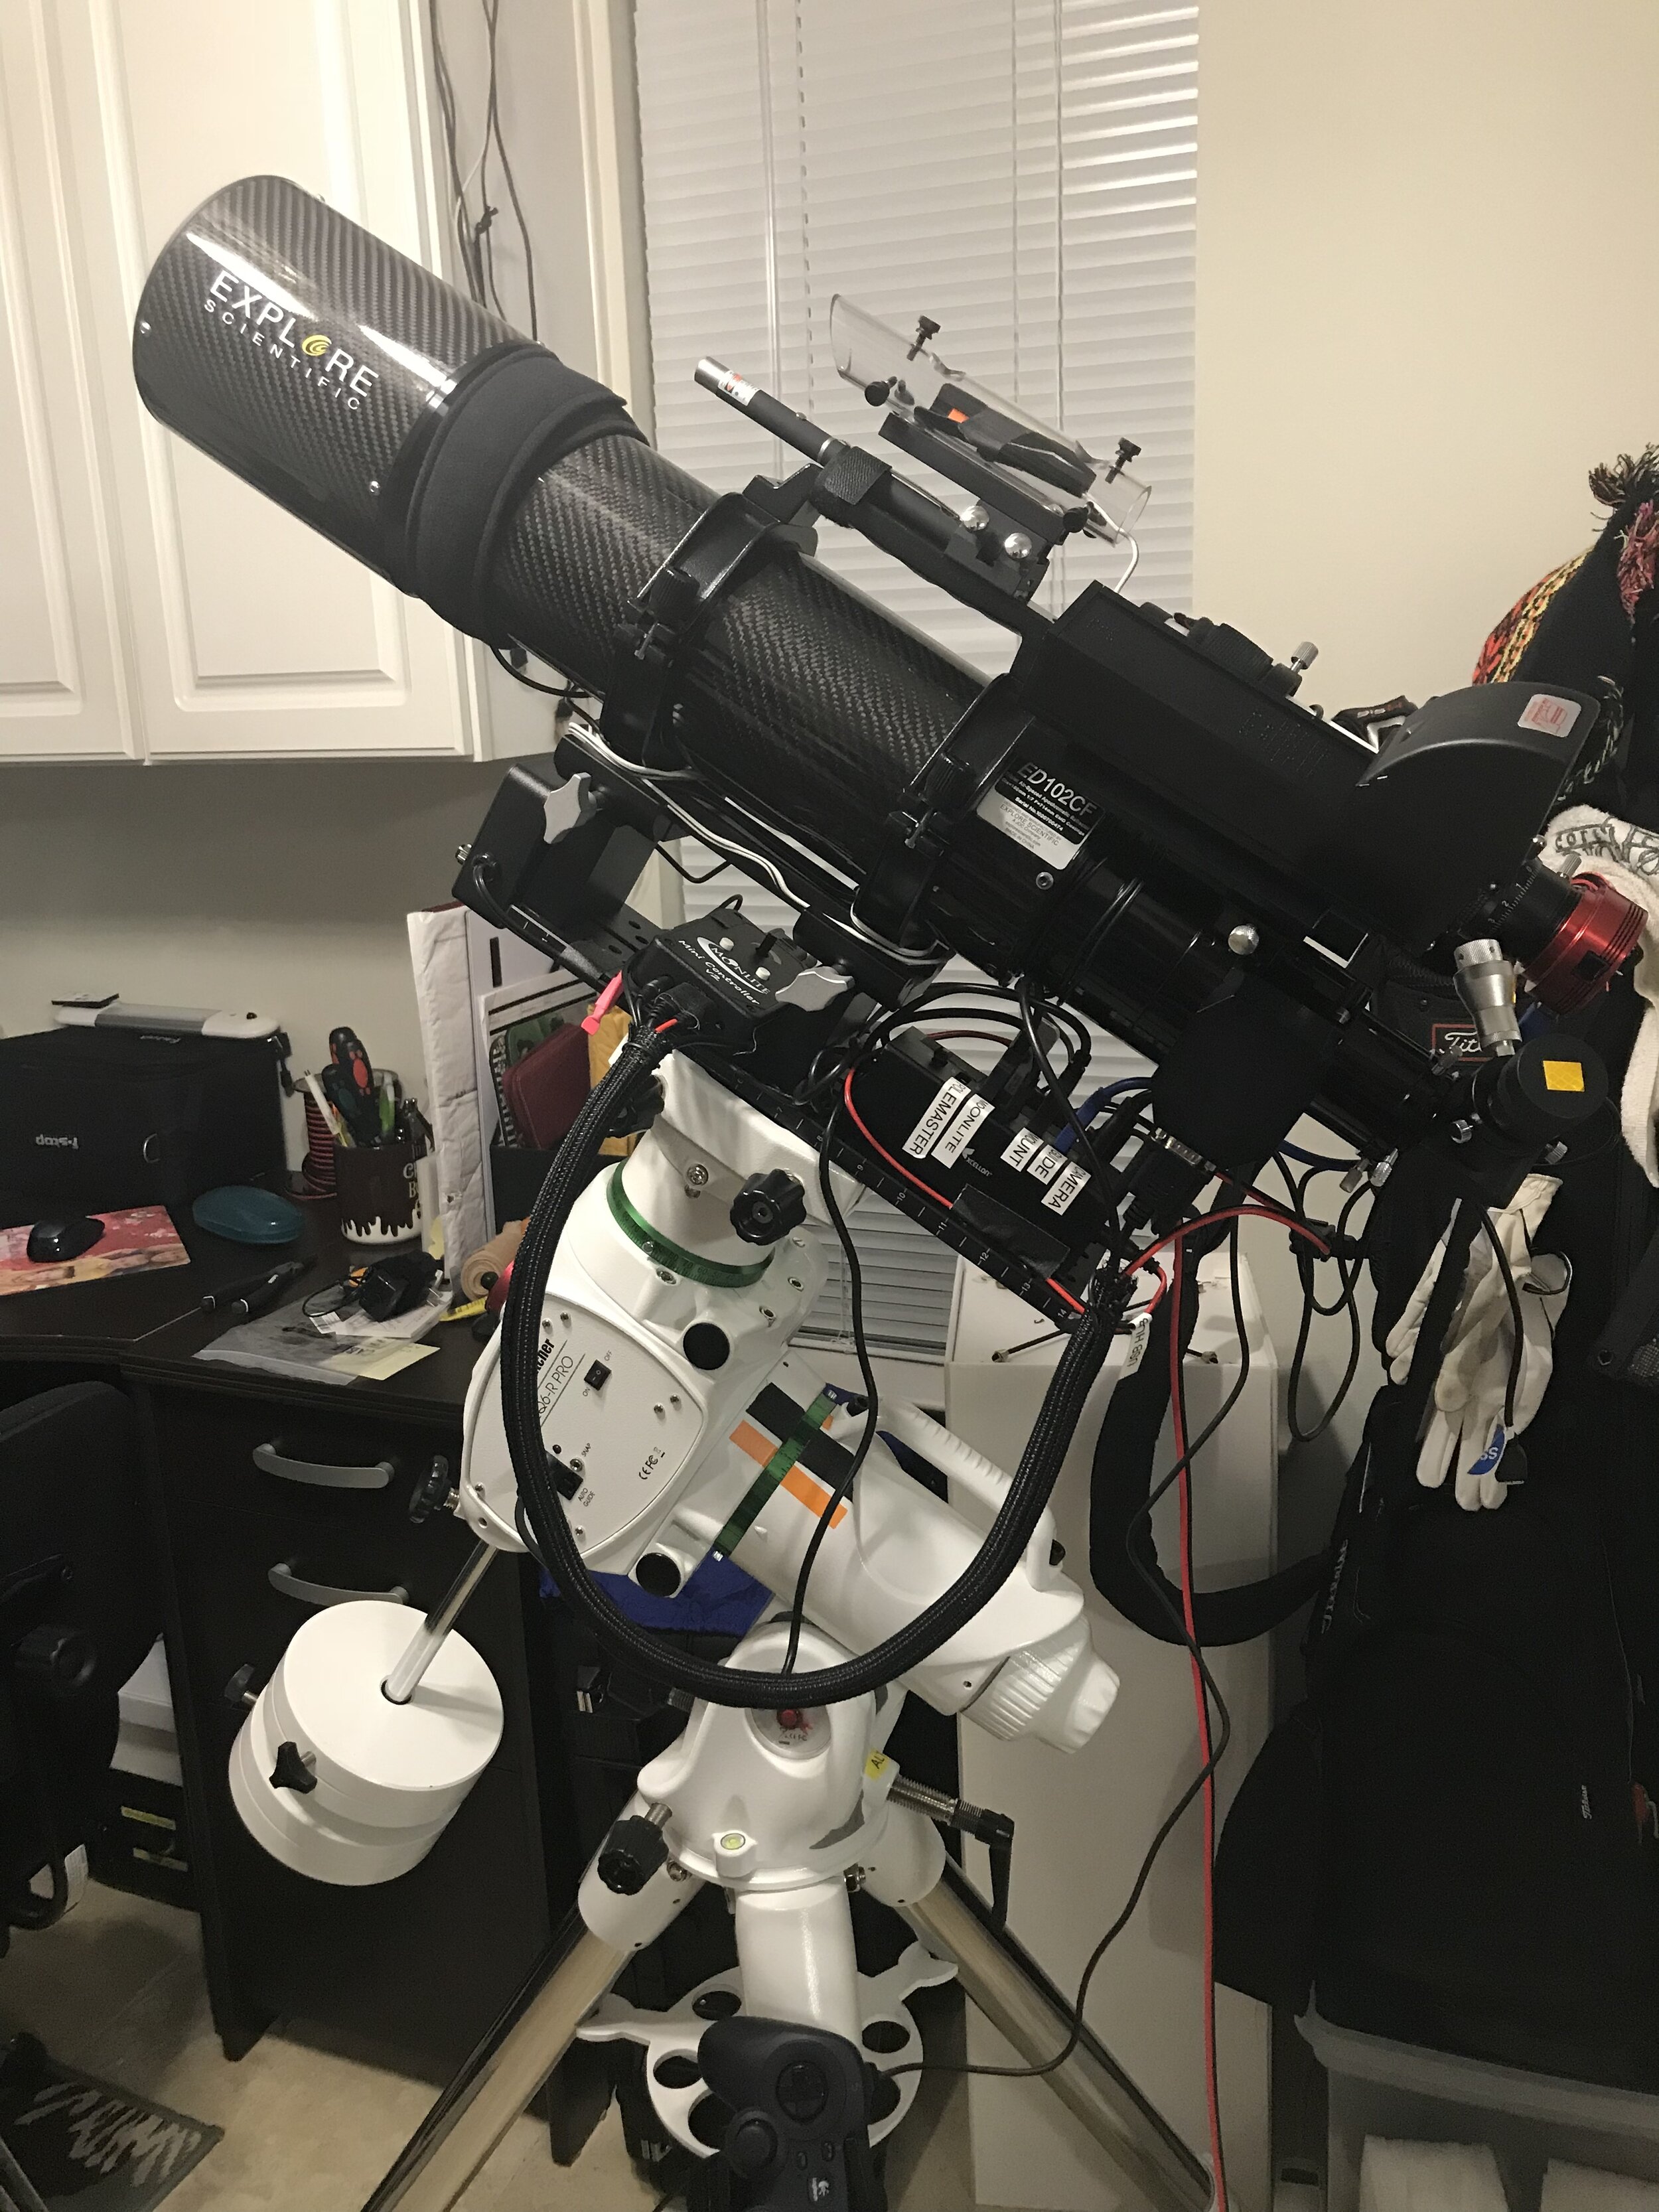
Over the next two years my gear changed, it grew, there are more wires, more gadgets and now wifi. I made some good purchases and some bad one. My friends helped me along the way. I have made so many friends in this hobby. I could not have done any of this so quickly without them.


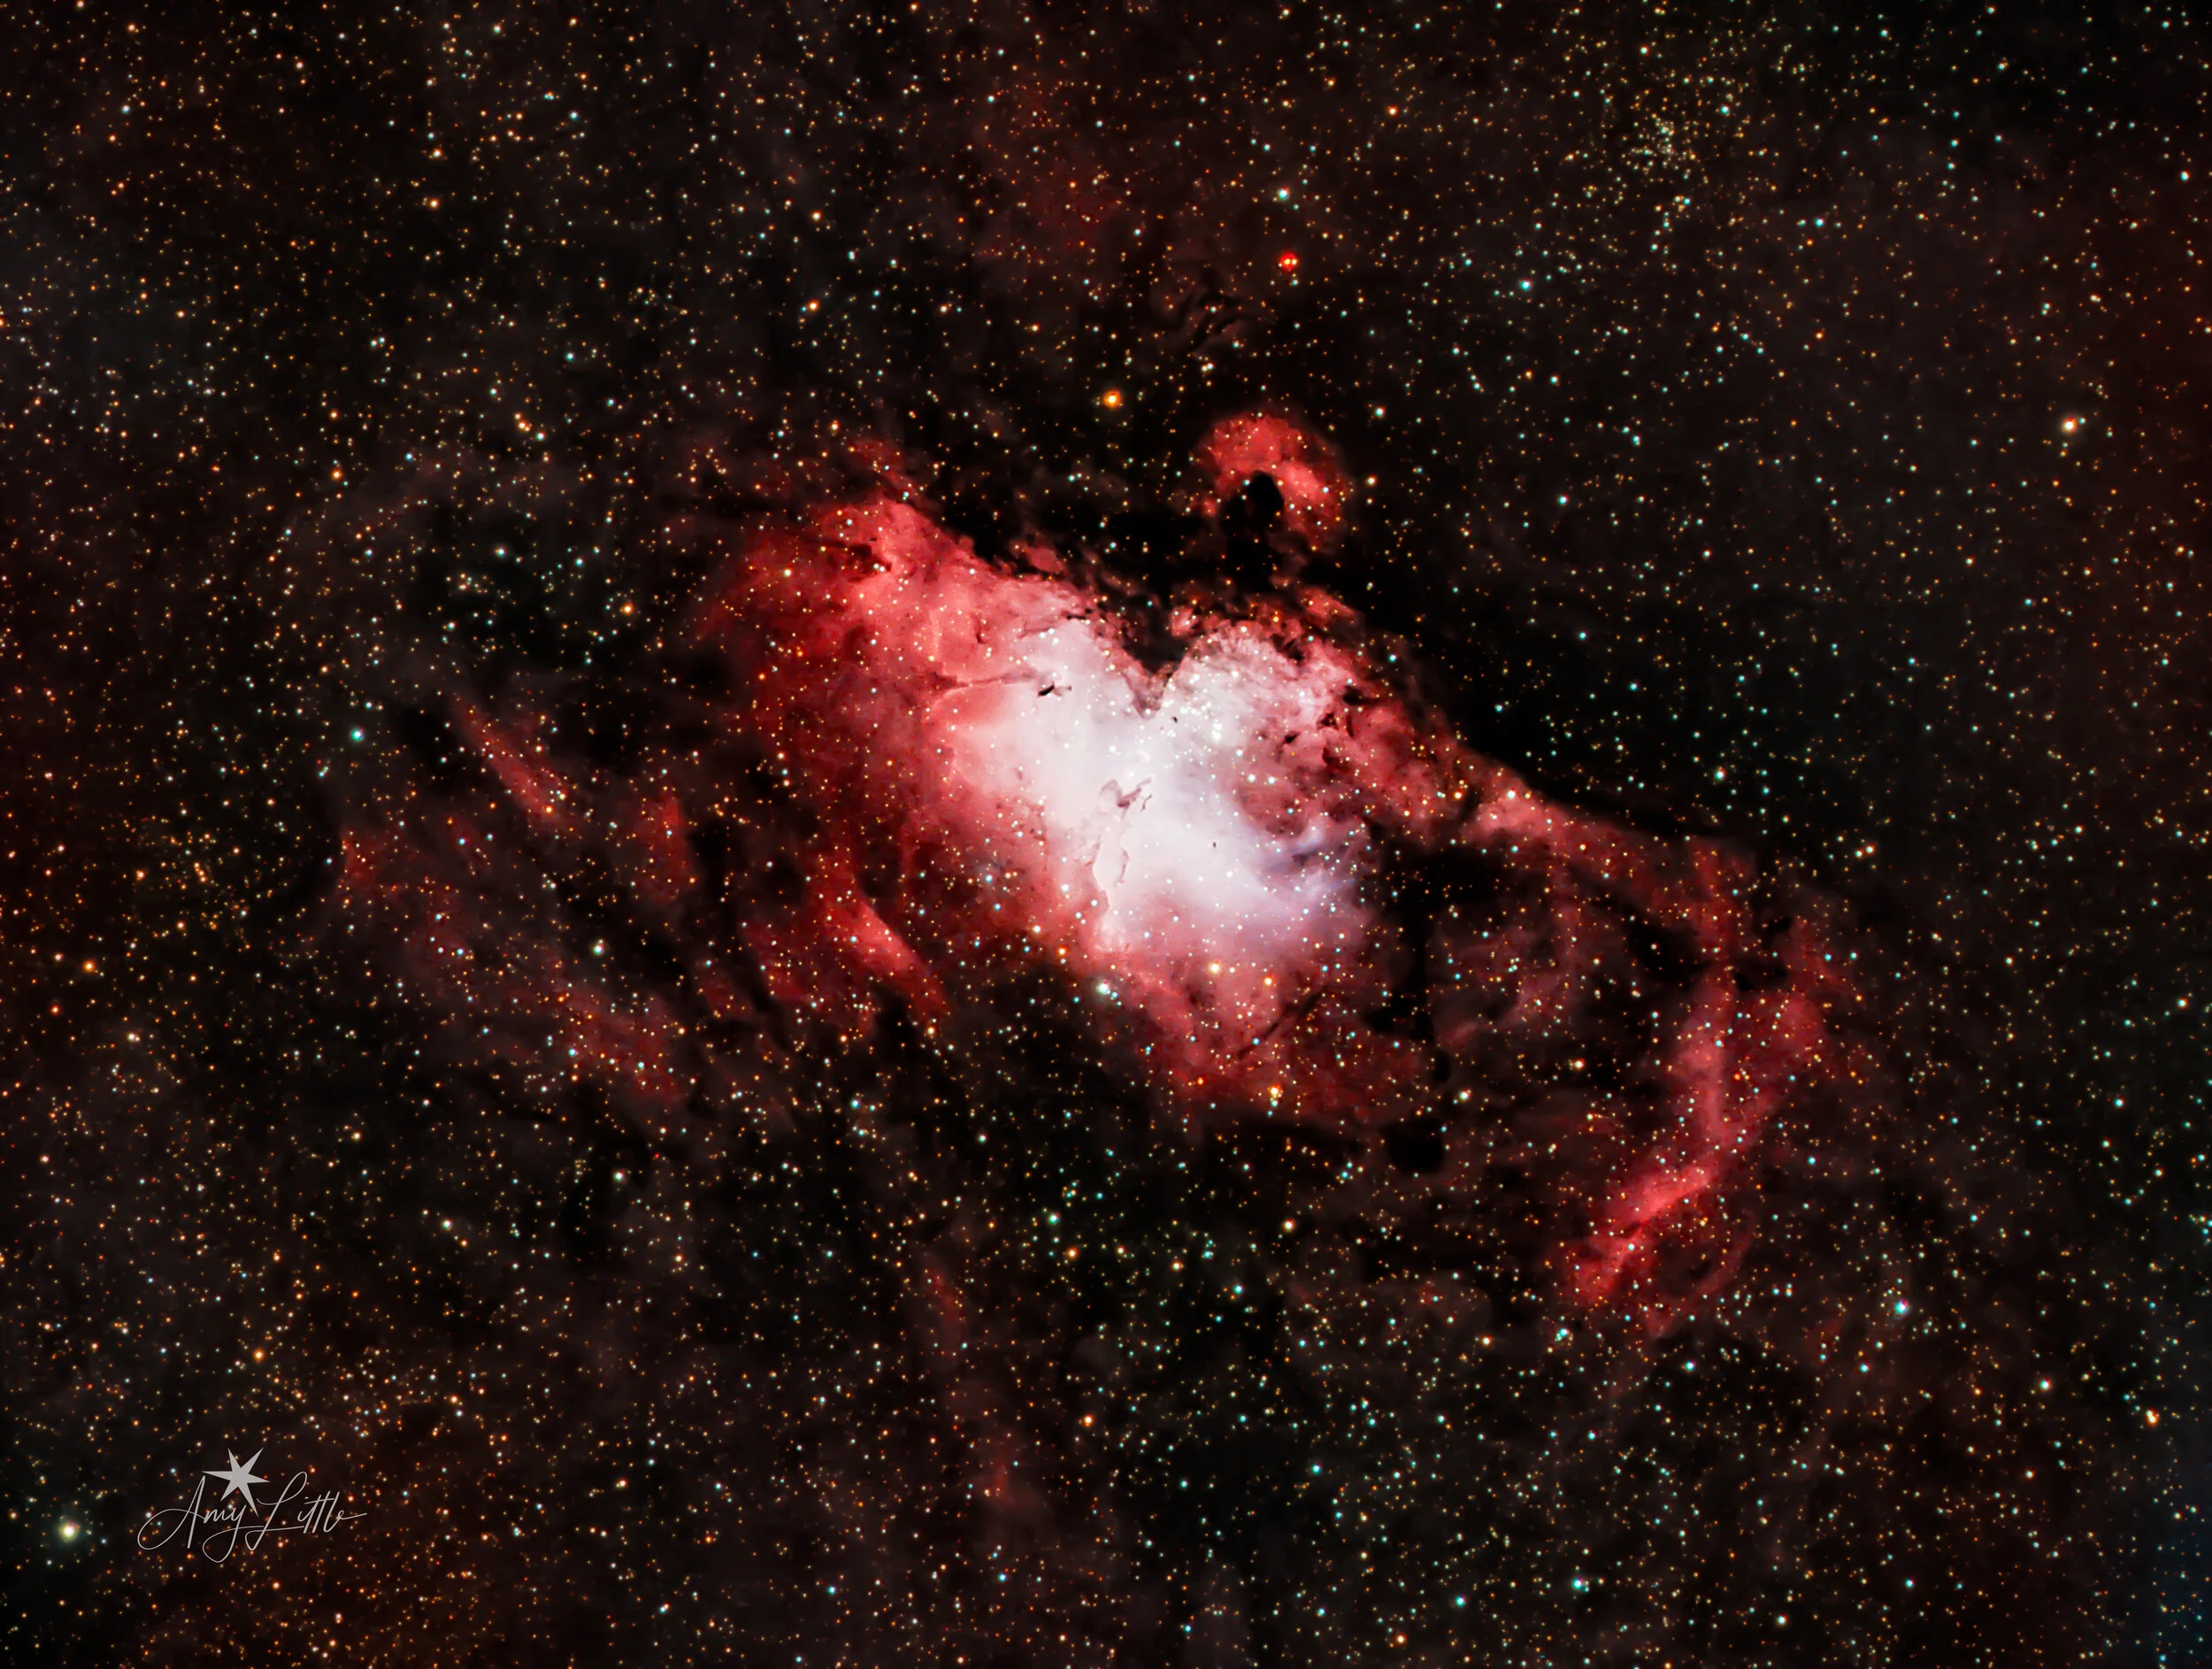
With my photography background I naturally excelled at the processing portion of the process. Again, I feel I have a skill I can share with folks and contribute to the hobby. This is all about sharing our knowledge where we can. This past August I started a YouTube channel called "Amy Astro" I am using
this platform to help folks with the processing. I am showing PixInsight edits step-by-step. Breaking down the processes and answering question. Stop by and check it out.
The night sky is so therapeutic. Yes, there are some frustrations, over all the experience is completely worth it. Do not let your lack of astronomy knowledge stop you from trying. Join a club, a FaceBook Group or follow a few YouTube Channels. There are plenty of folks who would love to share their knowledge. It truly took a village to get me where I am today.
This village welcomes everyone.

Deep Sky Dad: AF3 production
AF3 production officially started
AF3 was developed from our experience with AF1/AF2 and feedback from our customers.
It has reduced noise/vibration and increased accuracy with microsteps down to 1/256 (AF1 and AF2 had microsteps down to 1/8). It also retains the hand controller and temperature sensor options, available in AF2. The only con in comparison with the AF2 is lack of Wifi. But it will come back in AF3 Pro, hopefully in wireless ASCOM driver, stay tuned
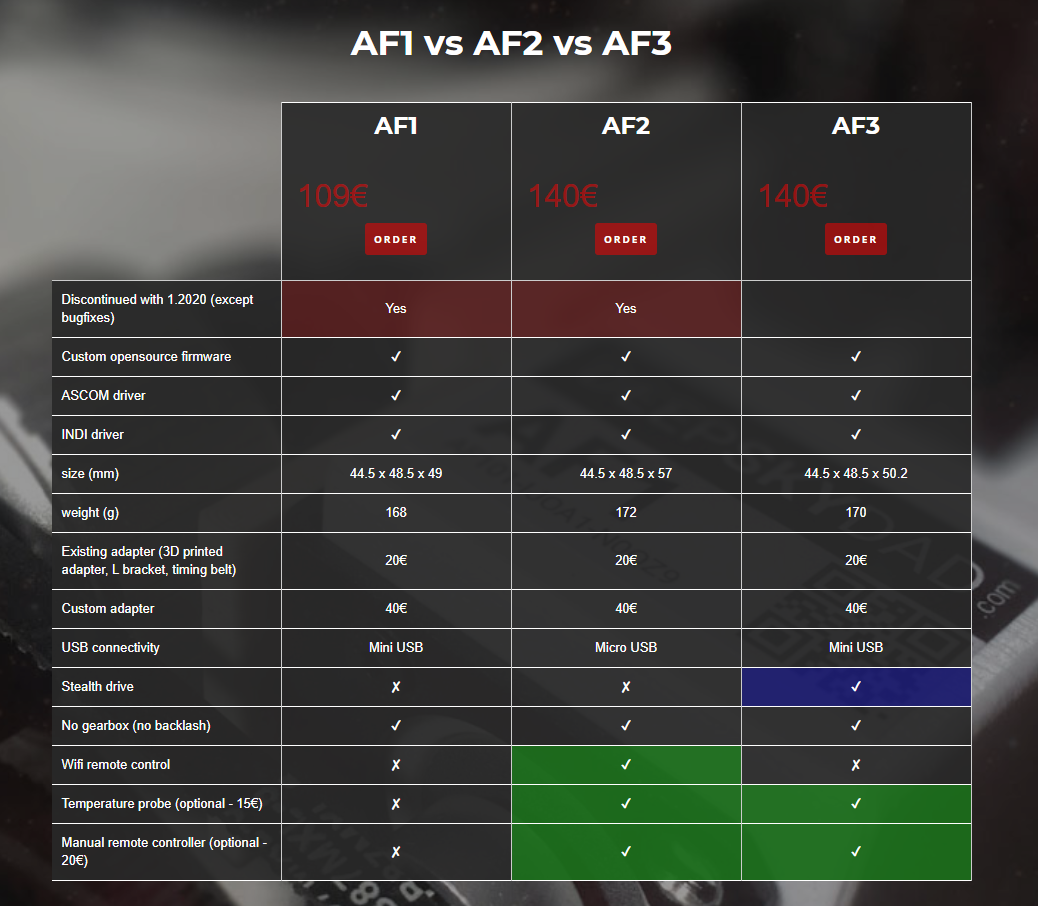
Below you can also see the comparison table between AF1, AF2 and AF3.
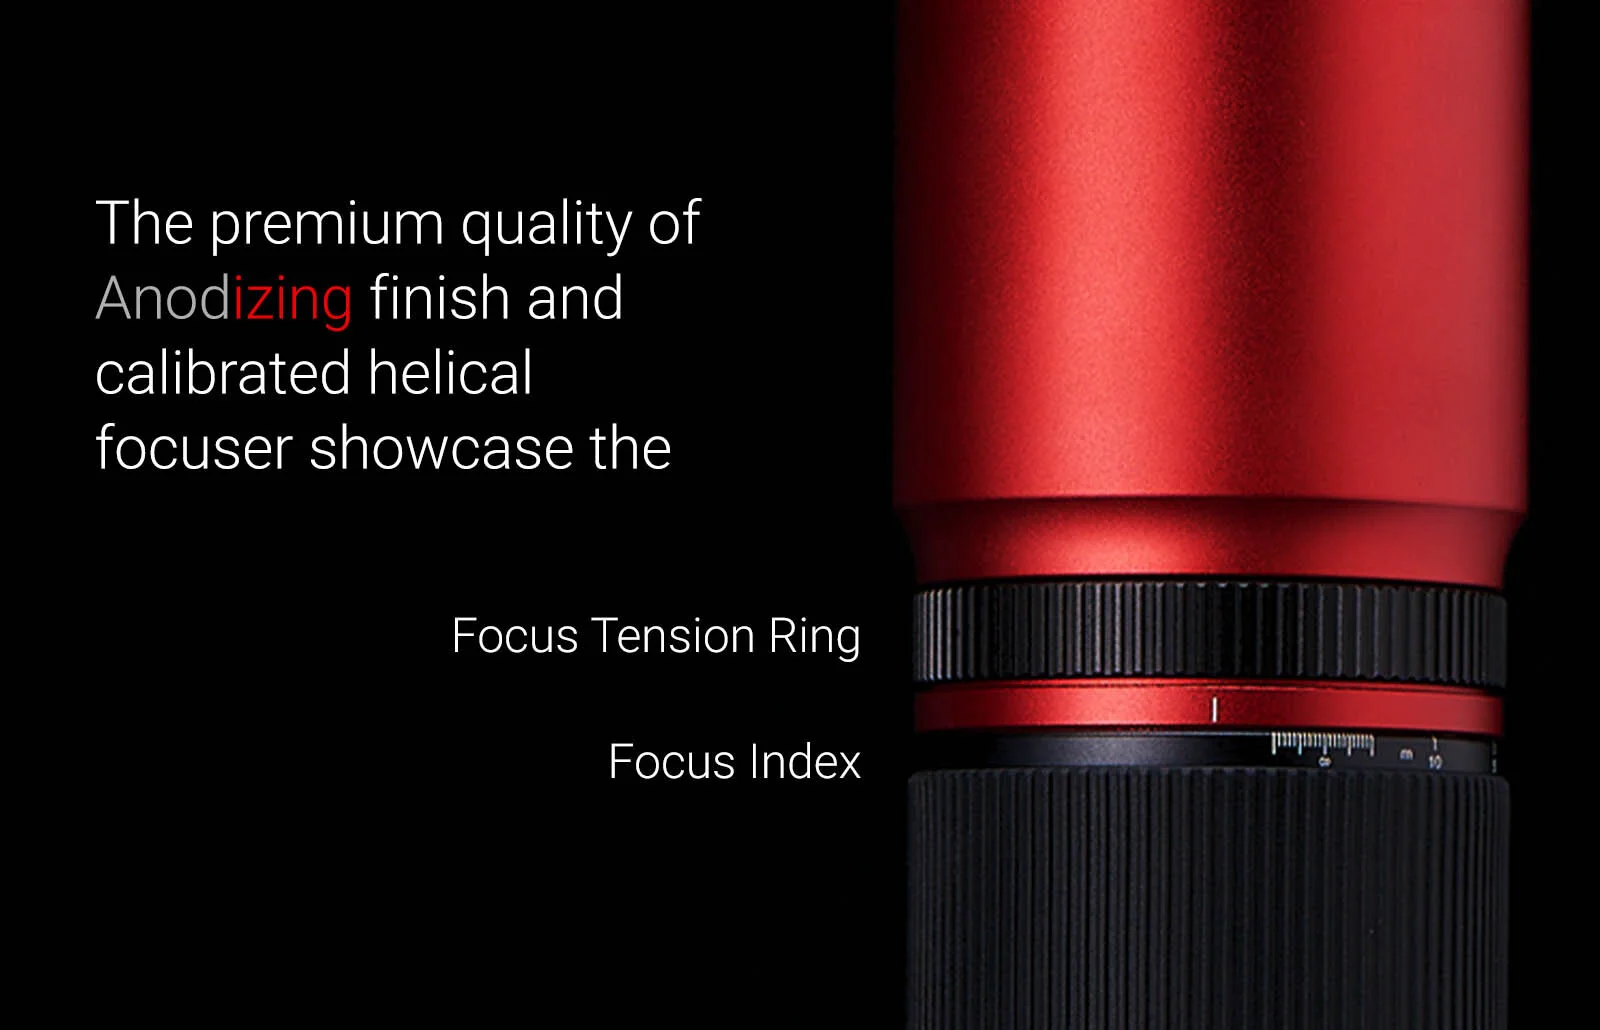
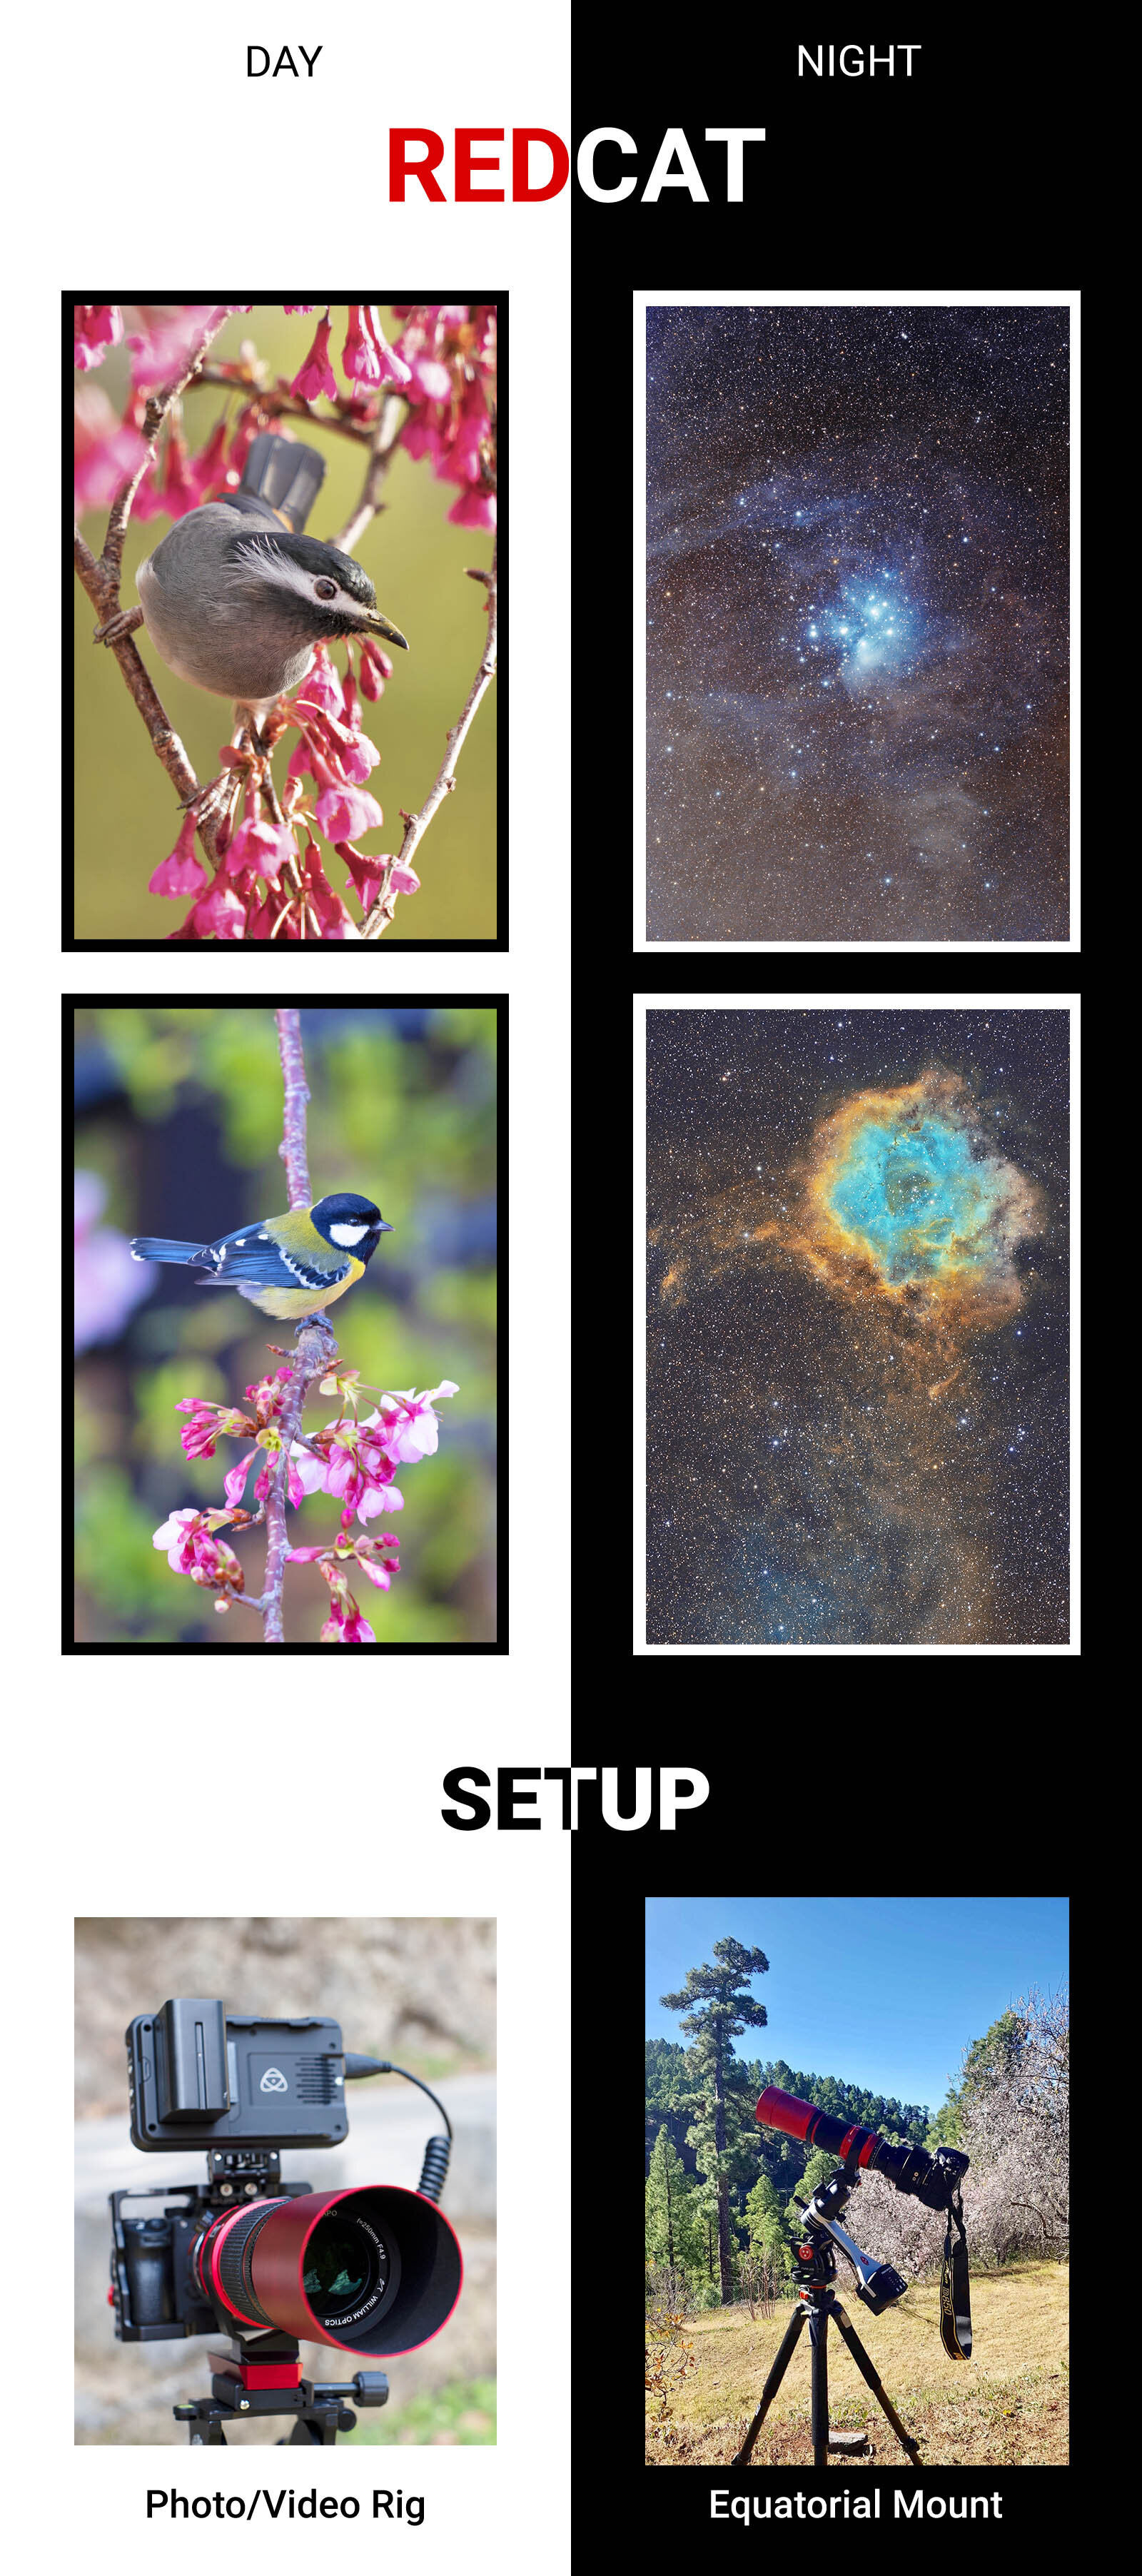
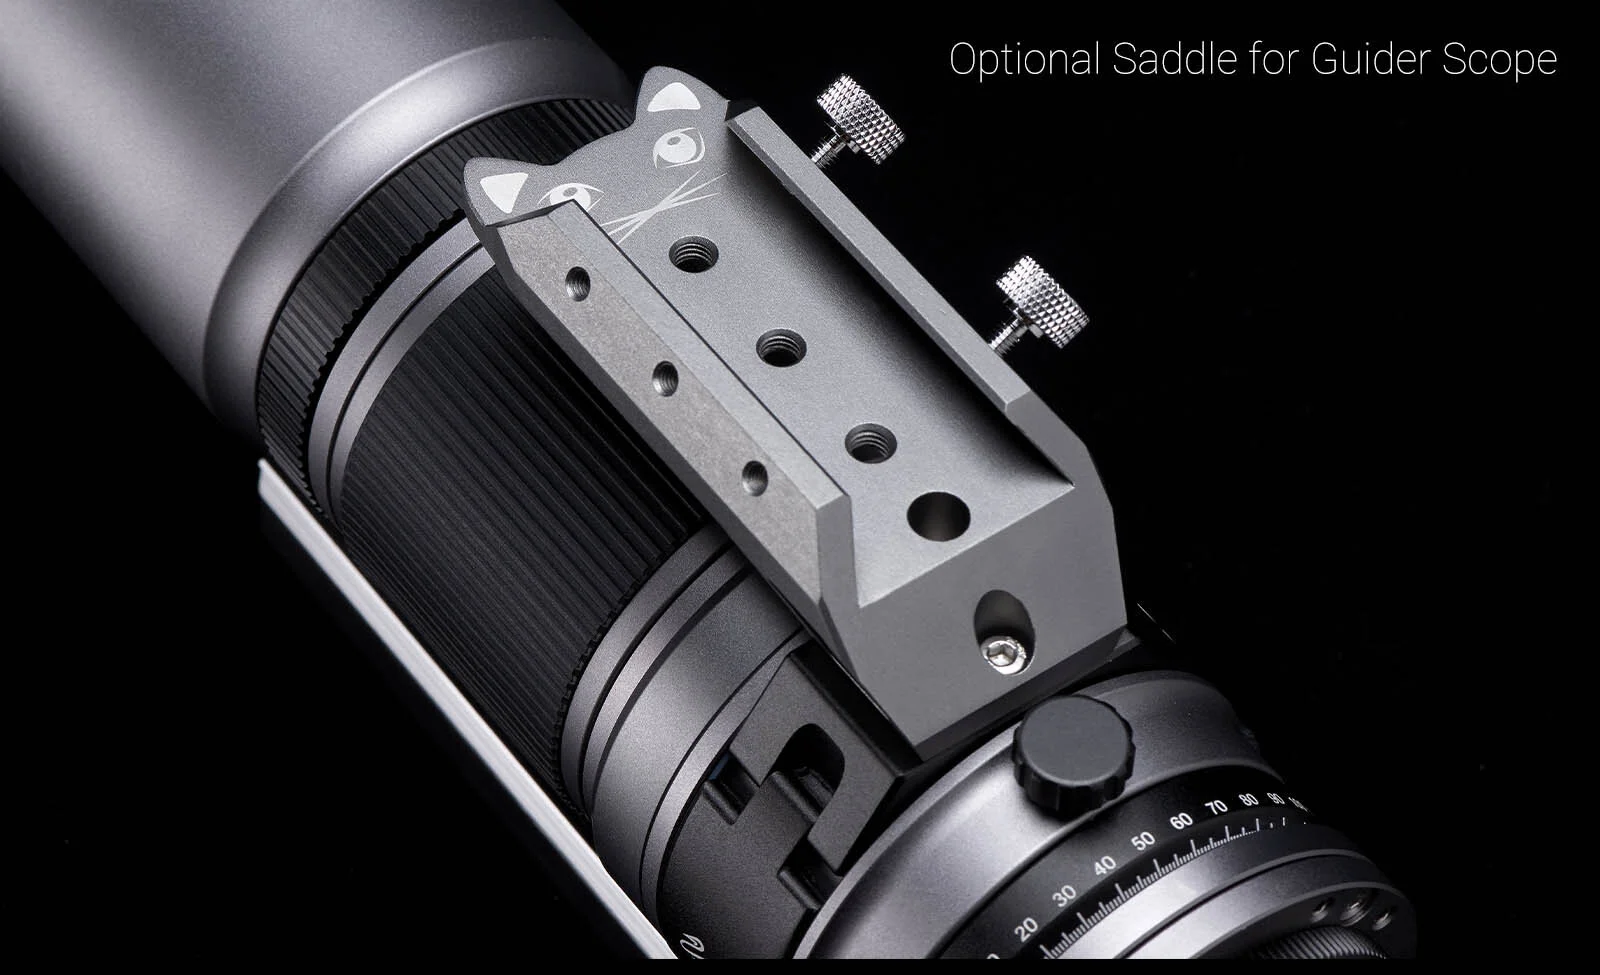
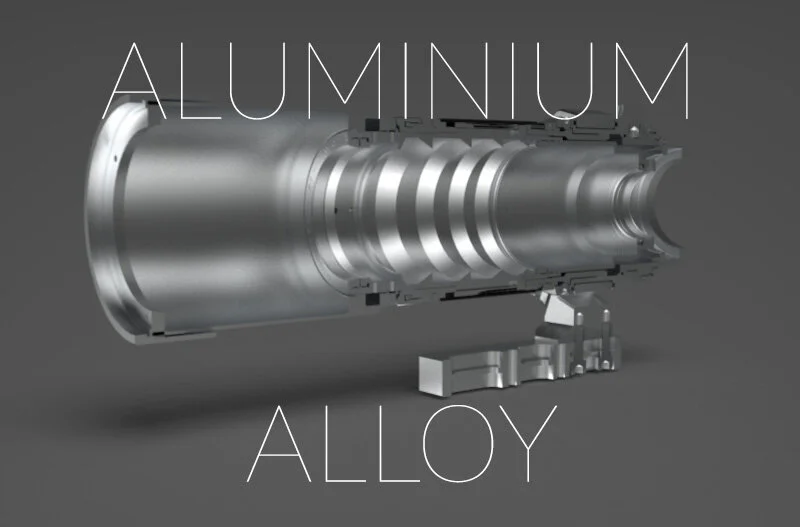
Red Cat Test
TS61ED test
Sigma 135: test
Starkeeper:- Voyager

A professional solution
The astrophotography isn’t a simple activity... often the amount of equipment and software that lead us to satisfy our passion become a source of considerable trouble. Voyager is the the perfect choice for those who search for a professional and very reliable solution.
The purpose of Voyager's user is to obtain the best quality data from its own instruments, with only the bare essentials. Voyager is a multi core optimized software, resilient, with advanced built-in algorithms and advanced A.I. driven automata.
A.I. driven Automata
Voyager uses AI technology to improve focus, star recognition, equation calculation for VCurve, statistical calculations, and decisions for how to handle exceptions generated by the watchdog timers. Watchdogs are timers that oversee all requests to external hardware / software and recover from soft errors. In conclusion advanced AI technology inside Voyager contributes significantly to Voyager's exceptional reliability.
Made in Italy with Passion
Yes, this is yet another astrophotography software product, but it is written by an astrophotographer for other astrophotographers, including those who travel to enjoy their hobby. Every minute saved is a minute earned for photons capturing. As any experienced astrophotographer knows, things don't always work perfectly - the guide star is lost - a cloud passes by - and again Voyager is designed for maximum recovery and reliability when these things happen.
Astrophotography like a Pro
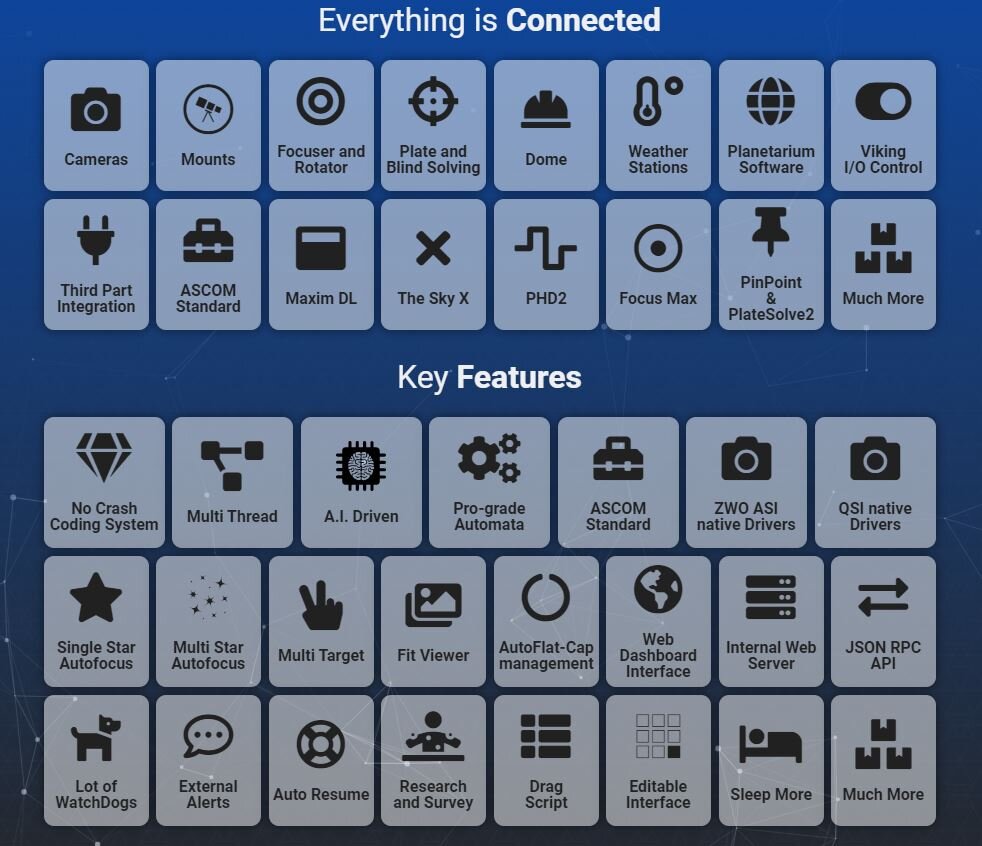
Everything is Under Control
Voyager is a systems integration software, interfacing third-part software products to make them work together and achieve practical results, using a single management console. Voyager’s goal is to reduce user interaction with the various software components needed for astrophotography, thus freeing up the astrophotographer to concentrate on other things. Voyager can interface and control a wide range of mounts, cameras, focusers, domes, weather inputs and much more.
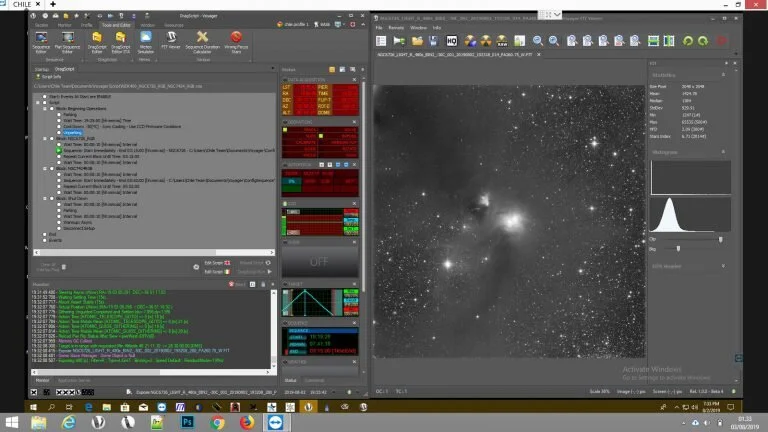
Voyager Main interface example
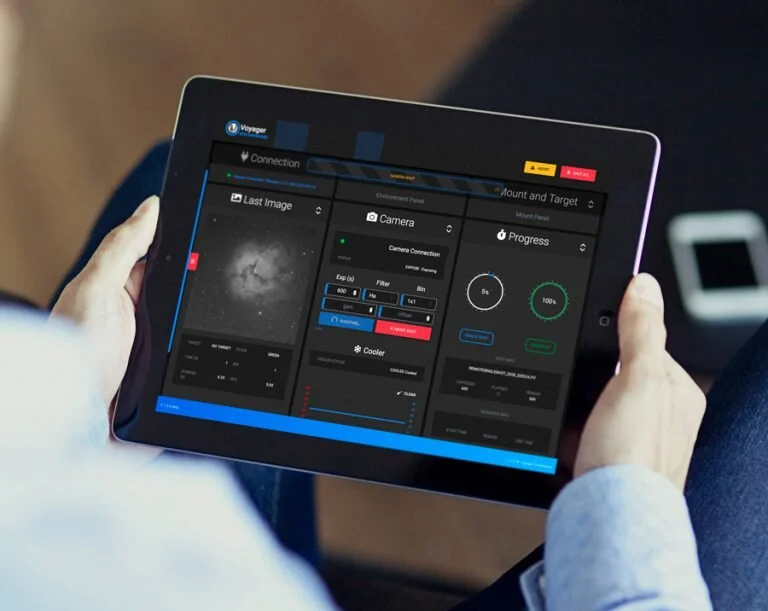
Voyager Web Dashboard
Voyager can also be configured to send warnings to the user by external message systems – sms, email, etc. – among those included.
Voyager allows you to invoke external scripts. The unique Voyager DragScript system is both easy to use and extremely flexible in application. With Voyager you can plan anything from a simple to a complex single imaging session or multiple imaging sessions. It will provide, exactly as if you were operating yourself, a complete operational approach including equipment connection and shutdown at the end of a session. This level of control allows you to determine what you wish to image and how, many other automated programs don’t do this. Voyager also has the ability to shoot sky flats or flats from a panel. When shooting sky flats Voyager can be programmed to calculate astronomical twilight and dawn.

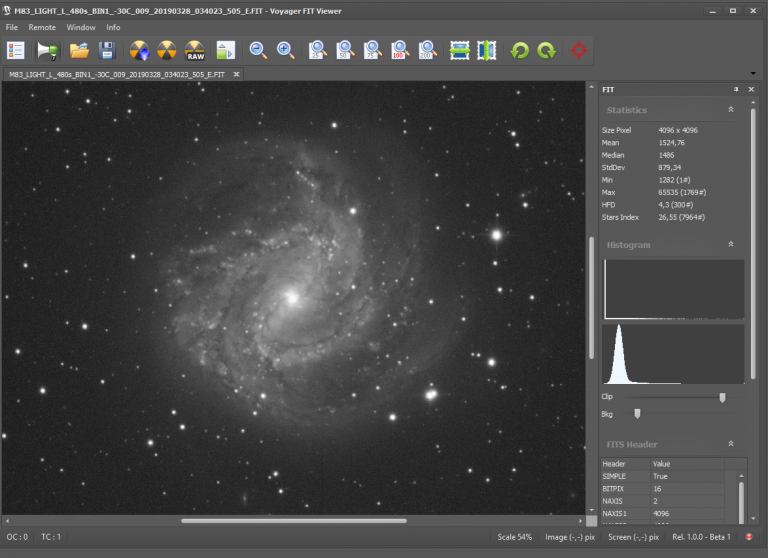
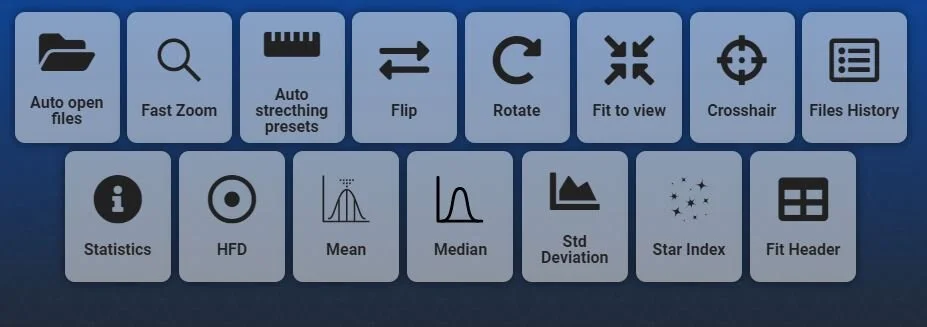
The FIT Viewer runs in its own window so you can view a full size image without having to share screen space with Voyager itself.
According to Voyager‘s “Reliability is First Priority” philosophy, it runs in its own process space, so you can view your images, change the screen stretch, etc. – without interference to Voyager’s core job – while acquiring images.

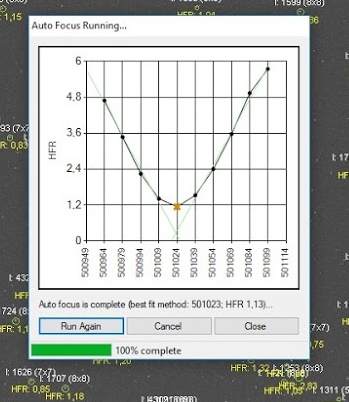
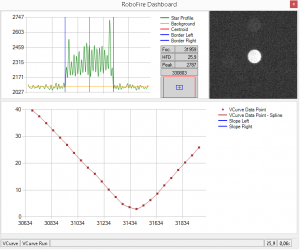
VCurve autofocus is done on a single star at the center of the field of view. VCurve works best when your optics are flat – the focal point is the same across the field – or when the region of interest is in the center of the field, in a portion that is flat or close to flat (same focus). For example, this is a good choice for small galaxies and planetary nebulae.
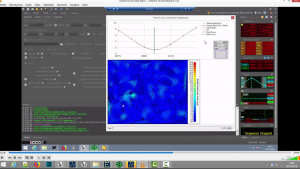
LocalField autofocus optimizes the average focus (HFD: Half Flux Diameter) of multiple stars across the entire field. If your optics are not flat – there is some variation across the field – and your region of interest spans the field, LocalField will give you the best focus across the entire image. For example, this is a good choice for large nebulae or star clusters taking up the entire field.
Ahead, once again
VOYAGER WEB DASHBOARD
ALSO HOSTED LOCALLY ON VOYAGER'S INTERNAL WEB SERVER (FROM VOYAGER 2.2.1).
THIS WILL LET YOU USE THE DASHBOAD WITH AND WITHOUT AN INTERNET CONNECTION, WHEN STARTED FROM LAN.
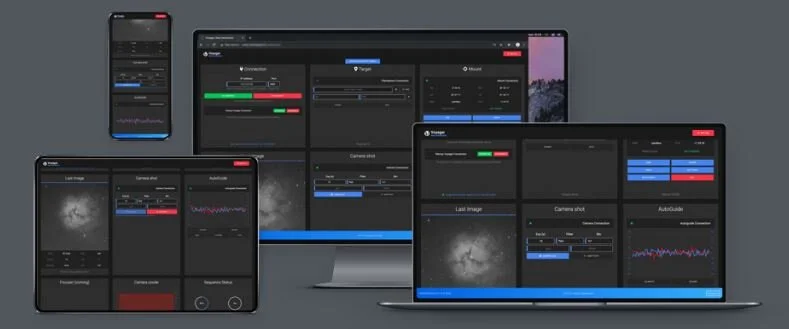
Voyager Web Dashboard is a Responsive Web Interface that reports session data and let you have control over your running Voyager installation, from your backyard or halfway around the world. Voyager Web Dashboard is where you can find the overview of all your connected equipment and totally manage it, taking a shot, pointing a target (celestial object) or performing an entire night sessioncalling and executing your favourite Sequence or DragScript.
With a glance in the “engine room” you can check in realtime a preview of the last shot, in a zoomable 1:1 fullscreen window, and much more…
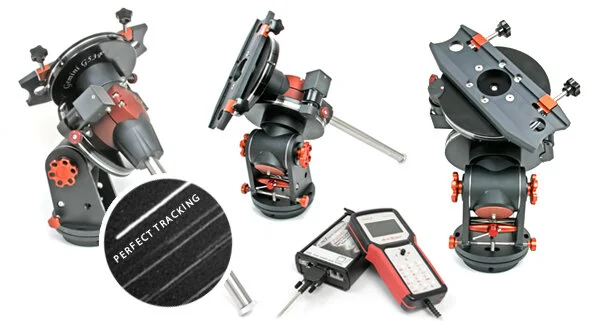
Gemini Telescope Design:- G53F Friction Drive Mount – German Equatorial
by GTD
This German Equatorial mount tracks the stars with the highest precision in its category. Based on our Friction Drive System (without gears) is the perfect solution for amateur or professional astrophotographers working in the field and for small to medium observatory use, operated locally or remote.
What are the advantages over the gear worm based system?
Our friction based mounts have no backlash at all, guide perfectly even in DEC, enable longer autoguiding exposures (5-10 sec). Our special wear resistant design keeps its performance over time. All these characteristics and many others together with its low weight make the G53F Friction Drive German Equatorial Mount the ideal astrophotography mount in the field or in the observatory.
Video below features the G53F with a 30-cm f4 tube made from carbon, length 110cm, total weight 26 kg.
Main features of the G53F German EQ Mount
NEW 2017 model intro video
Encoder based friction drive system
All cables routed internally (from 06.2016)
USB and 12V power routed internally
PULSAR 2 based drive system
Real Time PEC function to keep the target within cca 1,5″
Absolute position reference for recovery after system breakdown
Can be separated in two parts (4 screws), the total weight is 20 kg
45 kg payload
Integrated Losmandy rail interface (exchangable)
Sidereal, Lunar, Solar and custom tracking of all Solar System objects with C2A
Up to 4,5 deg/sec GoTo speed
LX200 (most commands) and ASCOM compatible
Reference stars, M, NGC, IC, and custom programmable database
Smart meridian flips (for robotic mode and efficient goto)
Parking also via external switch (cloud detector) – when the PC breaks down
Real time refraction correction (for tracking and goto)
12-18 VDC operation, 1A consumption
Built in GPS reciever in the hand controller (from november 2012)
Free firmware updates, language versions and many other goodies
Accurate 12×30 polar finder with illumination (optional)
5 years of warranty for mechanical parts and 1 year for all electronic parts
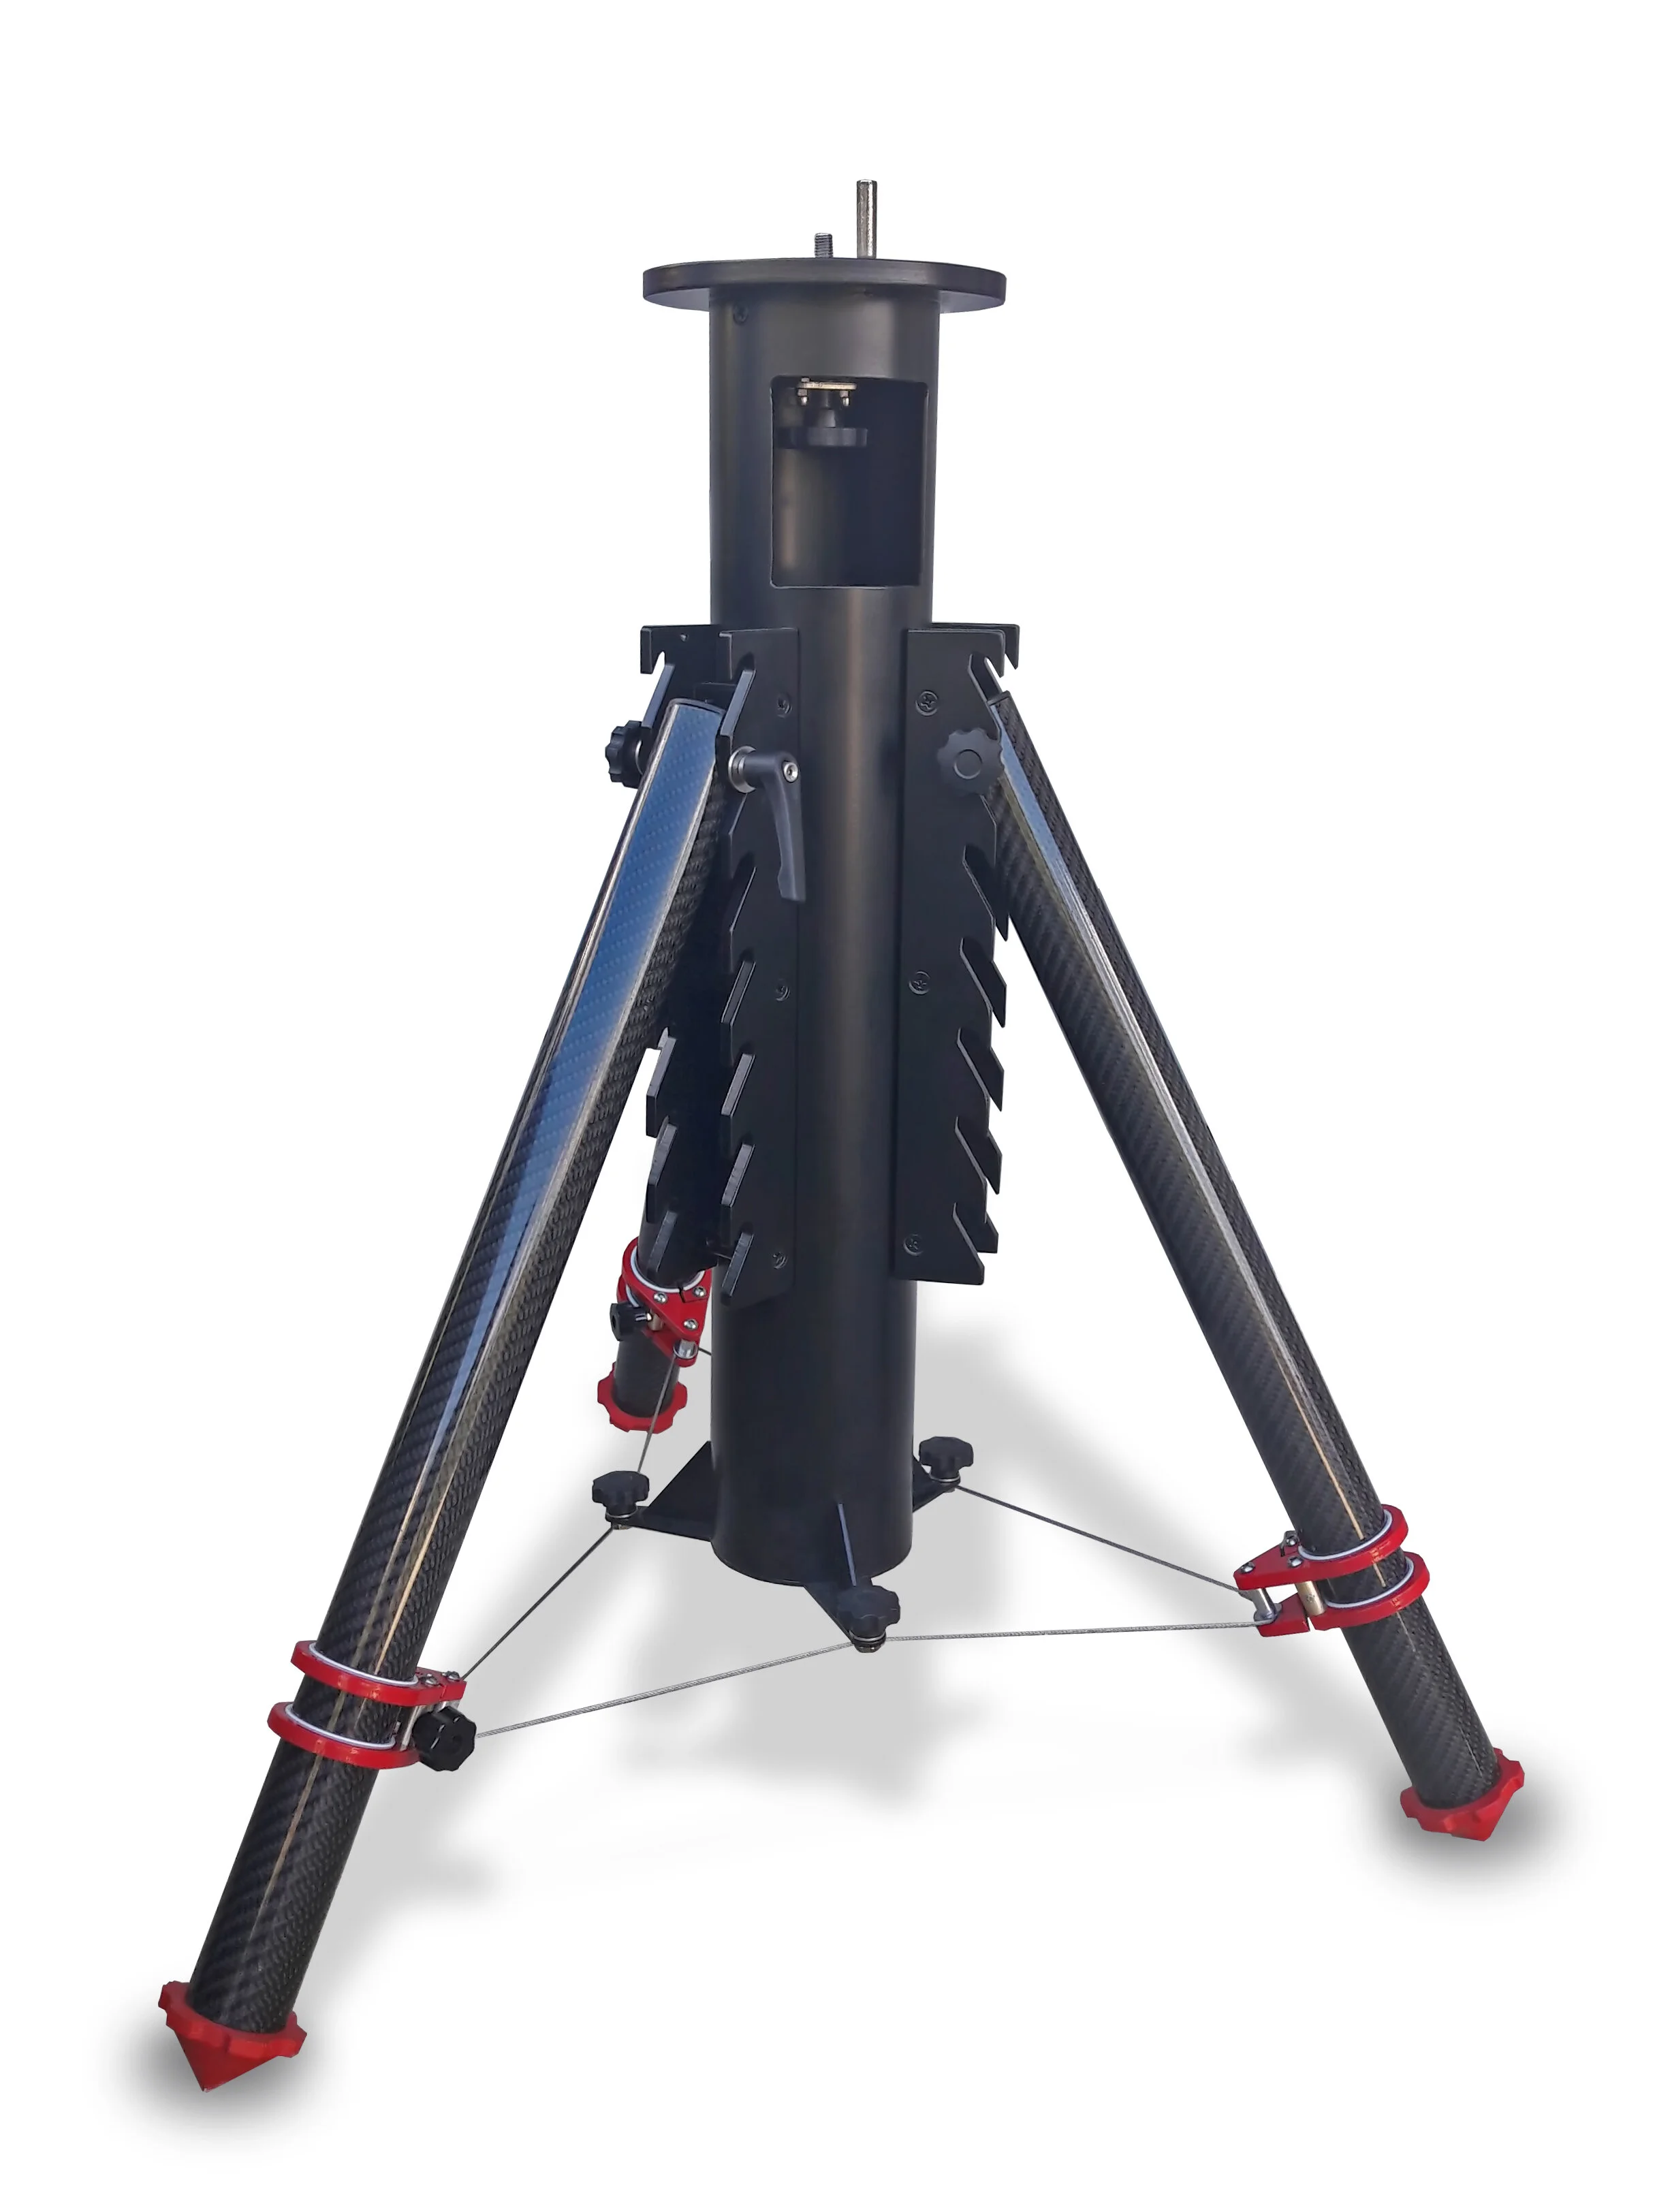
Stable GHS CArbon tripod
The GHS CArbon tripod offers an uncompromised solid base for your G53F. The carbon fiber composit legs adjust independently which means easy setup in the most rough terrain conditions. What has not changed, is the legendary stability confirmed by many satisfied customers. The Qlock system saves you a lot of frustration in the dark! You just put the mount head on, turn a hand knob inside the pier and it’s done. Adjusts between 75-110 cm. The legs fold completely for easy transport and storage . The GHS CArbon tripod weights only 9 kg! Watch the video.
The geometry and materials of this tripod represent the highest standard in vibration suppression and torsional stiffness. Available with a variety of adaptors for other types of mounts.
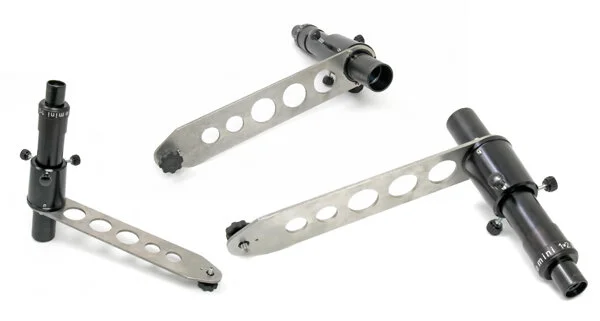
Gemini polar scope HP2 – Easy polar alignment
Precise polar aligment in a few minutes? Yes, possible with the original polar scope Gemini HP2! This polar scope uses three stars for alignment for high precision and freedom from reading star charts. You just find the position when the three circles on the reticle match the stars. It is more accurate than traditional “Star Drift” methods. The large 30 mm objective lens lets you see enough stars for a precise alignment. The 12x magnification provides the accuracy needed for GoTo and astrophotography.
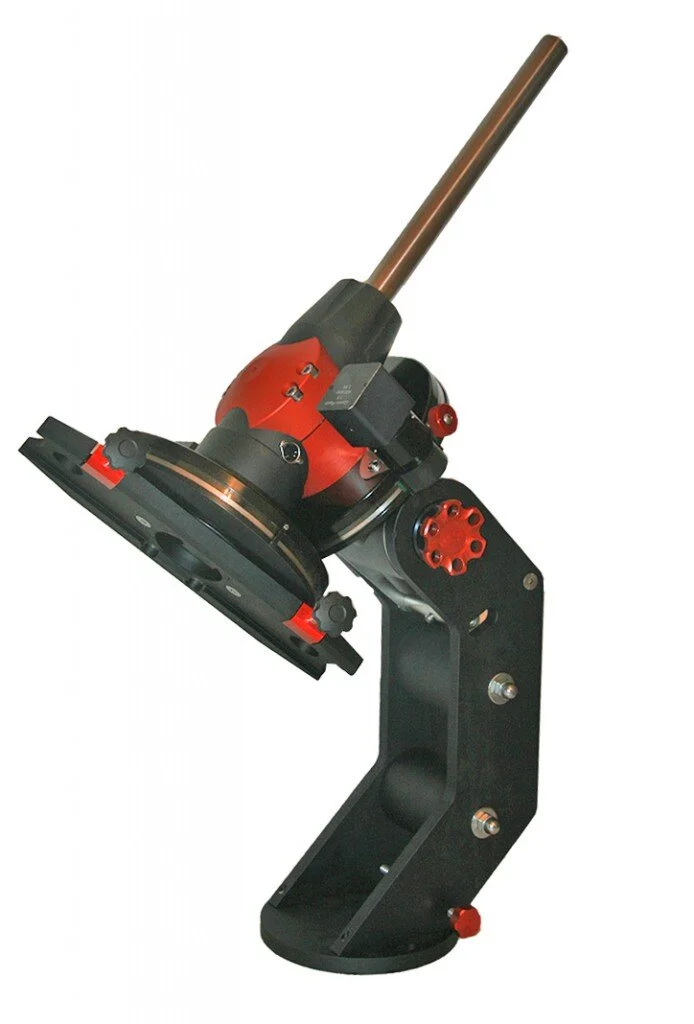
Gemini No-Flip pier extension – Uninterrupted astrophotography for compact telescopes
This practical pier extension allows you to take images uninterrupted, even when the object crosses the meridian. Works with refractors up to 5″ or reflectors up to about 10″. The elevation range is 35-50 degree. Adds 390 mm to the pier (241 mm more than the original base) and weights 5 kg. Robust aluminum construction that will not compromise stability. The RA head can be exchanged in 5 minutes between the original and the extended base.
Price list for the G53F and accessories
G53F with cables, cw. shaft, Pulsar2, RealTime PEC: 5350,00 EUR (this item is currently not available)
Tranport case: 170,00 EUR
GHS CArbon Qlock tripod: 1310,00 EUR
Gemini HP2 Polar scope (illuminator not supplied): 180,00 EUR
Adapter (G53f and G42) for the QHY electronic polar finder: 41 EUR
Permanent setup adapter: 80,00 EUR
No-Flip pier extension: 492,22 EUR
Counterweights d30 mm
Shipping and tax is not included. You will pay 22% sales tax (EU orders only) that you can deduct and pay the rate applicable in your country.
Mercury transit 2019: these products will turn the transit into an experience
Marcus Schenk
of astroshop.eu
We only see a Mercury transit every 3.5 to 13 years. On 11 November 2019 this rare event will take place once more. An inferior conjunction occurs as Mercury crosses in front of the Sun and we can observe this in broad daylight. Don’t miss the astronomical highlight of the year! But what do you need to observe it? With the following products you will be well prepared for a successful sighting.
Warning: never look directly at the Sun without a suitable filter. A solar filter is always required for observing.
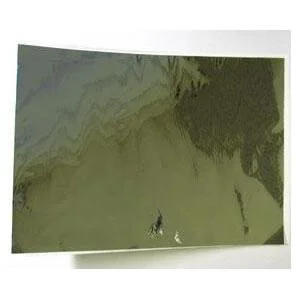
Solar filter film
The Baader AstroSolar solar filter film is available in various sizes, it is effective and very good value. Use the film to make your own solar filter which you can then attach to the front of your telescope.
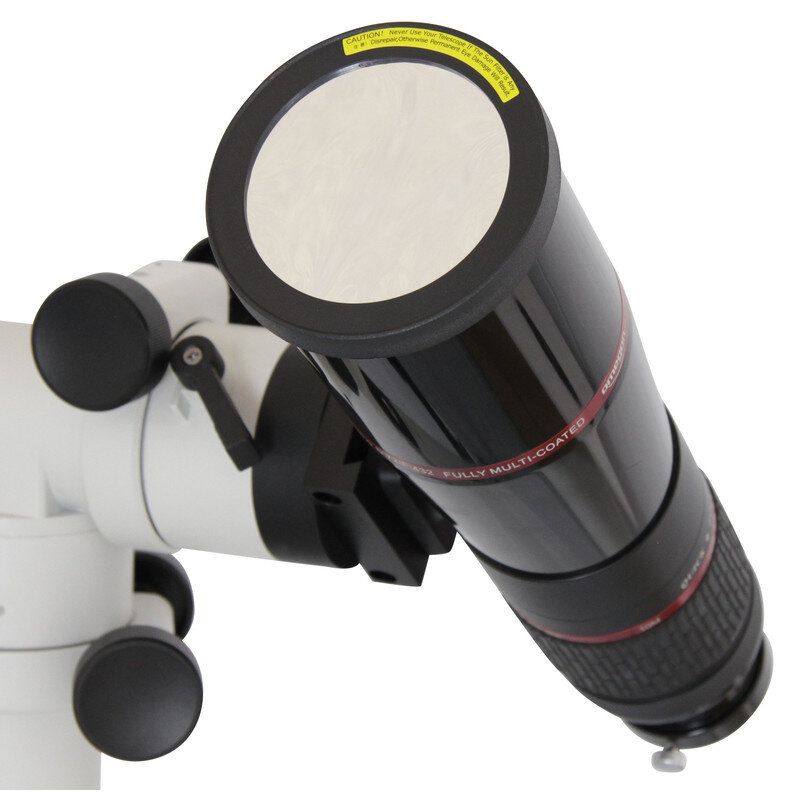
Mounted solar filter
Is do-it-yourself not really your thing? Then a ready-mounted filter is the perfect solution for you. The Omegon filters for smaller telescopes or the Baader ASTF filters are good value and are available for many sizes of telescopes. You simply choose the diameter that suits your telescope and attach the filter to the front of your telescope. Before long you will be safely looking at the Sun and discovering sunspots – and of course Mercury.
Tip: to be certain which filter will fit your telescope, measure the outer diameter of your tube before making your selection.
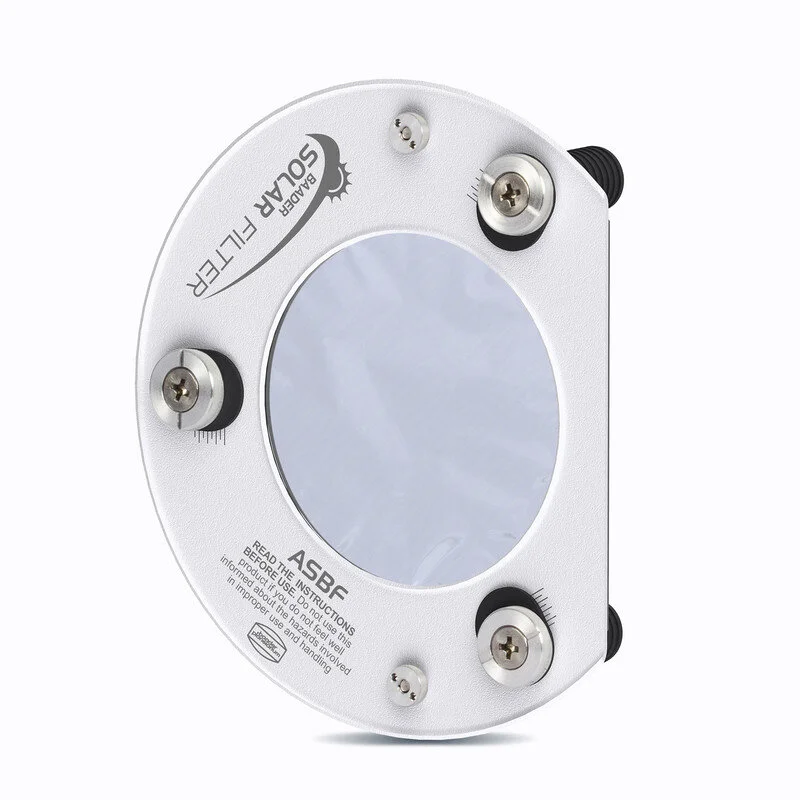
Solar filter for binoculars and cameras
You can also follow the Mercury transit with binoculars. Just by attaching two normal solar filters? This works particularly well with the AstroSolar binocular filter. They are laterally cut in such a way that they don’t make contact even with objective lenses that are very close together. This is also an advantage for DSLR cameras: the flattened filter edges makes it possible to attach a camera flush to a telescope or a mounting plate.
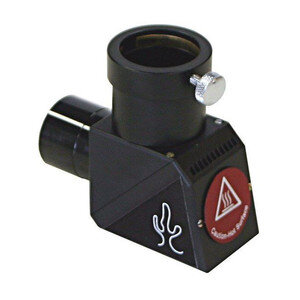
Herschel wedge
Even more contrast is on offer from the professional for solar observing: a Herschel wedge. Combined with a ND3.0 filter it can be connected to a refracting telescope. The advantage: you see the Sun in front of a black background, and the granulation and sunspots appear in unimagined levels of detail.
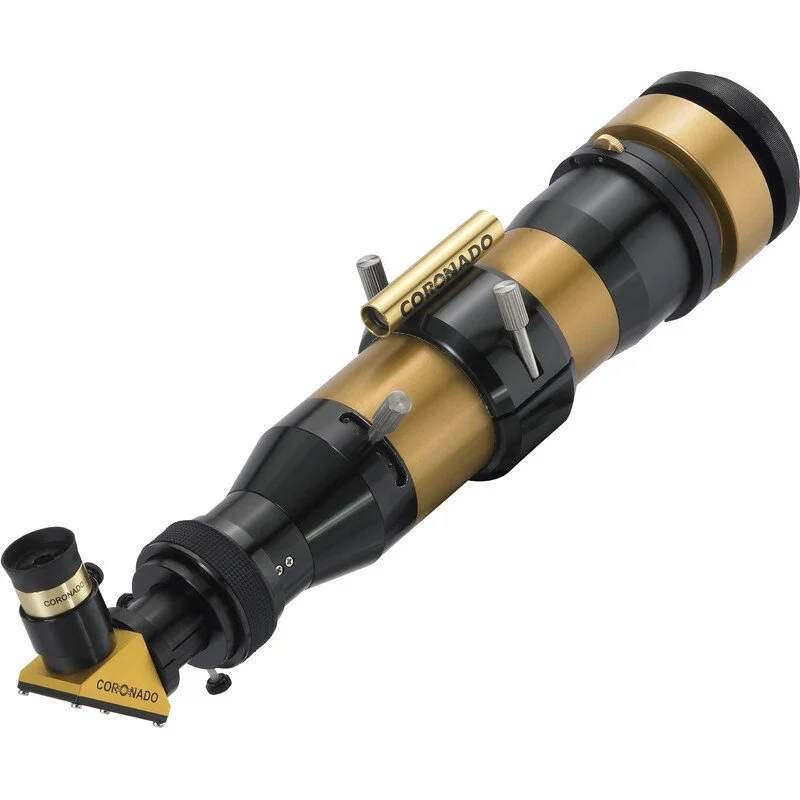
H-alpha telescope
You will experience a bit of the action when observing the Sun in H-alpha light. In a very narrow, deep-red band with a wavelength of 656nm you can observe a very active Sun. Prominences flare millions of kilometers into space and are changing rapidly. Even when you see no sunspots on the Sun, there is almost always something to see.
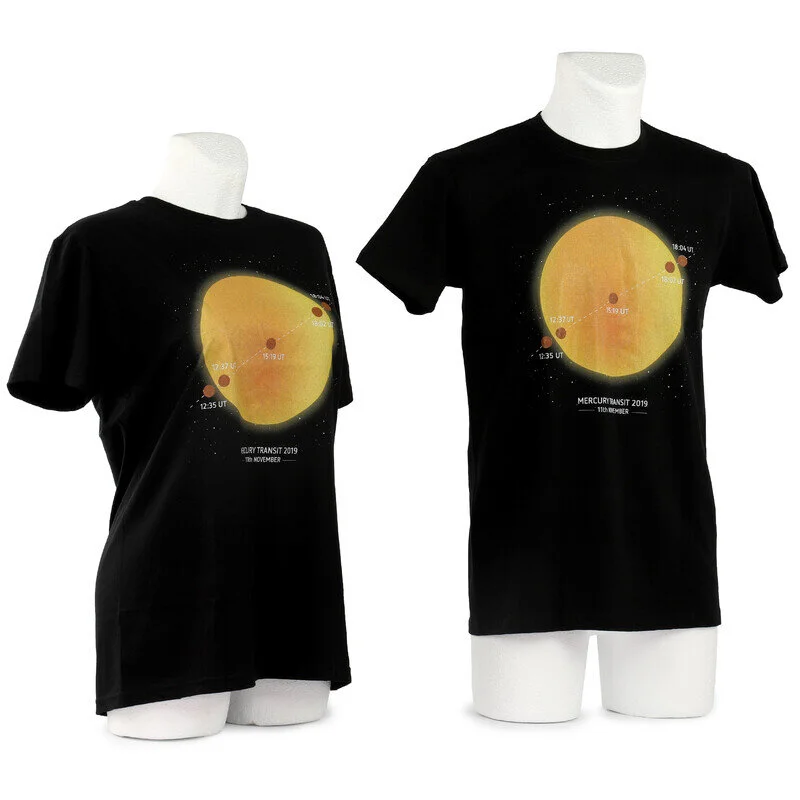
Mercury transit T-Shirt
For huge fans of astronomy: show your passion for astronomy with the new Mercury transit T-shirt. It shows the progress of the transit with all the important information and timings. So anyone can look to see when Mercury will appear in front of the Sun, or how long we still need to wait until the next transit.
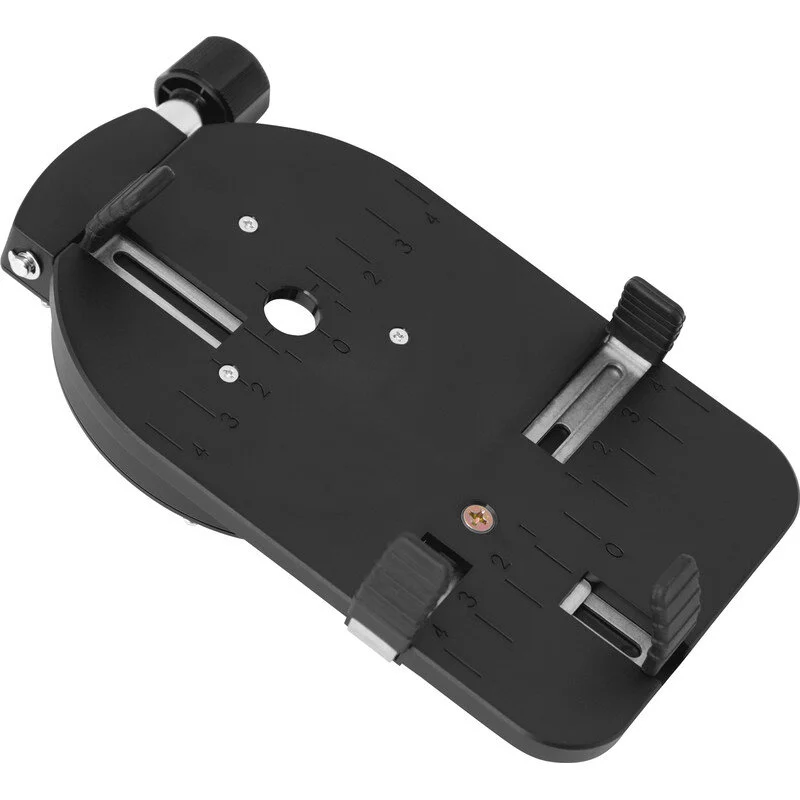
Smartphone adapter
Photographing the Sun swiftly and simply: with a smartphone adapter you can quickly take beautiful pictures of the Mercury transit. It works really well with small telescopes. Simply attach the Omegon smartphone adapter to your eyepiece, and soon you will be capturing these astronomical moments for ever.

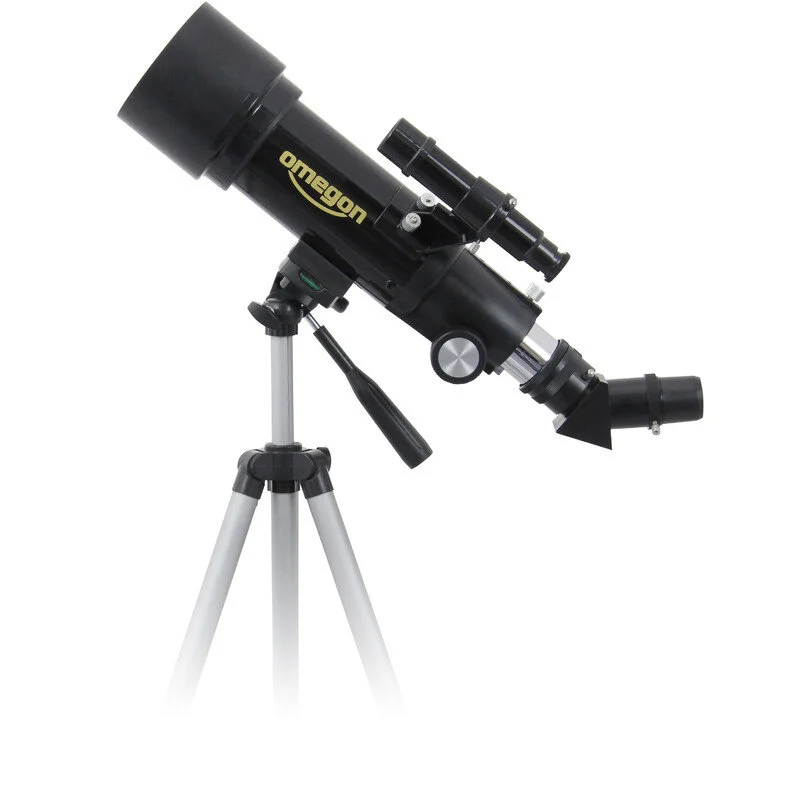
Omegon 70/400 Backpack with solar filter
If you are looking for a small travel solar telescope, then the Omegon Backpack 70/400 AZ is perfect. The set includes a finder scope, mirror star-diagonal, eyepieces and of course the appropriate solar filter. You get all of this together in a practical rucksack.
Finding the Sun made easy
Sometimes its hard to believe how hard it can be to find the Sun with a telescope without spending a lot of time searching for it. Finding it is much easier with the Geoptik 1.25’’ solar finder.
Simply attach the sun finder to your focuser and right away you can centre the Sun over your mount’s axes. The Euro EMC solar finder offers an alternative way of finding the Sun. It consists of a pinhole and a small screen onto which a small image of the sun is projected. Simply attach the finder to your tube using the Velcro straps included.
Gemini Telescope Design:-
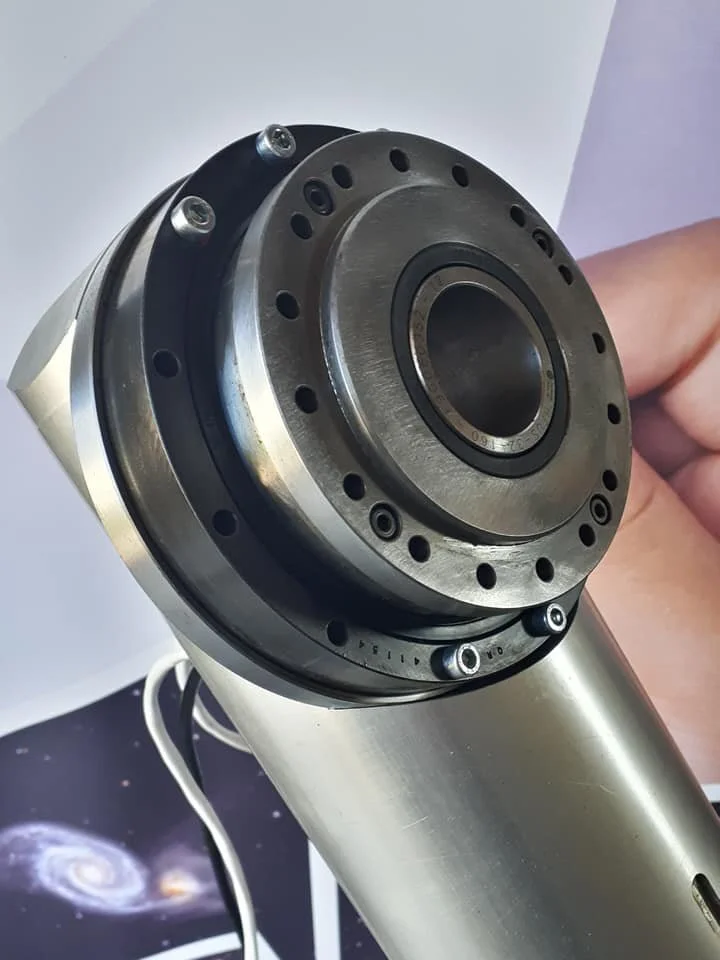
A harmonic drive is a speed reducer with high ratios with very high efficiency and no backlash. At very high ratios they are non-reversing too. Harmonic Drive AG offers them in a package with bearings and sealed housing, load and torque ratings that far exceed the needs of a telescope mount. To increase the reduction (160, but in fact 161) I added a planetary gear that slides inside the hollow input shaft of the harmonic drive. This drive on the Mountegra will serve you for eternity.
Lunatico Astro: Pocket Cloud Watcher
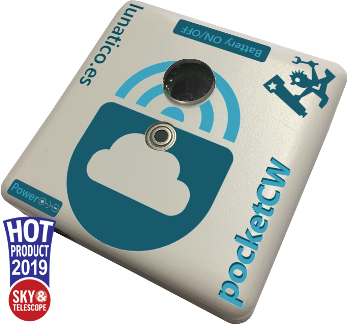
The best portable solution to detect clouds, measure temperature, brightness, relative humidity and dew point. Controlled and monitored from your smartphone.
PC Version available!All the features of the pocketCW, plus PC connection via a micro USB cable.
The PC can run all our AAG CloudWatcher software for displaying and automation - including ASCOM safety monitor and weather conditions drivers.
Any number of phones can be connected while the pocketCW is also sending data to the PC.
Take the new pocket CloudWatcher with you to your favourite dark place, and sleep relaxed while it monitors the sky and ambient conditions, waking you up in case of trouble.
Main Features:
Configurable Alarms (1) for any of the readings, plus battery level and data age (watchdog function)
Can run from the internal rechargeable battery, or from any standard jack (5.5-2.1mm, centre positive) and ubiquitous 12V power supply
Data shared via Bluetooth (tm) Low Energy - any device in the surroundings can read it! (*)
All data displayed, alarms fired at your Android or iPhone smartphone (Bluetooth LE required)
Brightness sensor optimized for natural light (artificial light, especially fluorescent, result in wrong readings)
PC version available
(1) New APP version! (2019/April) - 2.1 (available to everybody, including existing users - just an app update away).
✓ Much more powerful alarms: for safe, unsafe, with snooze, ignore period...
✓ Configurable screen saver.
✘Not to be permanently installed outside.
✘Not rain resistant.
(*) Bluetooth (tm) Low Energy available for Android 4.3 and iPhone 6, or better.
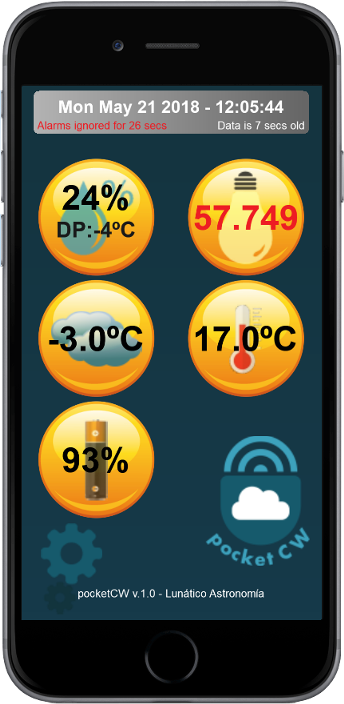
Technical specifications:
Portable detector including:
Relative humidity sensor
Ambient temperature sensor
Brightness sensor
IR sensor - clouds
Watchdog function
PC version available
Power:
Rechargeable battery 3.7V 450mAh (more than 24h of operation at above zero temperatures)
External 12V power supply with standard jack (5.5-2.1mm, centre positive)
Data shared via Bluetooth (TM) Low Energy (available for Android 4.3 (*) and iPhone 6, or better)
Measures: 71x71x27mm.
Weight: <85gr.
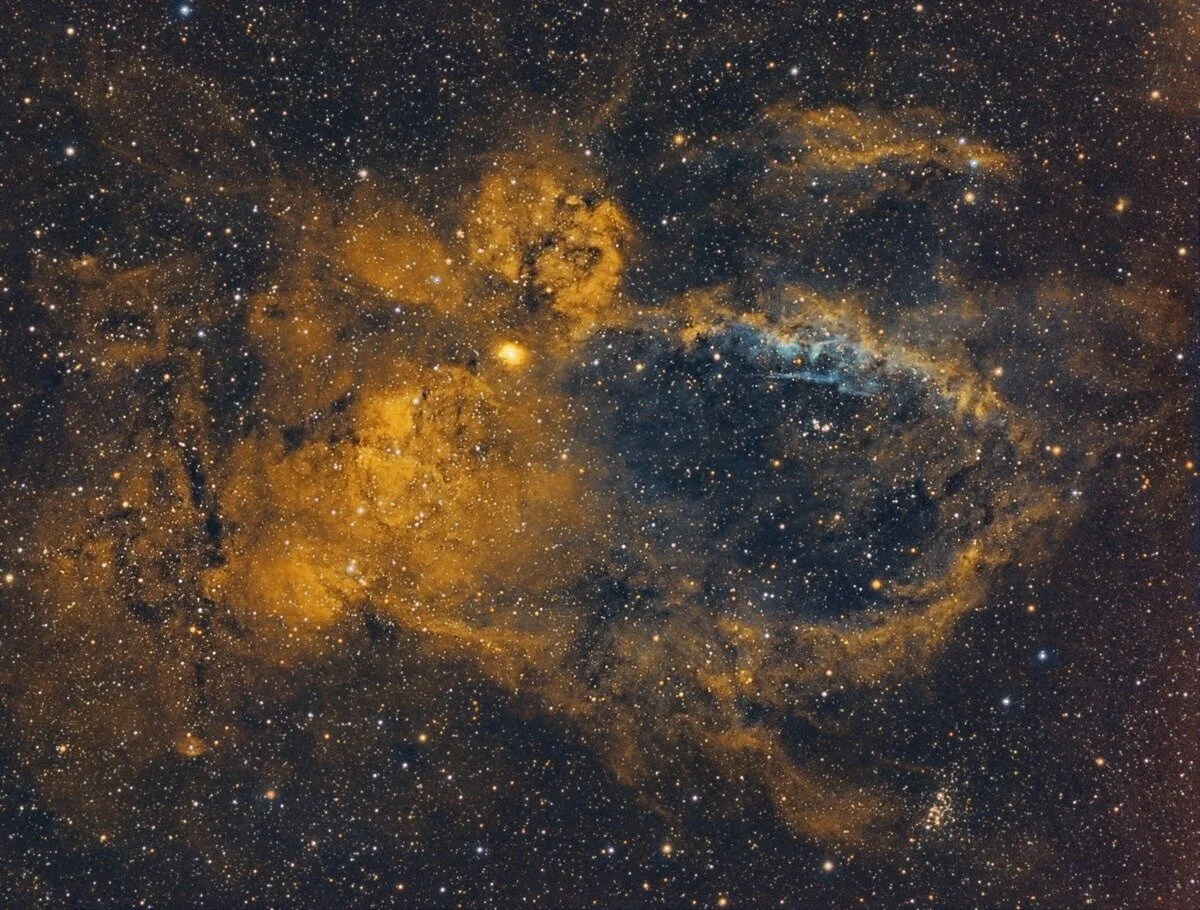
Dark Frame Optics:- StellarDrive 6
StellarDrive 6 has taken its first 2000 images.
Not a single wasted frame...
IMAGE: Martin Baker -
First process of the Lobster Claw Nebula Sh2-157.
Scope FLT98 & QHY163M CMOS camera
16x 8min Ha
24x 8min Oiii
10x 8min Sii
plus 10x 30sec ea RGB for star colour...
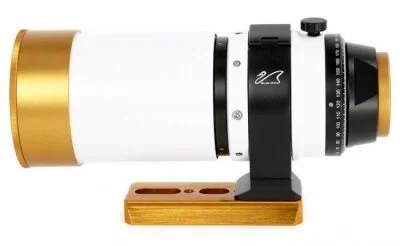
Skypoint:- Refractor Sharpstar 71 sdq f / 6.3 Refractor
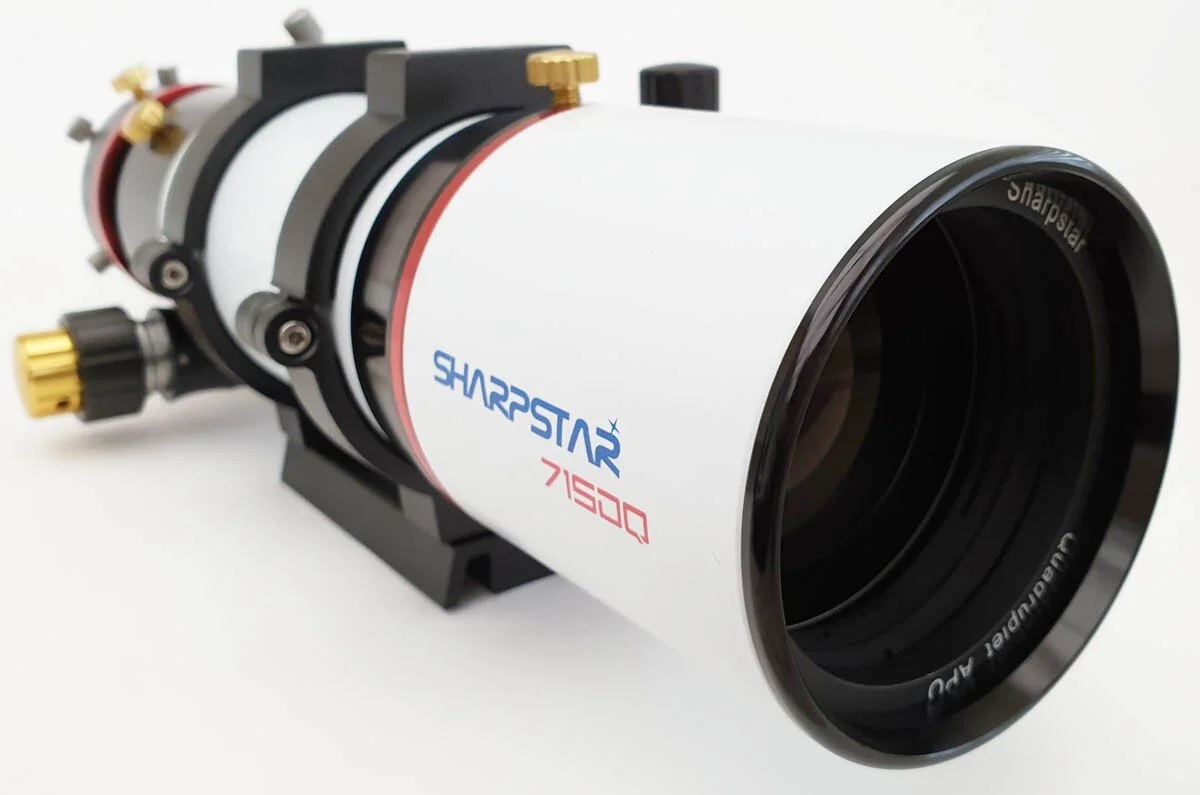
The Refractor Sharpstar 71 sdq f / 6.3 Refractor is a FPL-53 71 mm Diameter, 450 mm focal length and a correct field and the full-frame format. The Telescope is equipped with 2.5 " Sprocket Rotary Focuser 1:10 " pinion and rack with 2 " and 1.25 " adapters ". the endowment includes retractable gobo, CNC rings, Vixen and breadboard dovetail bar For seekers.
Soft Bag Geoptik 30 B034 for small refracting. Ideal for small apocromatici from 70, 80 or 90 mm opening and focal of about 500. Interior stuffed with sponge.
Click here for more details.
Rainbow Astro: Meade35cm's replacement
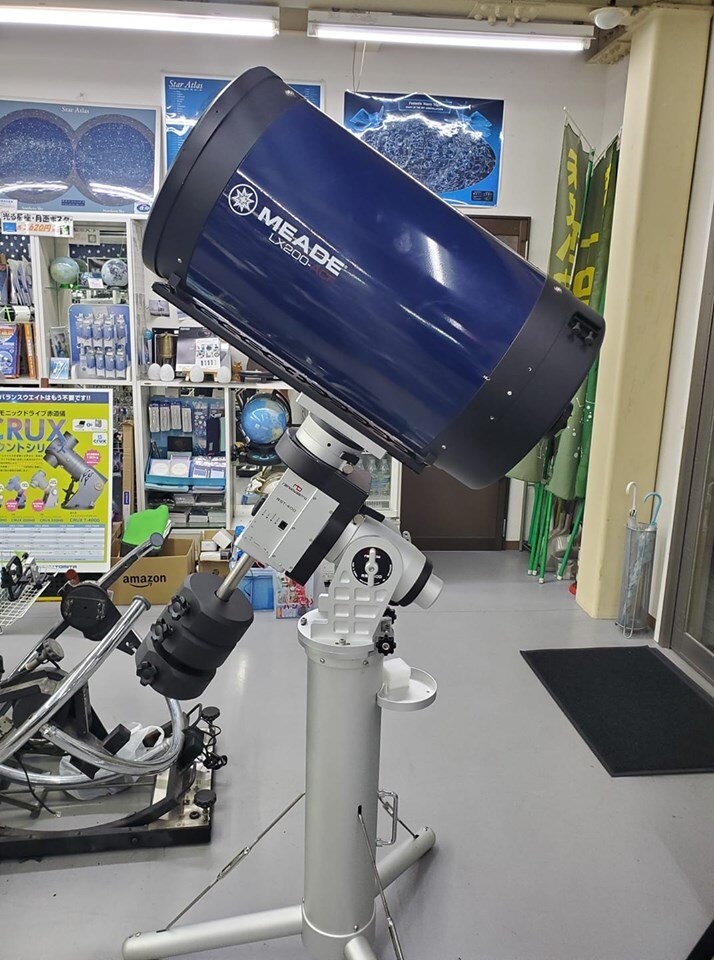
The Meade Lx200 Series has a new and new version, but there are not many cases that the fork mount trestle can fail in electrical parts. This time, I'm asking to use only mirror tubes in the same case. The Mount will also hold alignment information with the rainbowastro rst-400 home sensor, so the personal use is of course, the mount that is easy to use in public facilities. This time we will be renewal of the observatory of the hot springs facility! You will be able to expand the full service (Starry Sky Information) with a simple operation that is not necessary for expertise
Celestron RASA Astrographs: Telescopes for Astrophotography
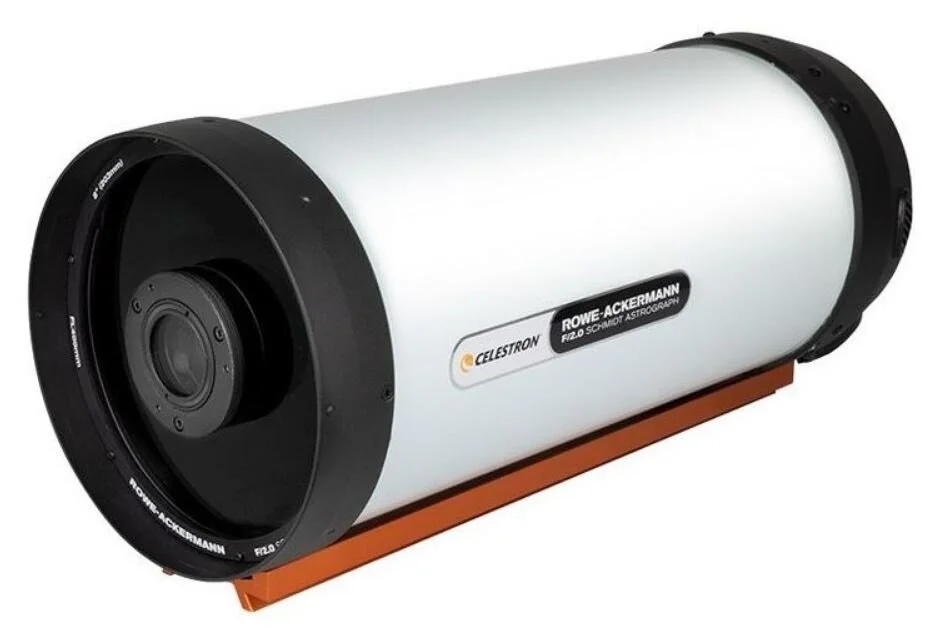
The RASA range of telescopes were developed specifically and exclusively for astrophotography. They are very fast; with a focal length of f/2 they take pictures twenty times faster than a Schmidt-Cassegrain lens at f/10! Because of this a tracking control is not required, and generally fewer demands are placed on the mount.
The RASA 1100 model with a 279 millimetre aperture has already been on the market for some time, and Celestron is now also offering a smaller version, the RASA 800, with a 203 millimetre aperture.
RASA 1100

RASA 800
The abbreviation RASA stands for the developers’ names: Rowe-Ackermann-Schmidt-Astrograph. It is basically a normal, routinely-produced Celestron Schmidt-Cassegrain instrument; that is with a spherical primary mirror in front of which is a corrector plate invented by Bernhard Schmidt. Instead of using a secondary mirror to direct the light path towards the Cassegrain focus at the end of the telescope, the camera sensor is incorporated in the prime focus. A corrector assembly comprising four lenses made of especially high-quality glass ensures optimal illumination.
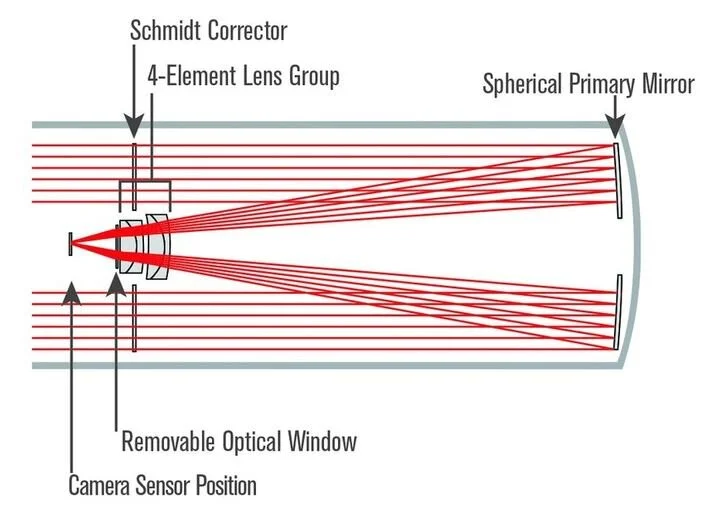
The RASA telescope from Celestron
As the term astrograph implies, RASA telescopes are designed exclusively for photography. There is no option to use an eyepiece. But if you are an amateur astronomer who specialises in astrophotography, you will not see this as a disadvantage, instead you will quickly learn to appreciate the advantages of the RASA telescopes.
QSI:- Competition
QSI 6162
2019 competition (open)
The 2019 astrophotography competition is open for business!
Don’t miss your chance to win a brand new QSI 6162 camera.
Entering is quick and easy… simply upload your amazing astrophotos, give us the capture details and a QSI 6162 camera could be yours. We’re excited to see what incredible images 2019 will bring.
Good luck to all our #Astrophotographers!
Tip: We publish the entries in batches so that we can monitor what is published on our public domain, so do not worry if you do not see your entry straight away.
Competition Terms and Conditions:
By entering the QSI Astrophotography competition you are accepting that your image may be used in QSI marketing material (where possible the photographer will be credited). All entries must have been taken on an QSI Camera. No responsibility can be accepted for entries lost, delayed or corrupted. If an entry is entered twice we only publish one. QSI Cameras reserve the right to amend or alter the terms of competitions and reject entries. A public vote will open after the competition closes in 2020, from which the finalists will be selected.The final decision will then go to the QSI judges. The decision of the judges is final and no correspondence will be entered into. The winner(s) will be notified by email and will then be announced on the QSI website and social media platforms. Competition closes 2020.

Atik: AME Astronomy Fair
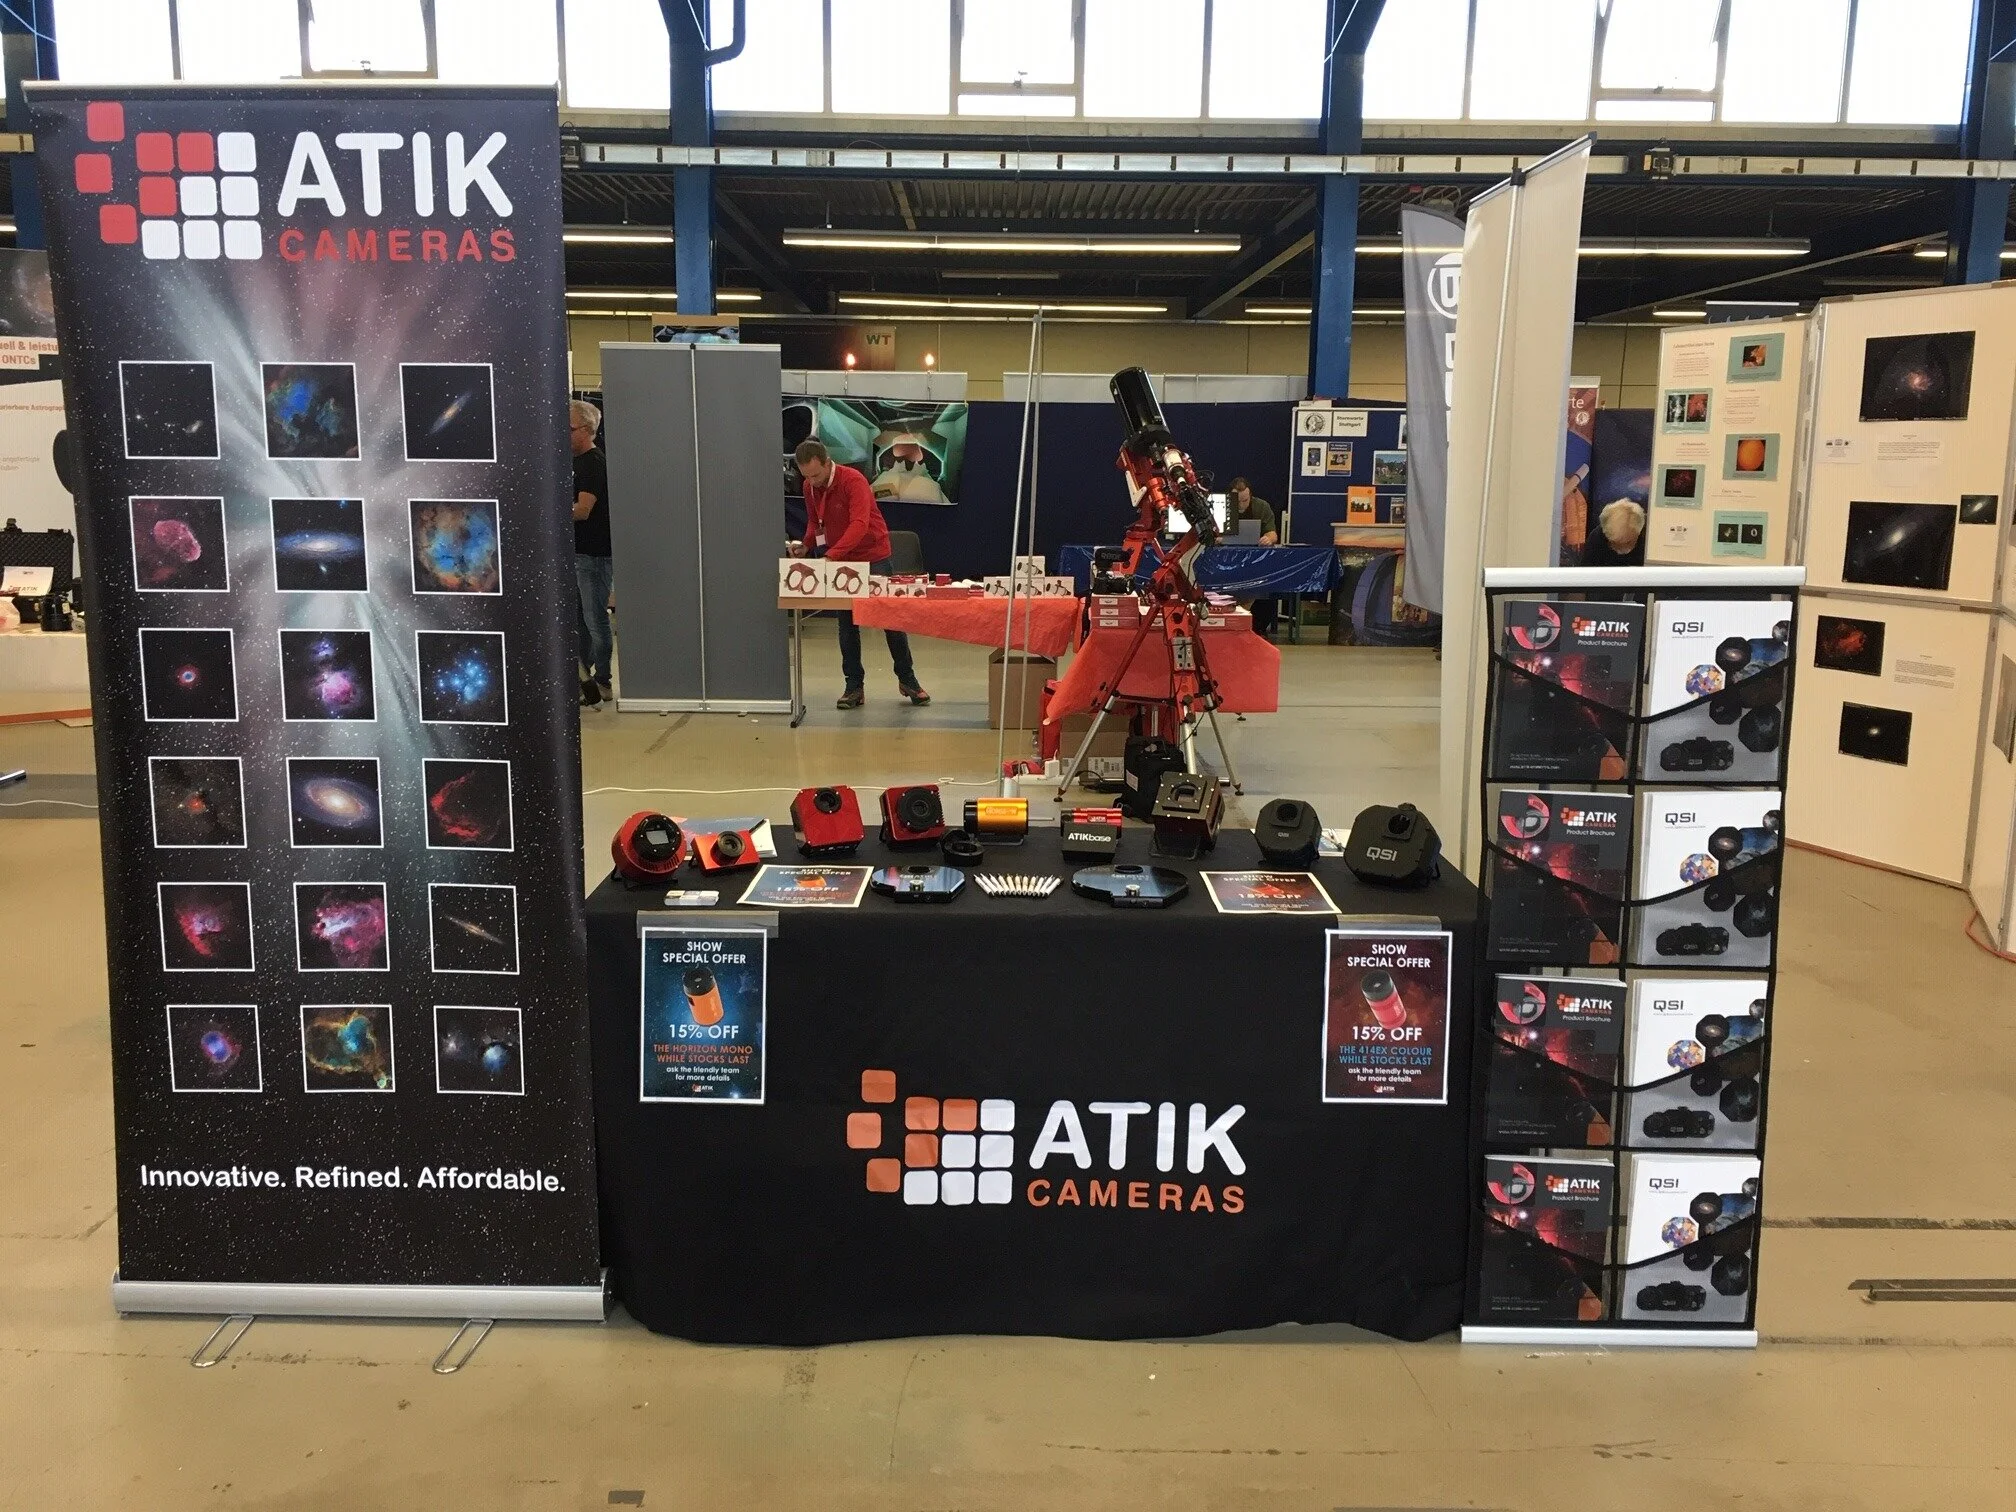
Thank you to everyone who came to say hello at the AME Astronomy Fair in Germany last weekend. It was great to see so many of you. As always, there was an enthusiastic reaction to all our latest software and products as well as our cameras.
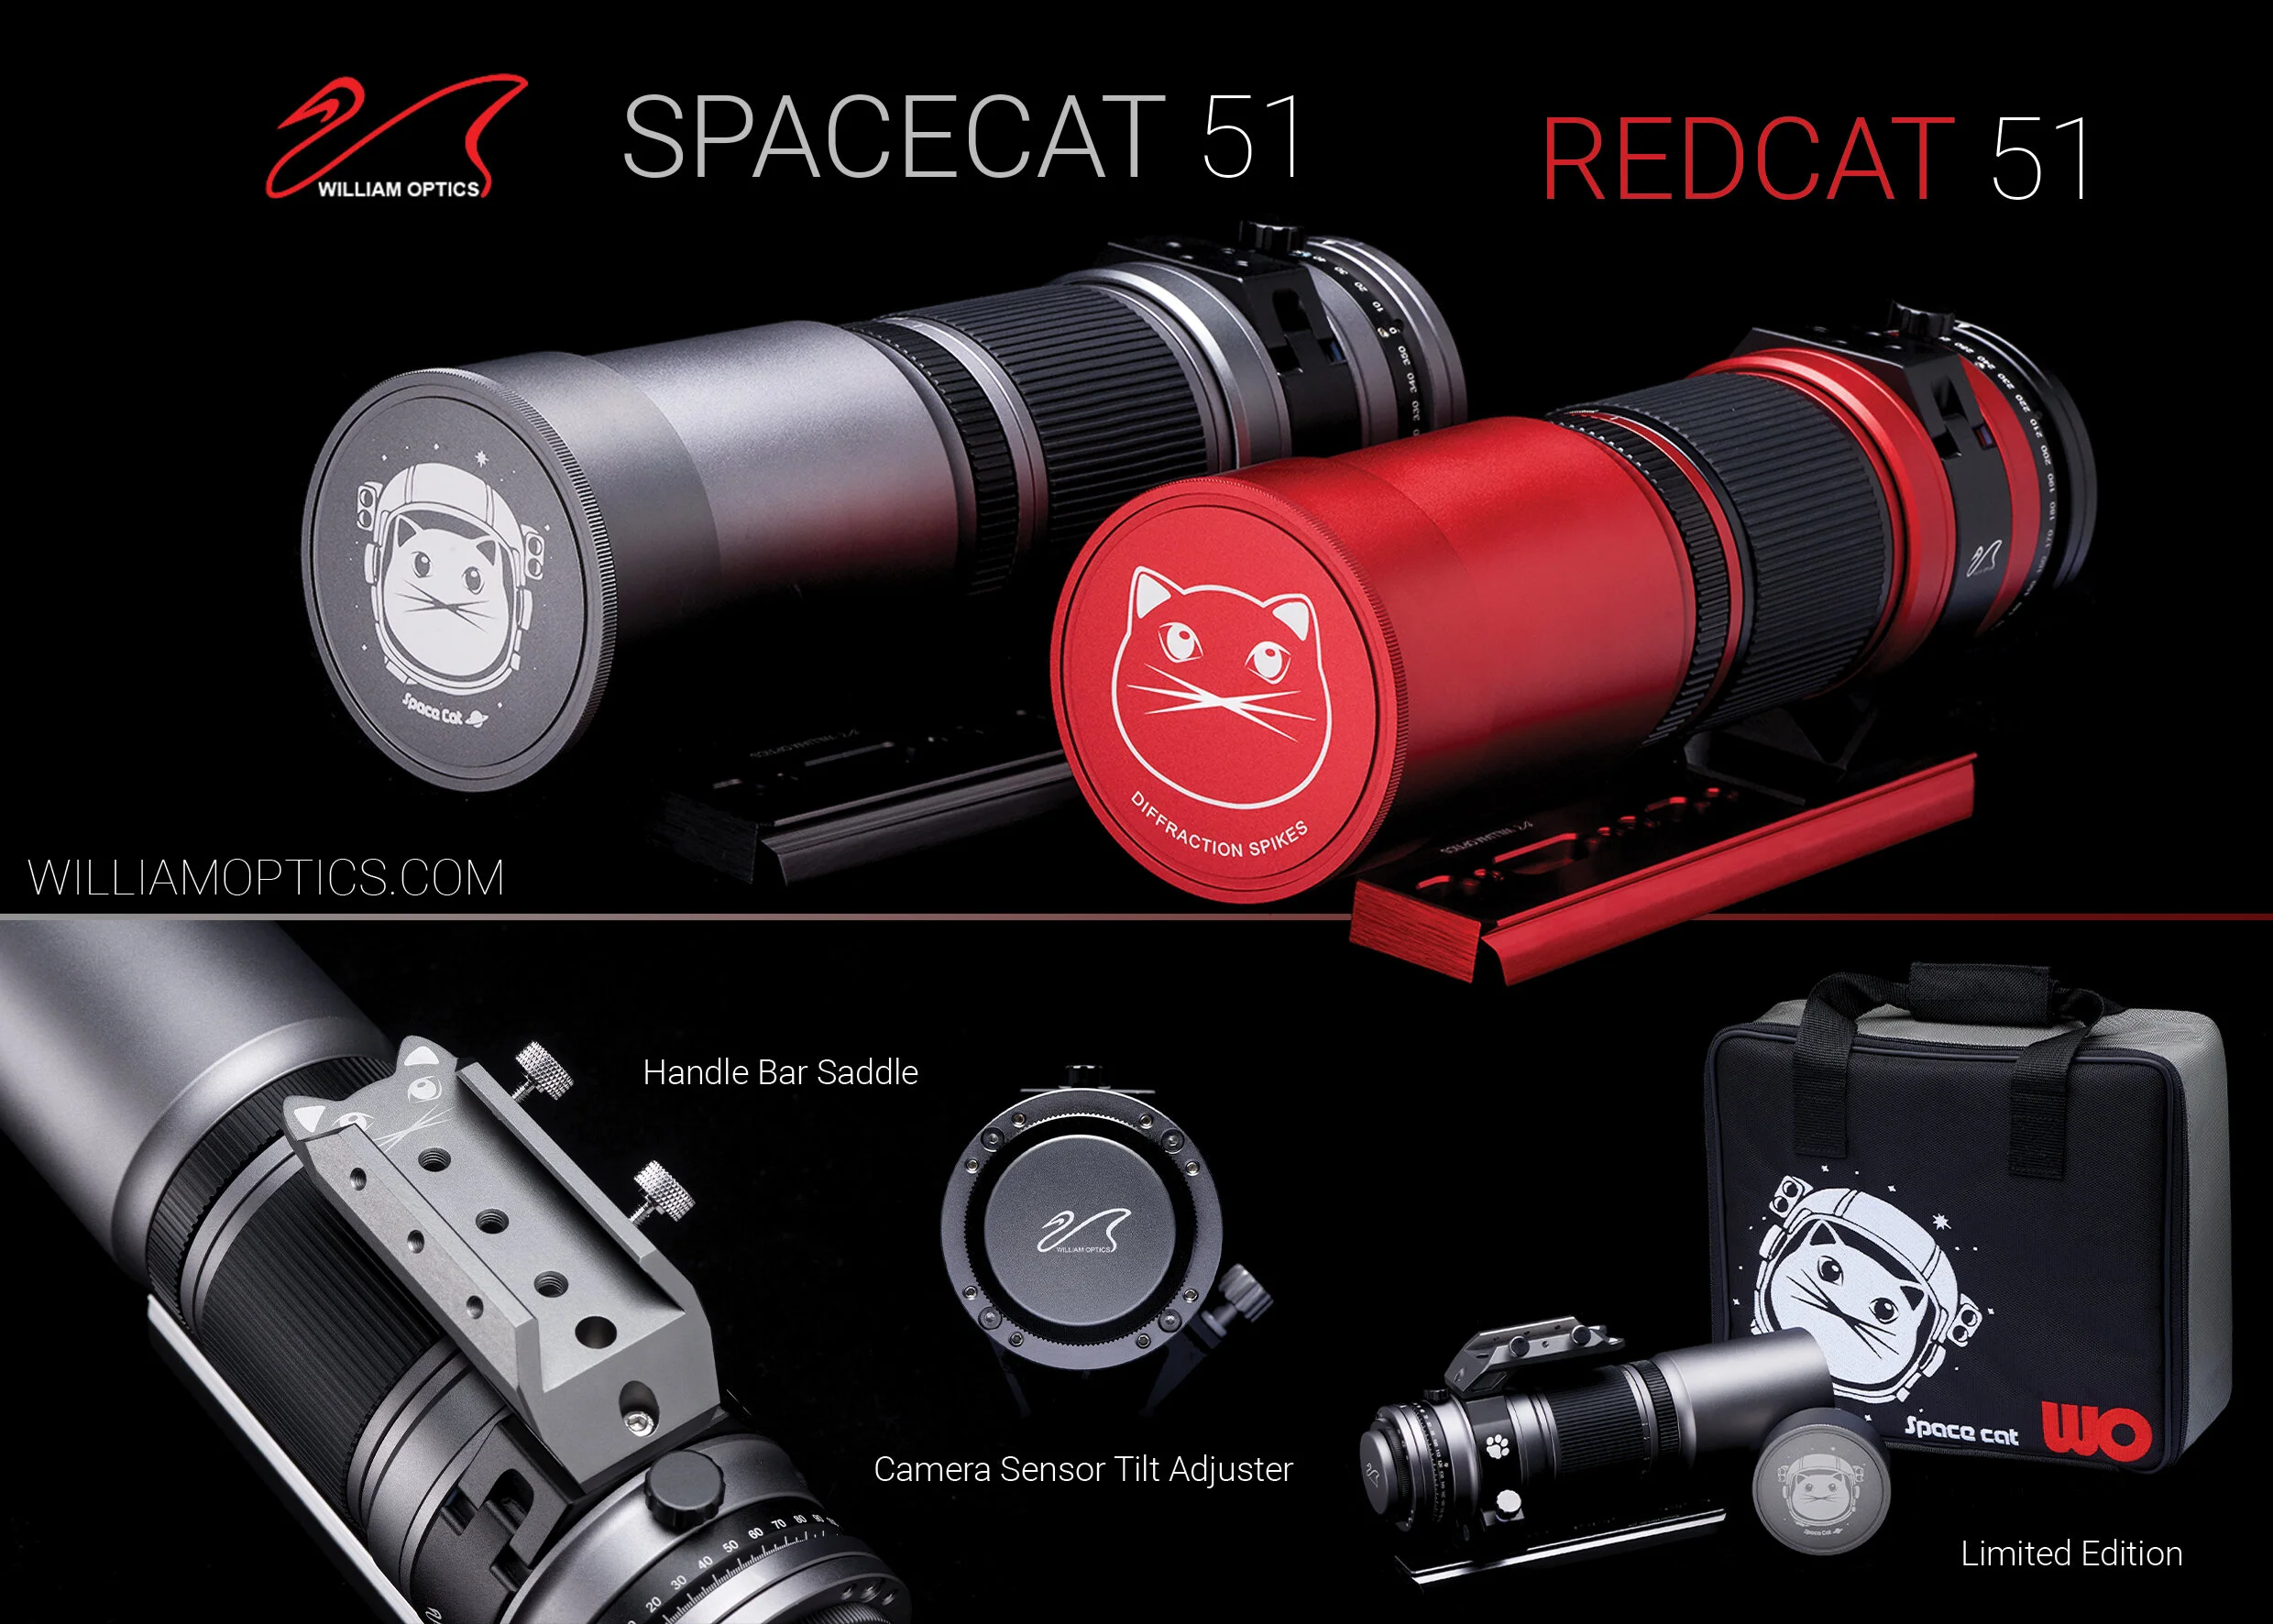
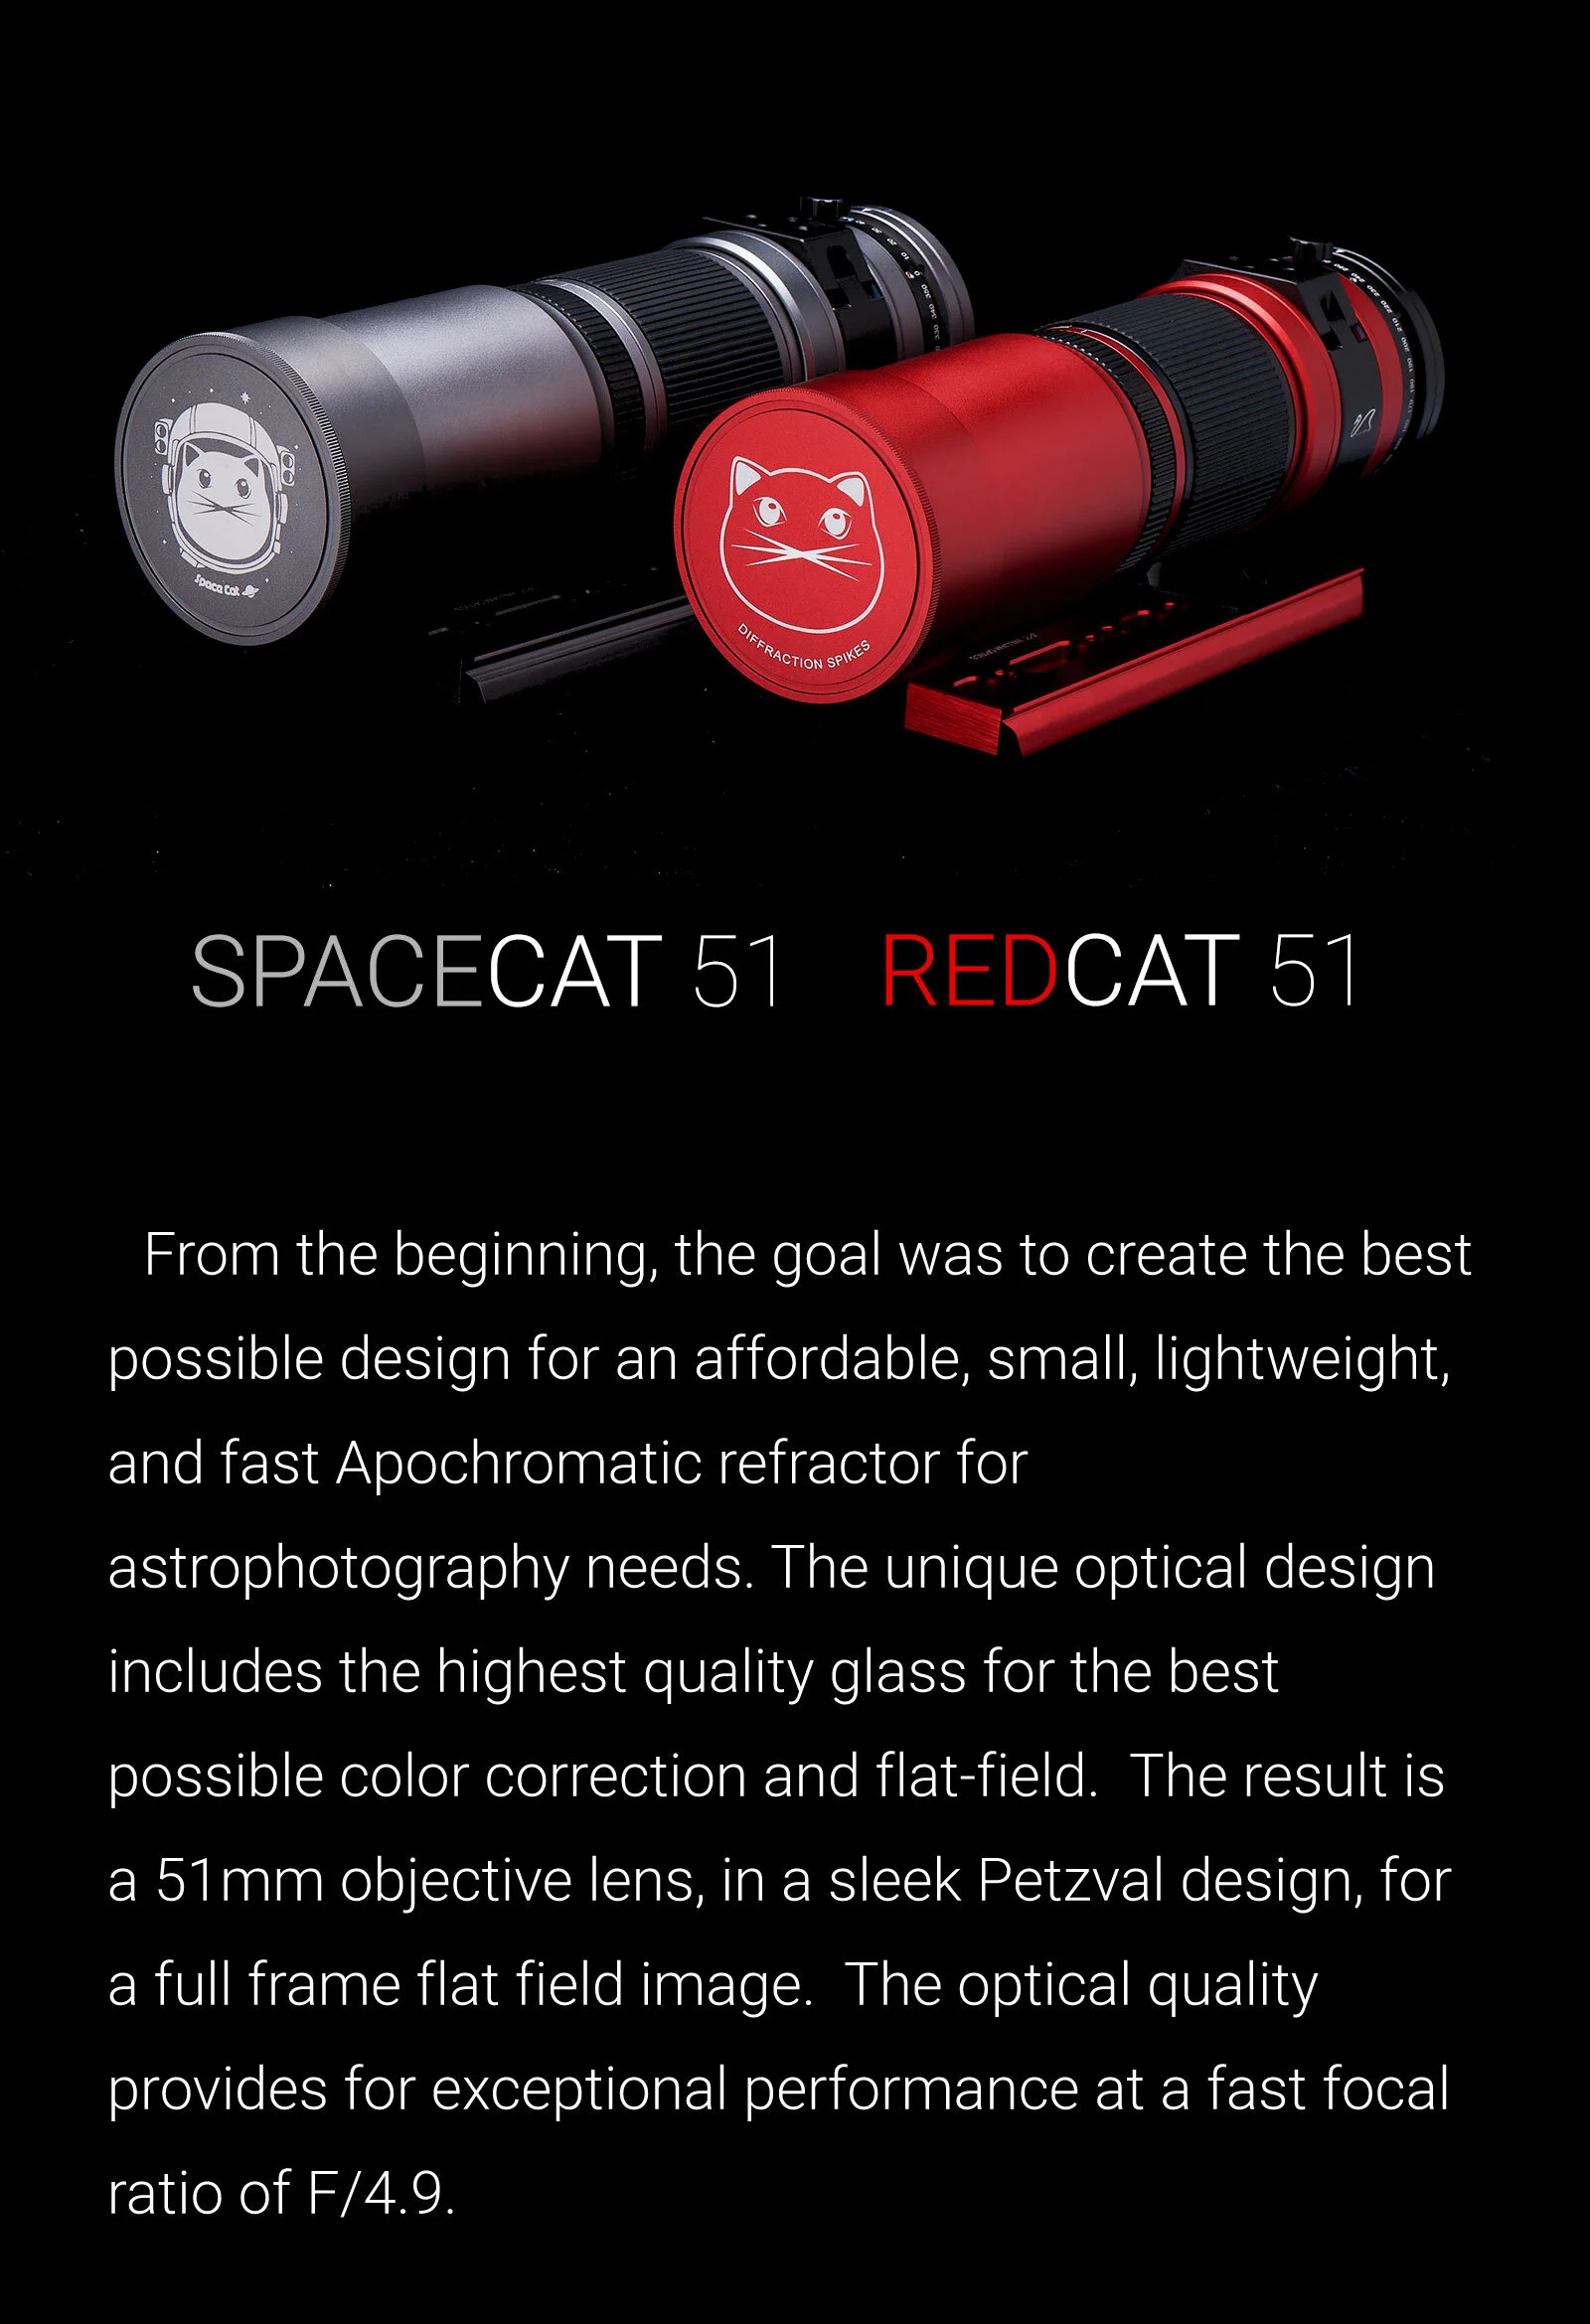
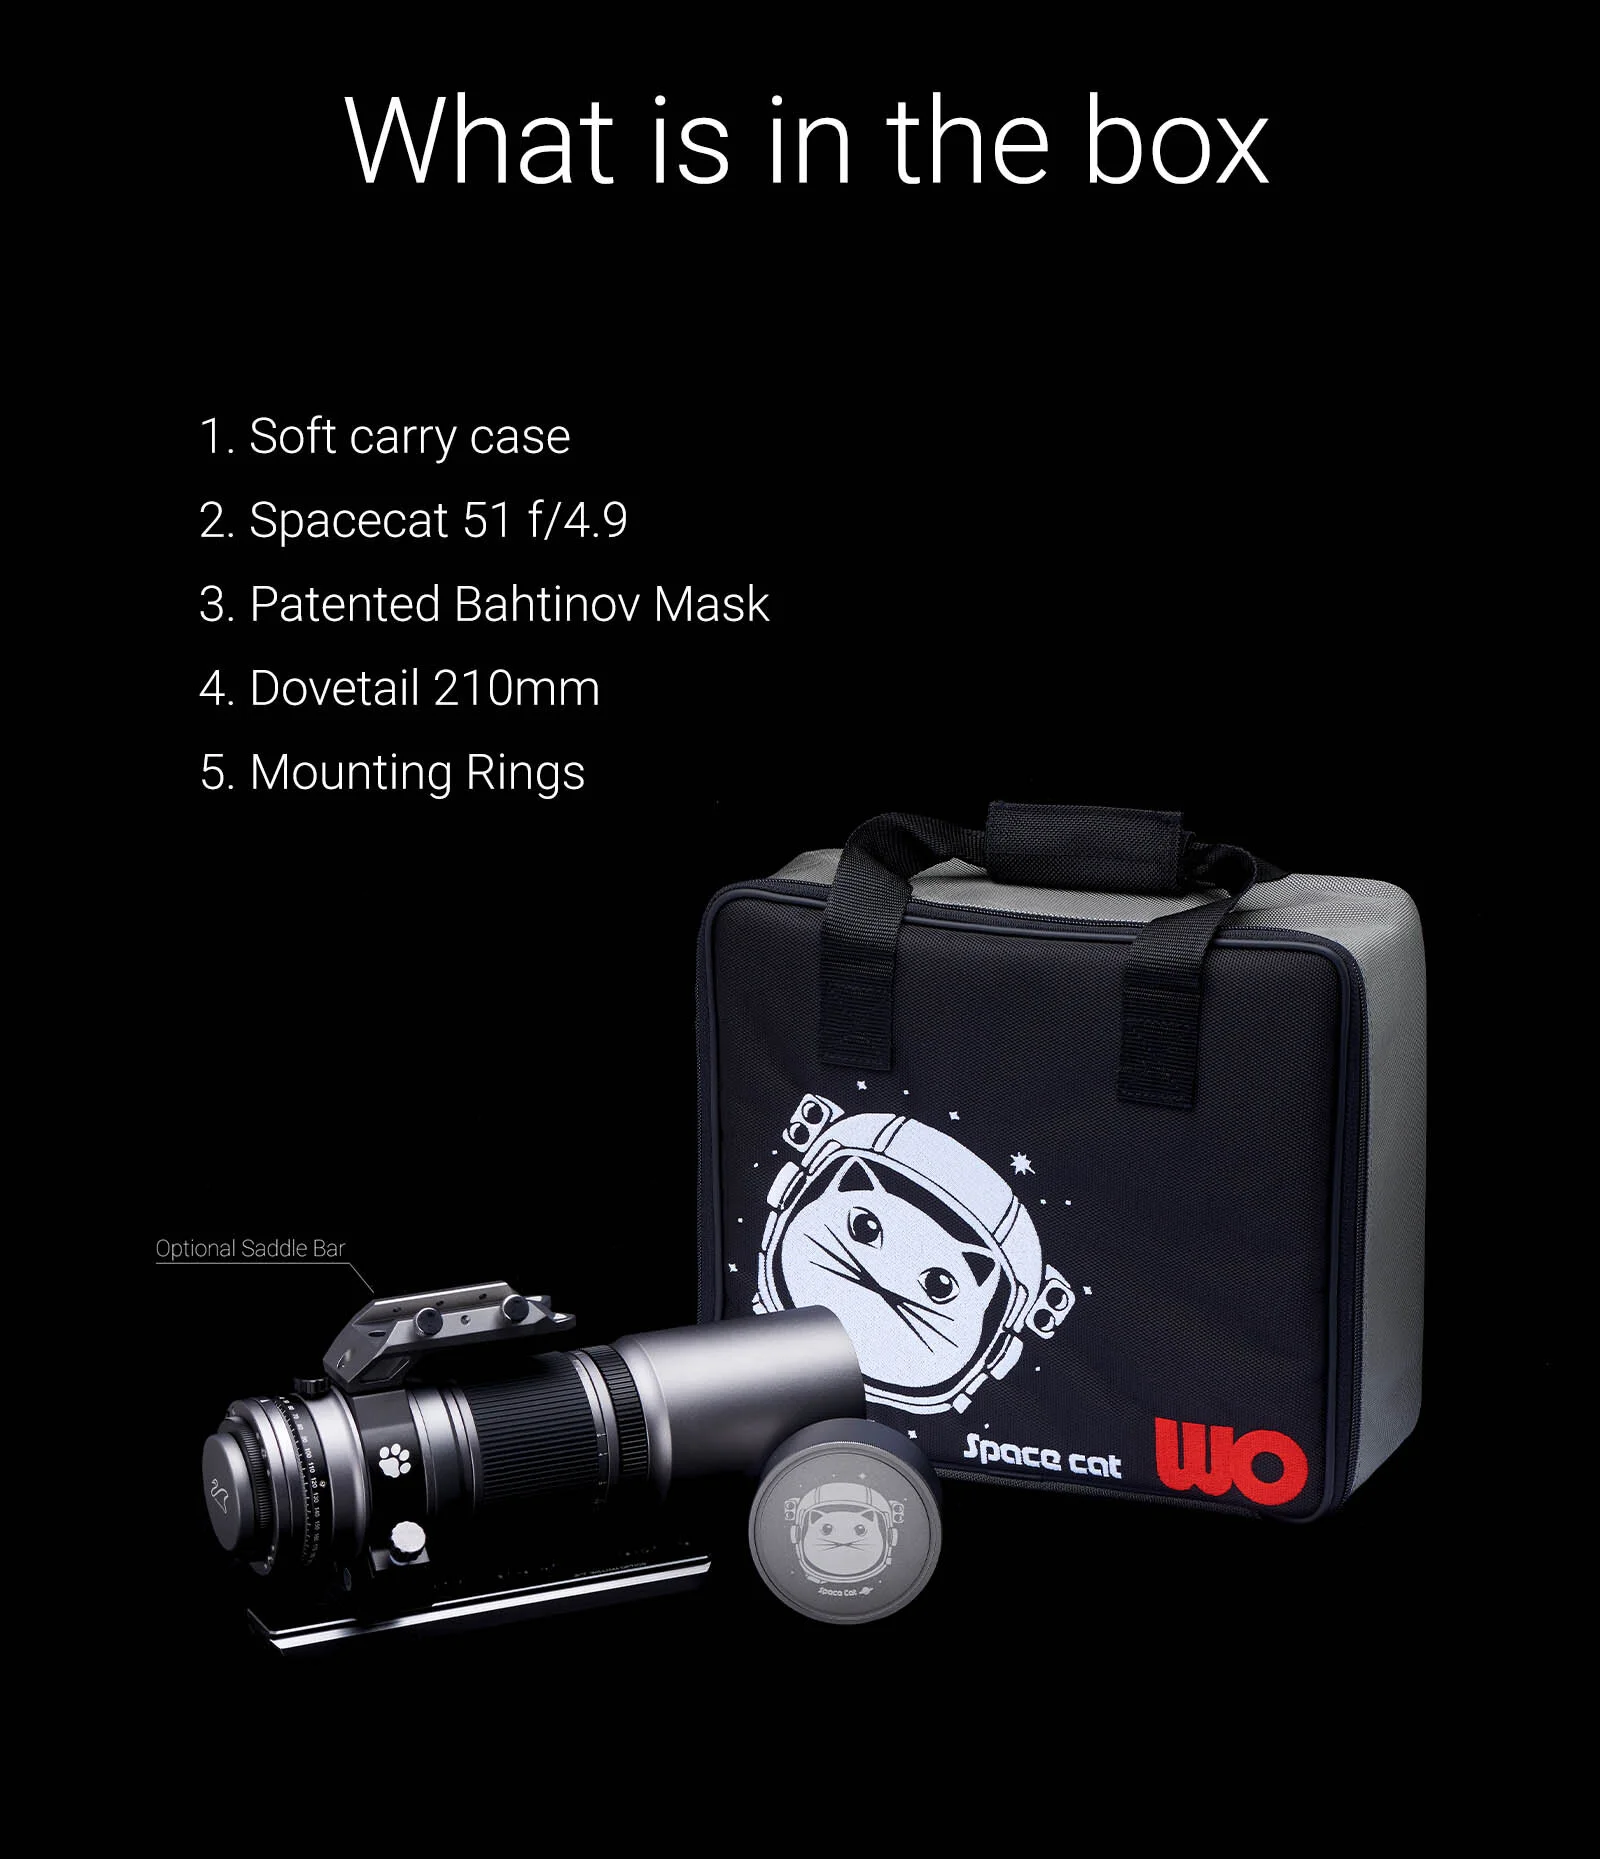
365Astronomy:- White Cat
William Optics RedCat (WhiteCat) 51 APO Apochromatic Quadruplet Refractor Astrograph Telescope - WHITE
£649.00
including VAT 20.00 % ( £108.17 )
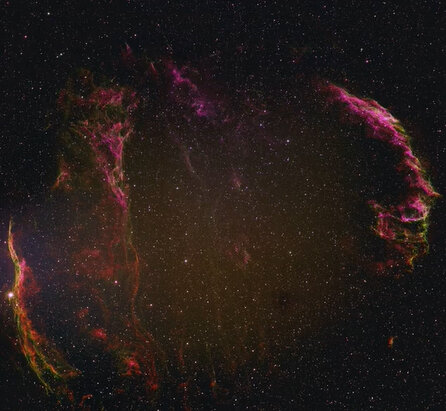
Astro Hutech / Borg: Another Veil thru NB1
1- This was a 1st test shot by Scott Denning in Colorado under the moonlight.
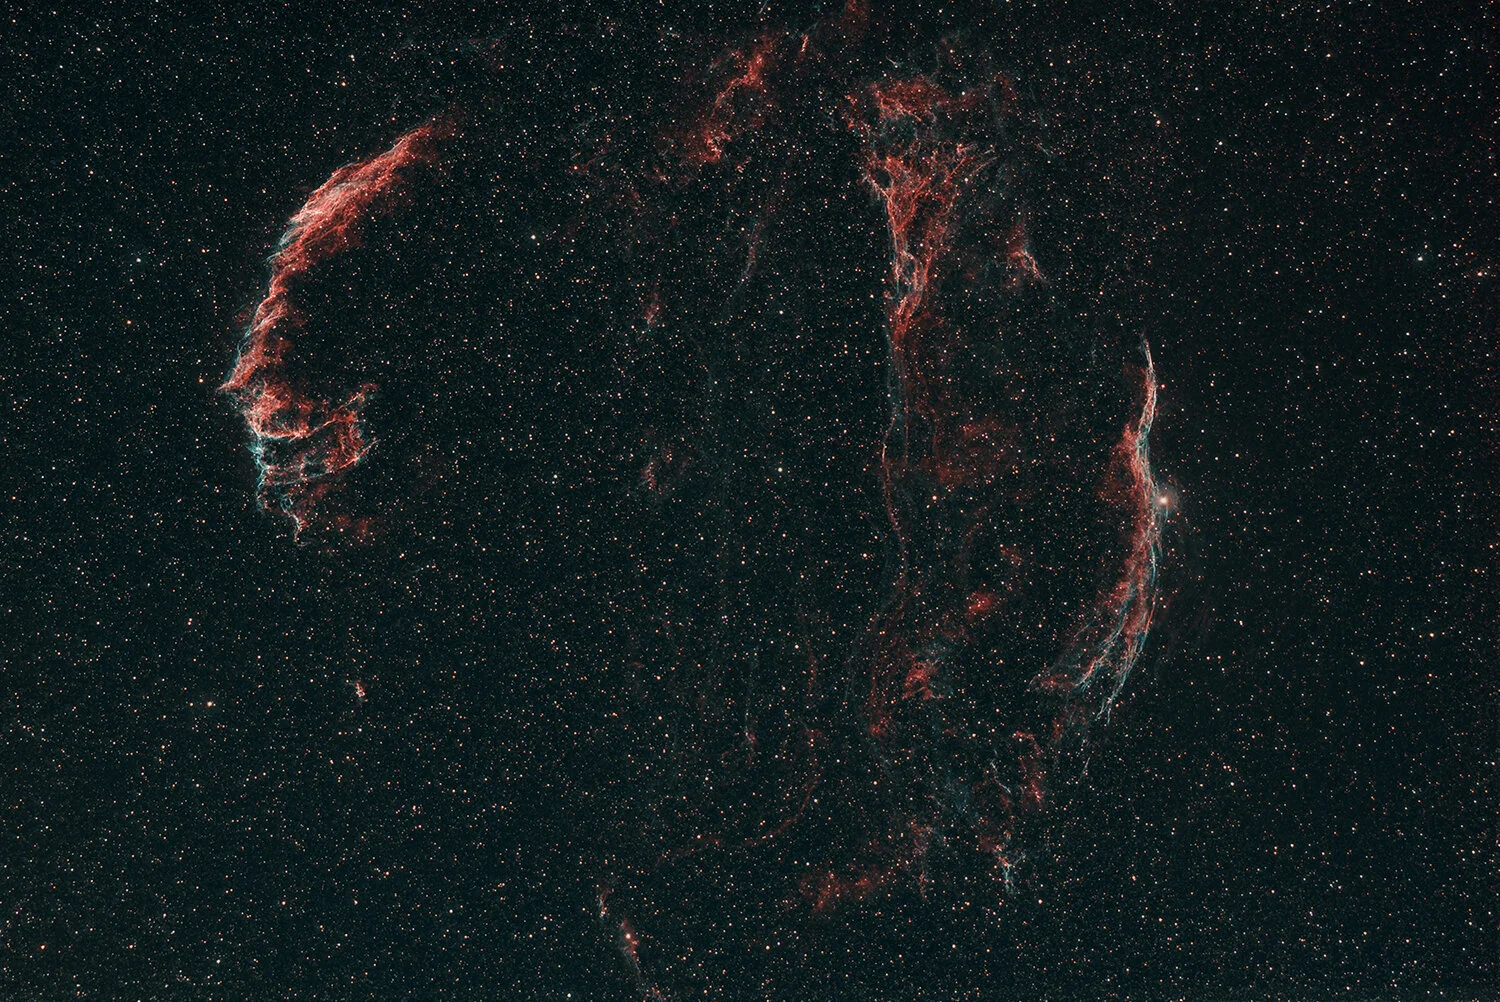
His comment : This is an experimental image of the Veil in Cygnus using NB1 filter with OSC camera (ASI 094MC Pro). About 2 hours exposure (25x300s) with Borg 125SD @ f/3.9 during waning gibbous moon in my suburban back yard the past two nights. Flats and darks applied, then processed in PixInsight.
It took a lot of work in PI to get the color balance to be pleasing, but I am very happy with the result. The NB1 filter works very well to isolate Ha and O3 under bright moonlit skies!
Thanks for your quick feedback on NB1. Enjoy with a new filter. Scott, when I used NB1 with my 183MC last time, I pre-set white balance – red – 96 & blue – 88. It might not be the same for 094MC. But I thought it might be useful for your next attempt.
2- I also resumed astro activity. This might be 1st time to take gear outside almost in 3 months. Fortunately now I can carry some portable mounts and scopes after foot and back injuries. Still a bit hesitating though. I missed a lot of summer targets this year.
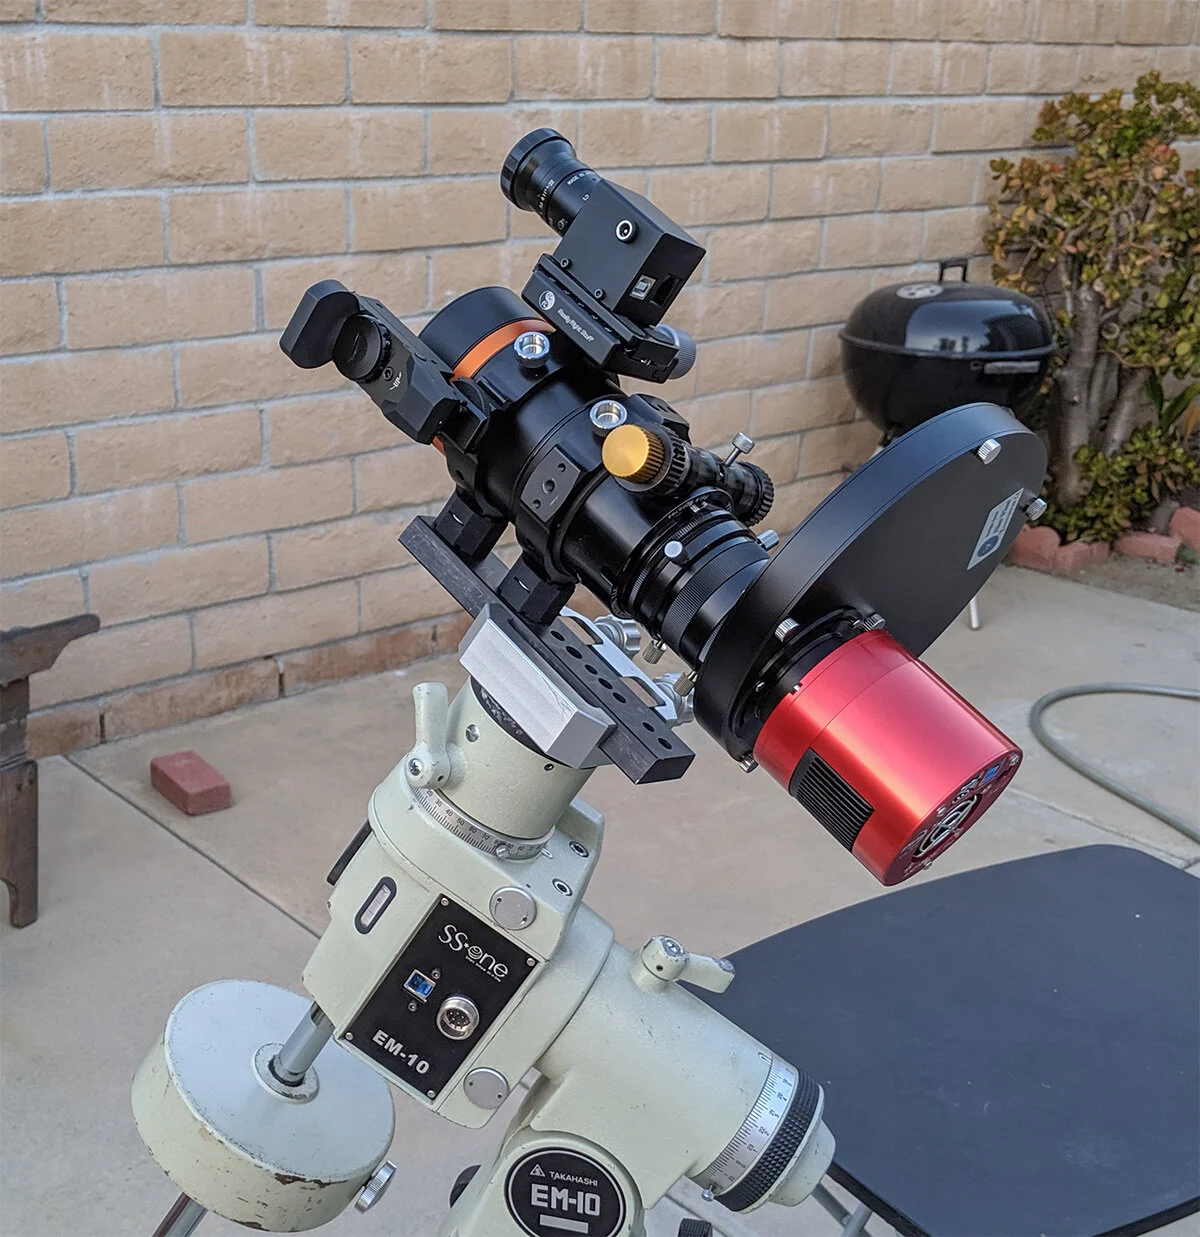
This was my 1st attempt to test CFW with a color camera under the sky. Unfortunately I was forced to be washed out by the marine layer quickly. But at least I figured out each filter was switched as expected from PC. So this was the good to start anyway.
IDAS filters are set as follows
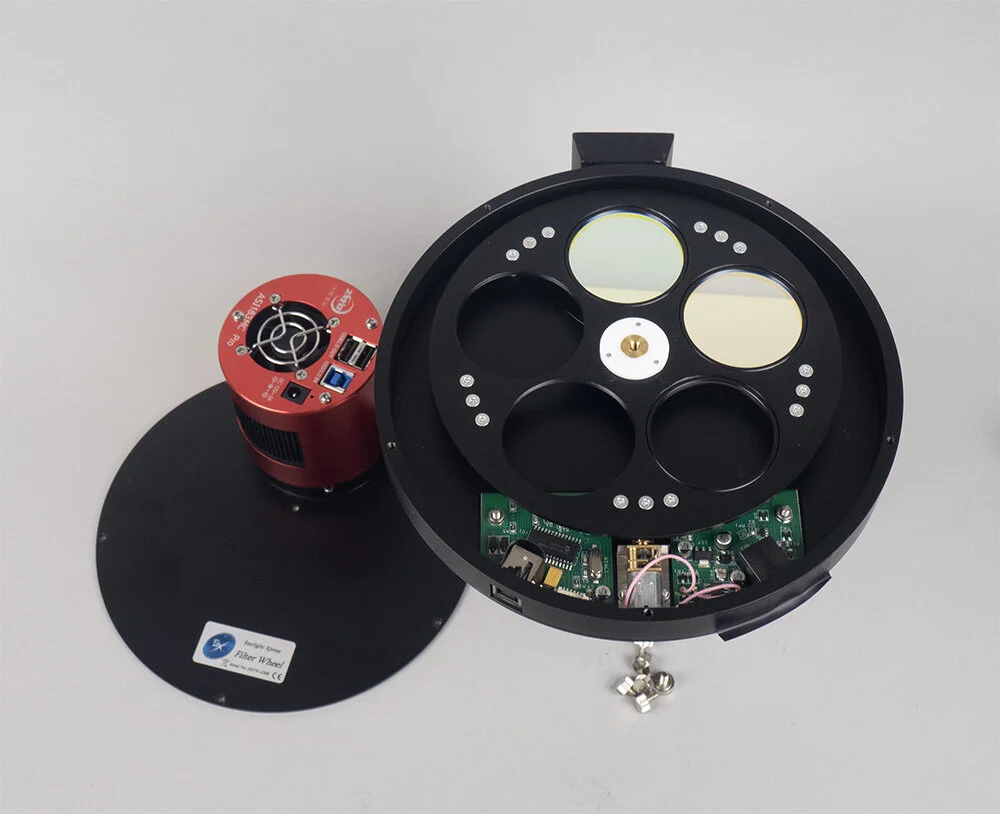
From top : NB2-48, NB3-48 and ODW(clear)-48
Dark Frame: Celestron CG5-GT
We like Celestron CG5-GT’s, like this one here.
The AVX is very similar and also very capable. The average age of a telescope mount in our workshop is nine years old, with the oldest dating back to 1996.
You don’t leave servicing your car for that long, and these precise instruments need the same looking after.
Our rebuilds can last up to 5-7 years without degraded performance.
How do we know?
We recently rebuilt and upgraded some of our earliest mounts from three years ago, and hardly any wear was measured.
We engineer tighter tolerances into your mount to make them perform. Like 20min guided images from CG5-GT’s. But don’t leave to long. The impossible we already do, but some miracles do take a little longer.
Book your mount in today.
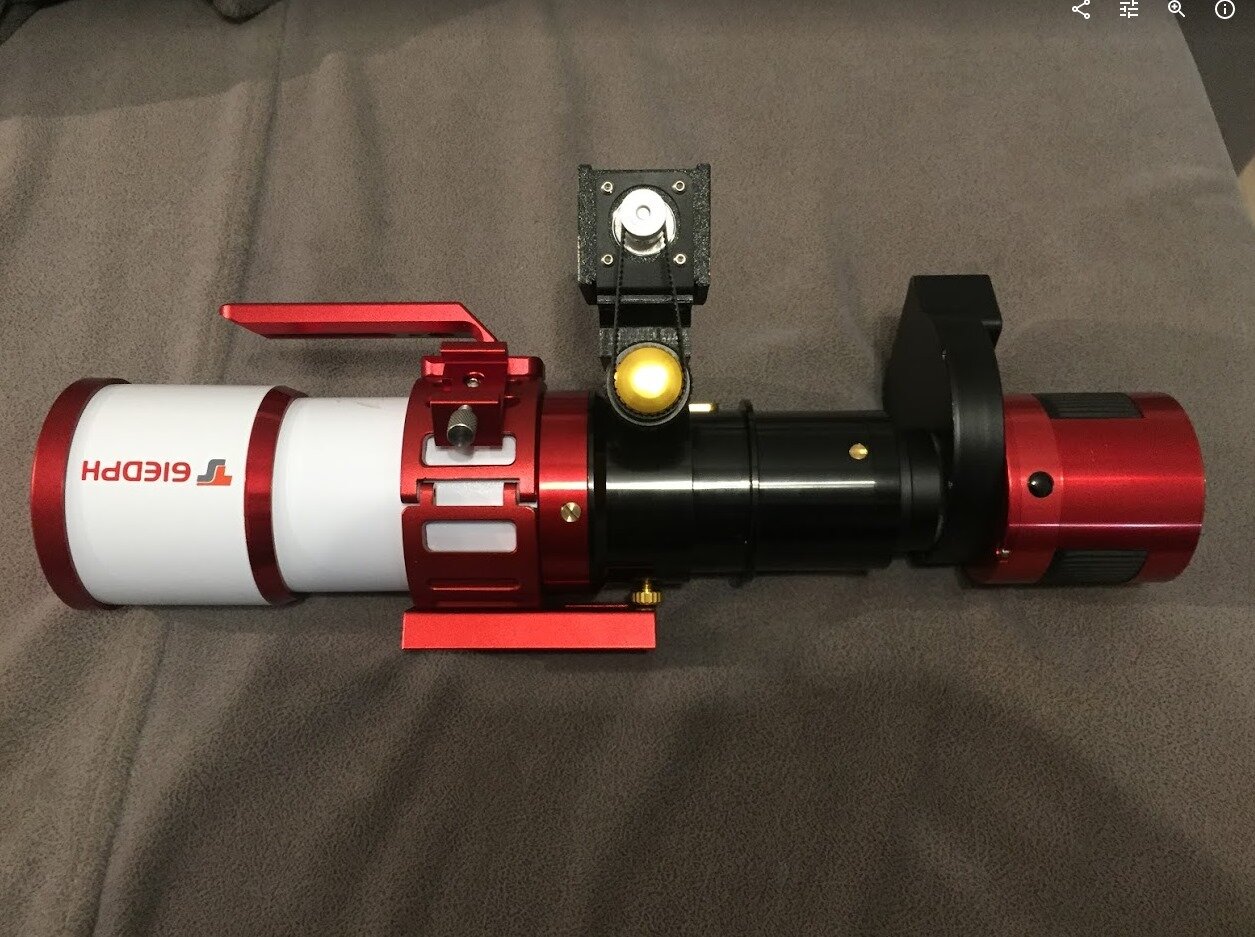
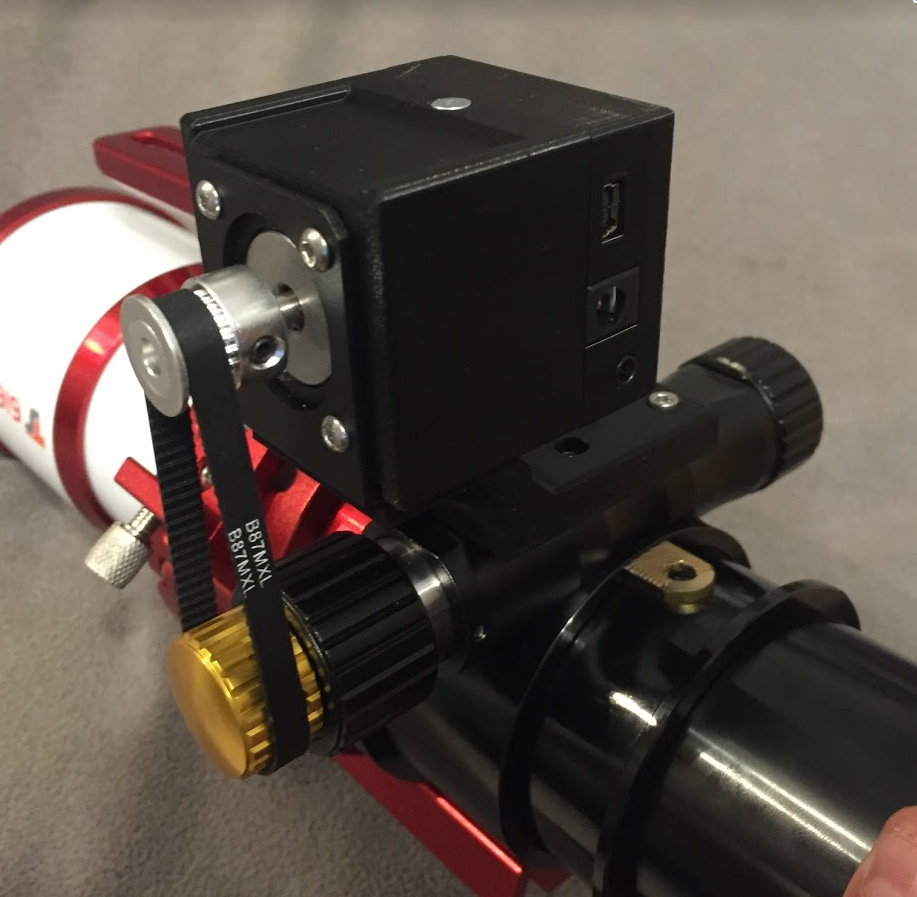
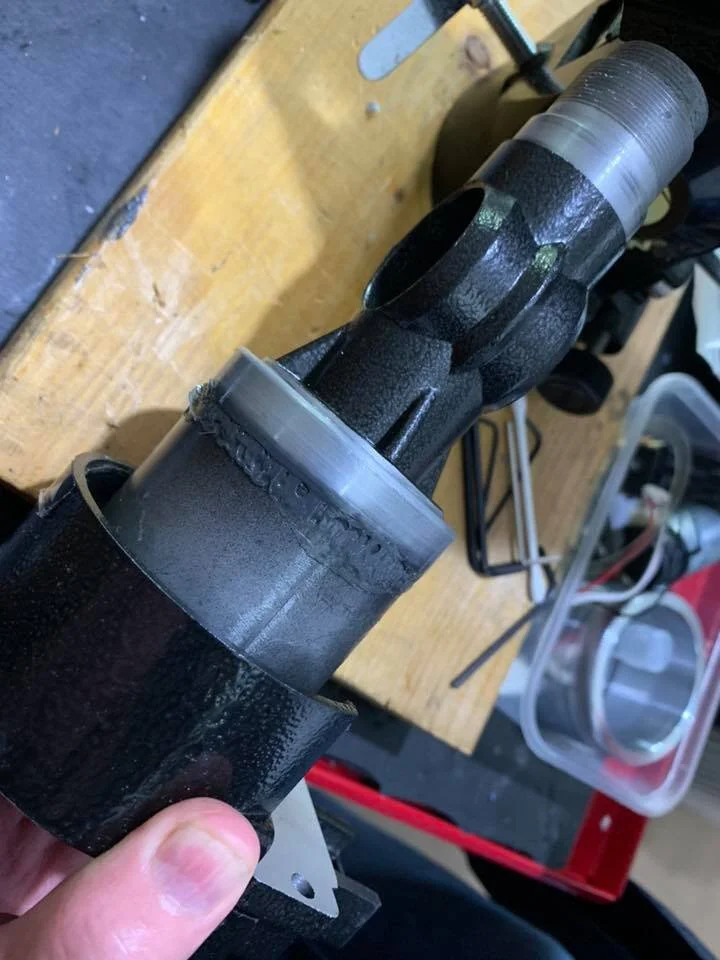
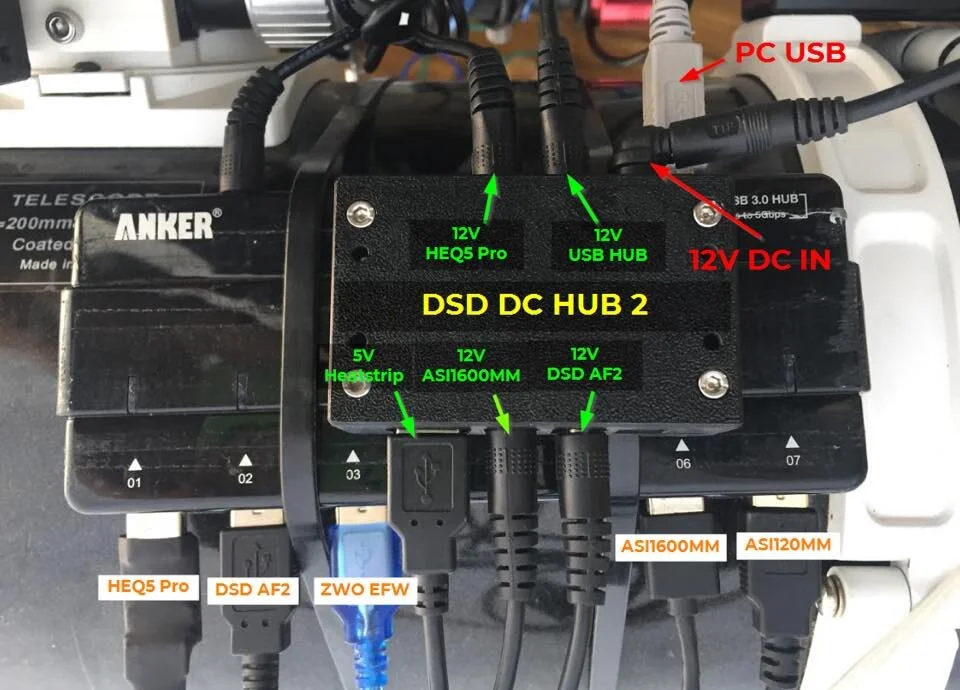
Deep Sky Dad
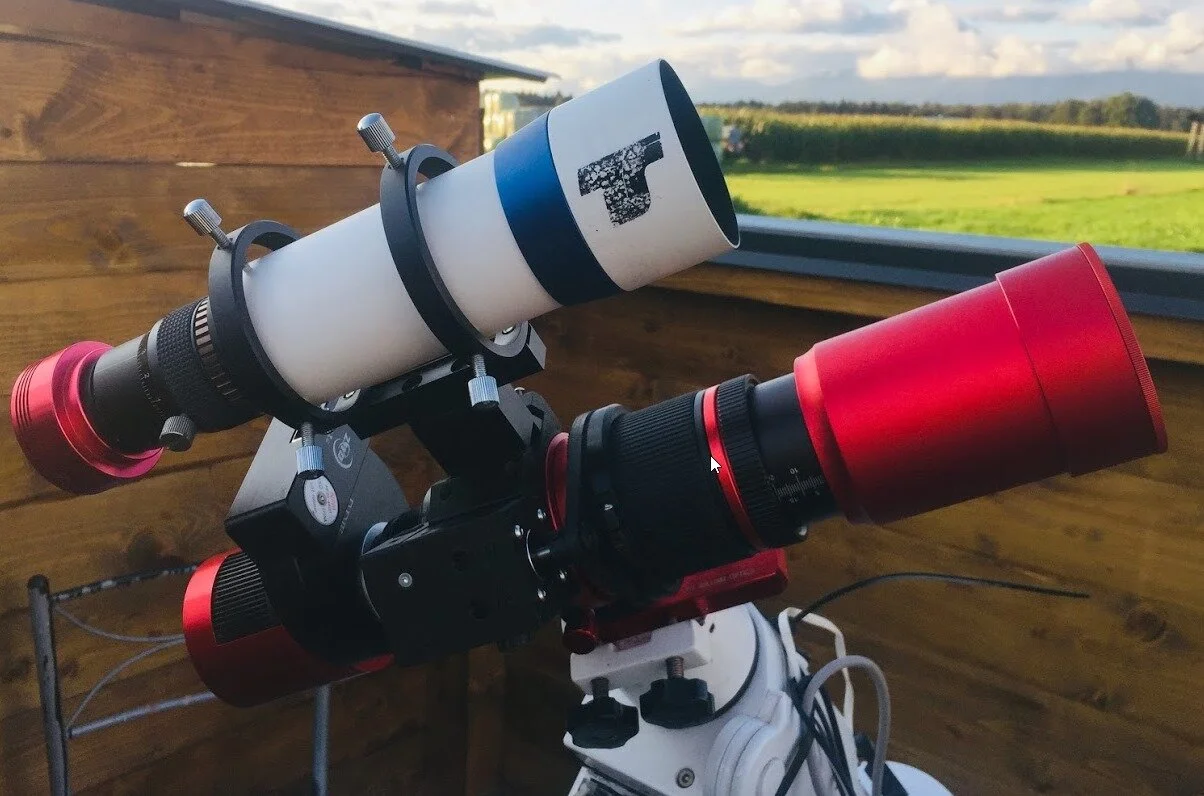
AF3 RedCat/SilentCat
Cables running to telescope:
-USB
-12V DC
Distribution:
-Deep Sky Dad DC HUB 2
-Anker USB HUB
AF3 prototype.
Noise/vibration free, tailored to customers feedback we received
Remark: the background noise is from highway